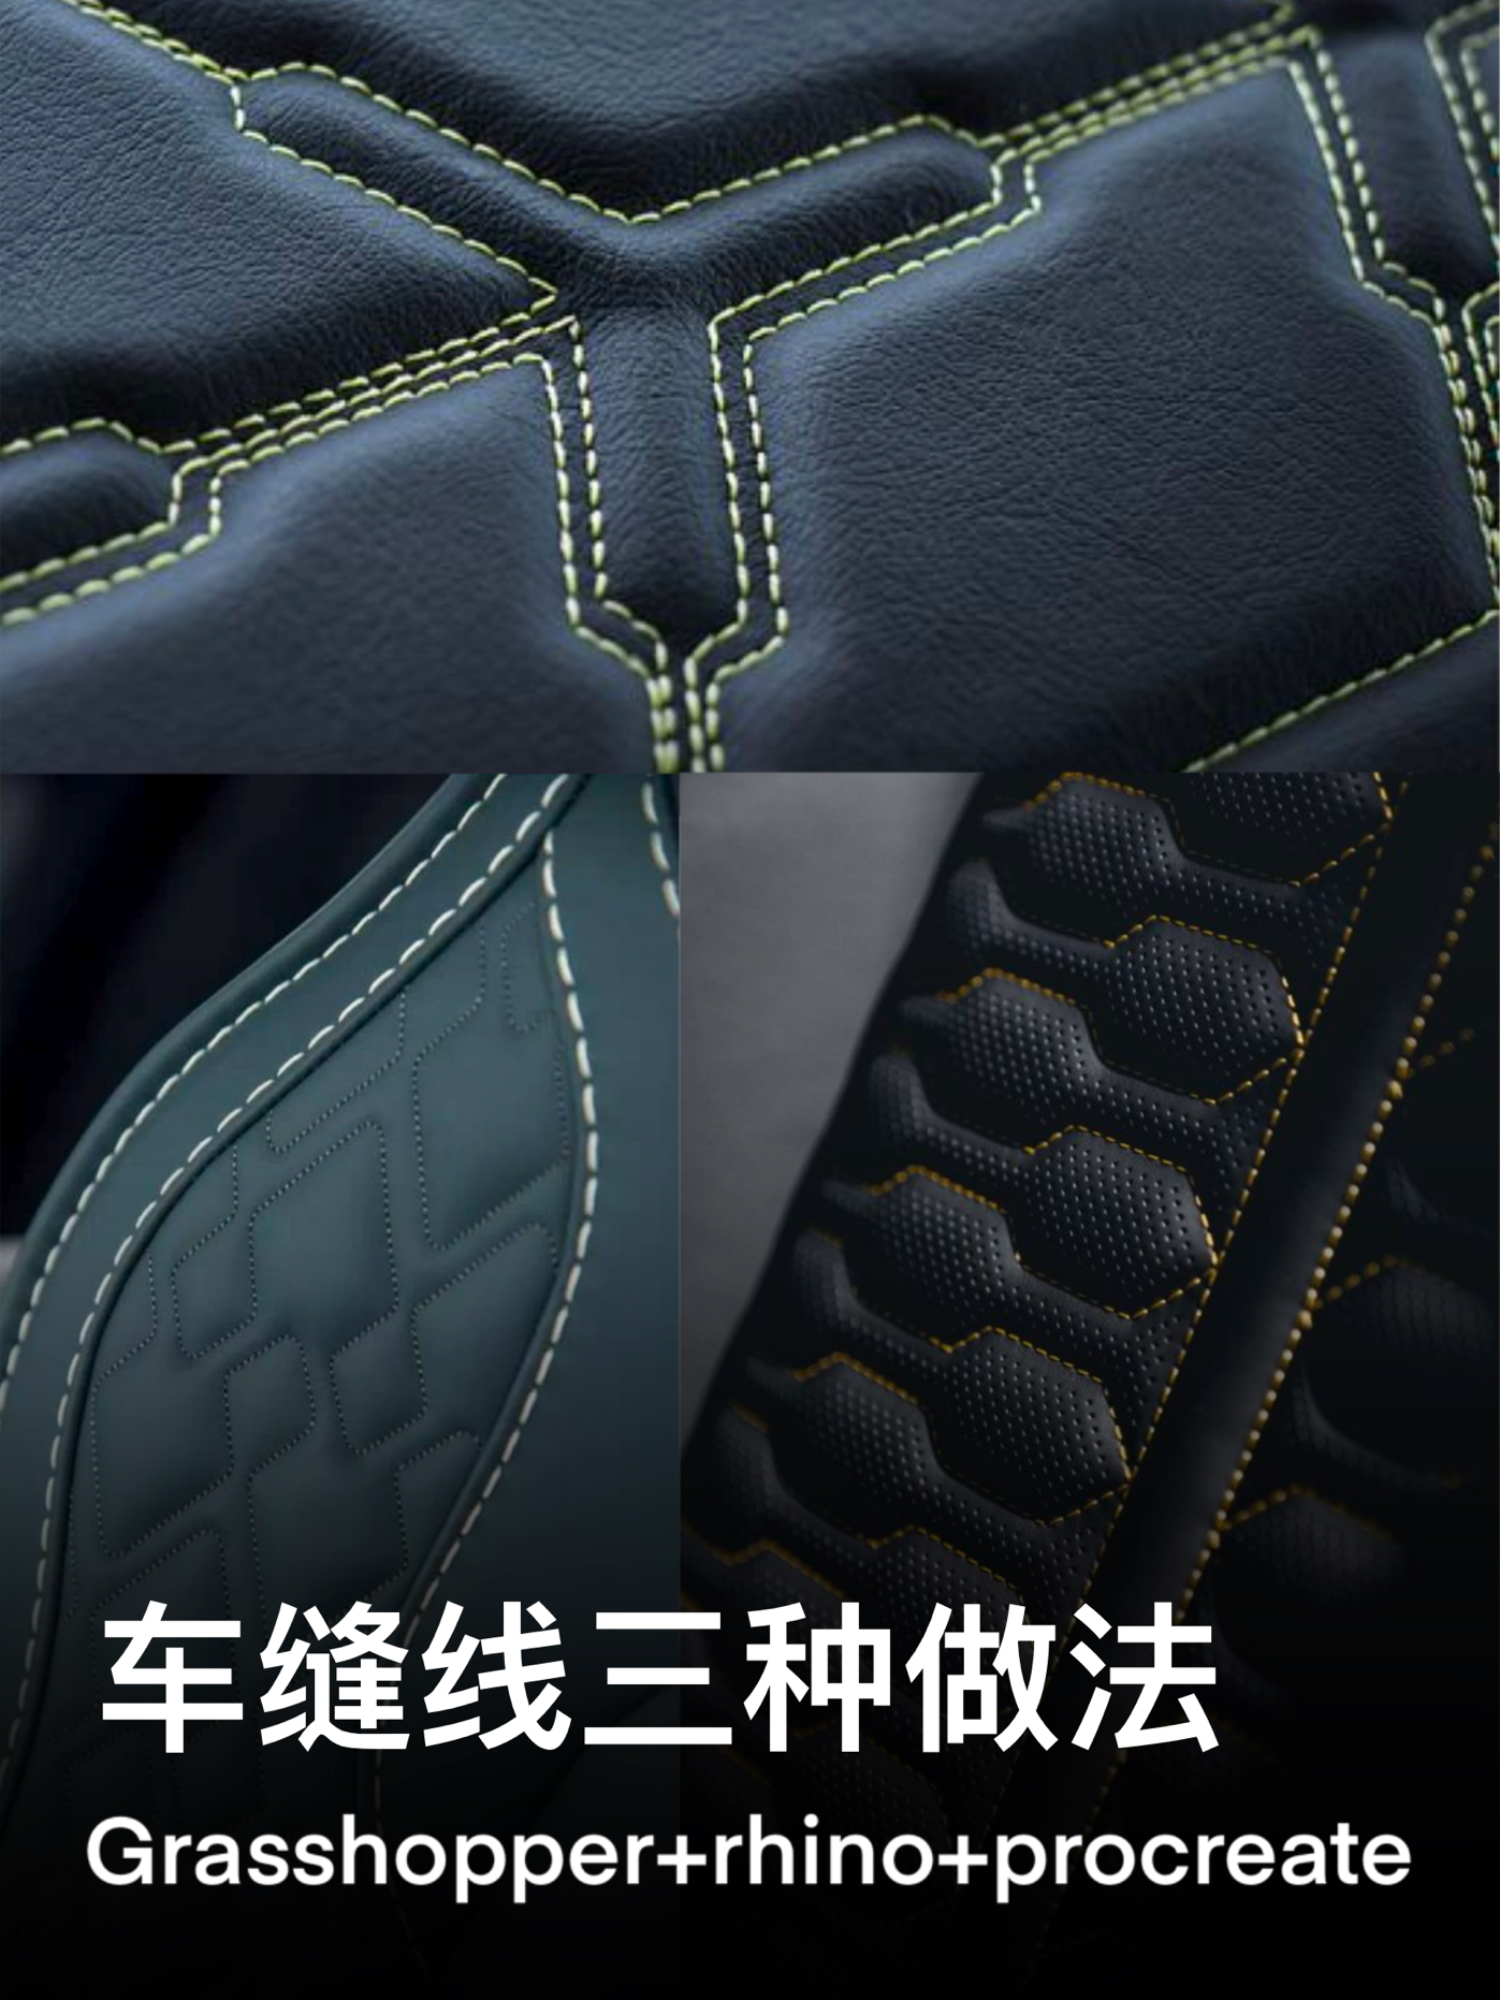
grasshopper rhino procreate stitching
Today, I 'd like to share with you how I make stitches.
procreate drawing:
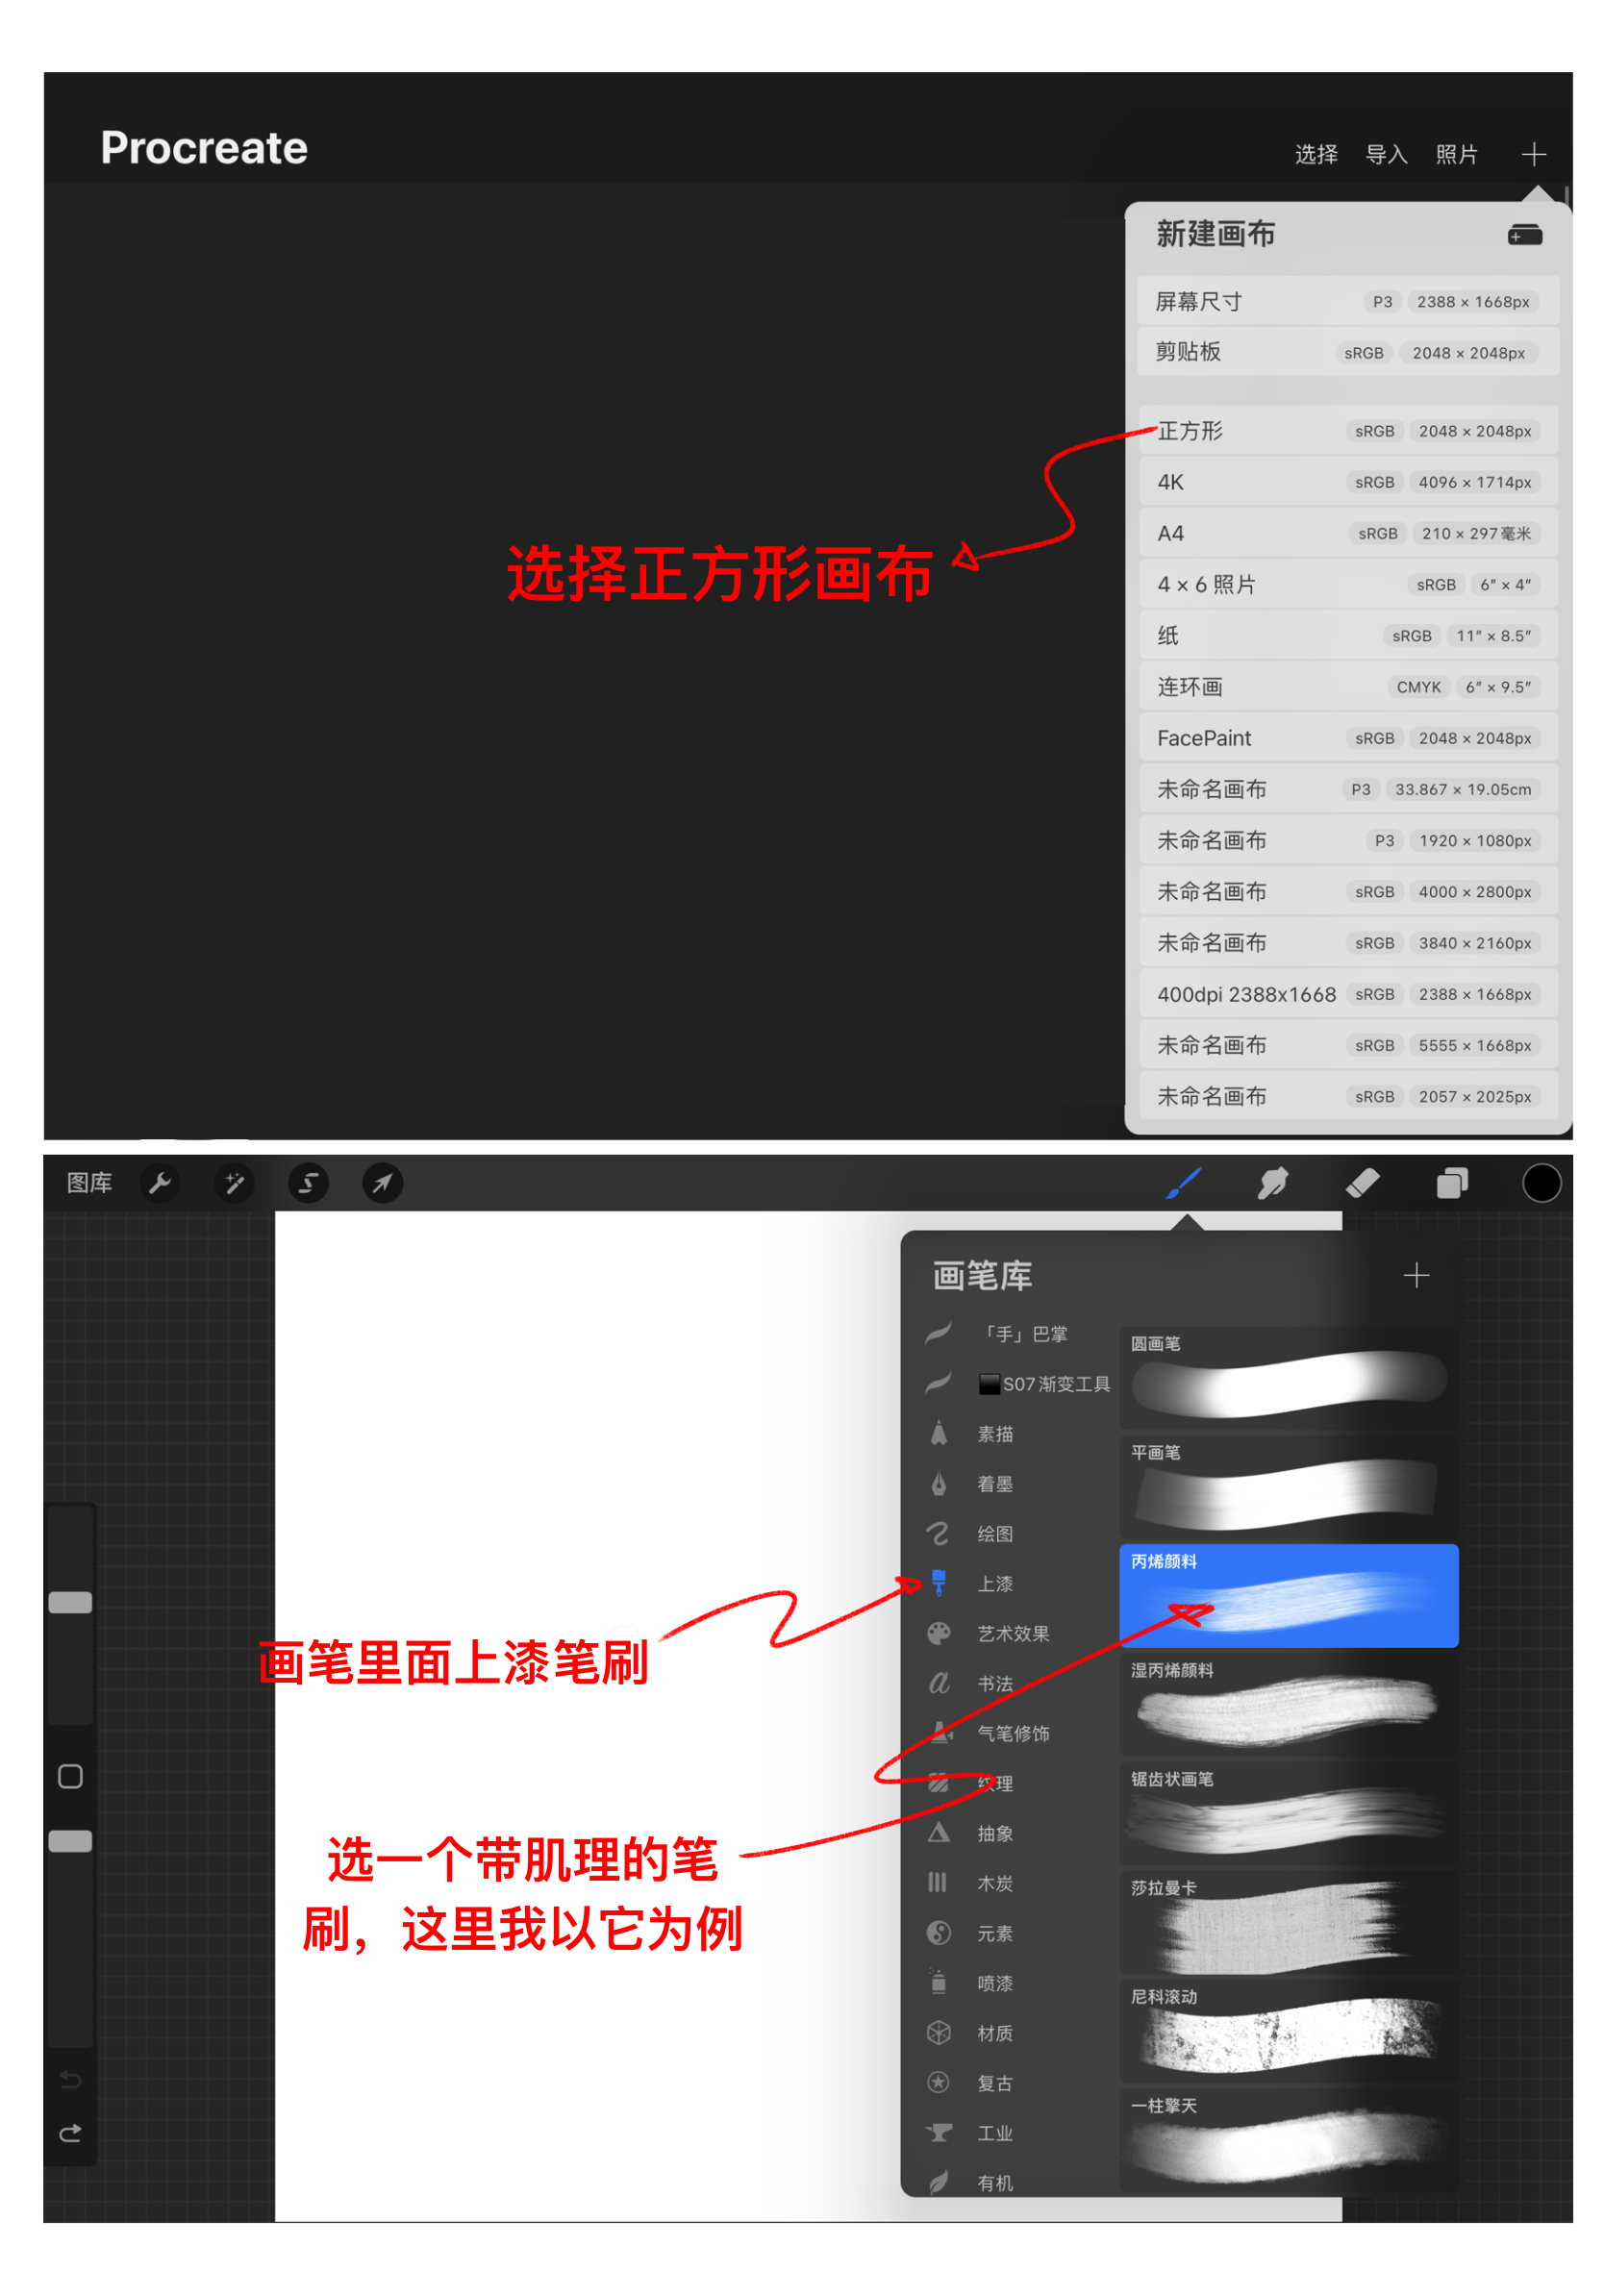
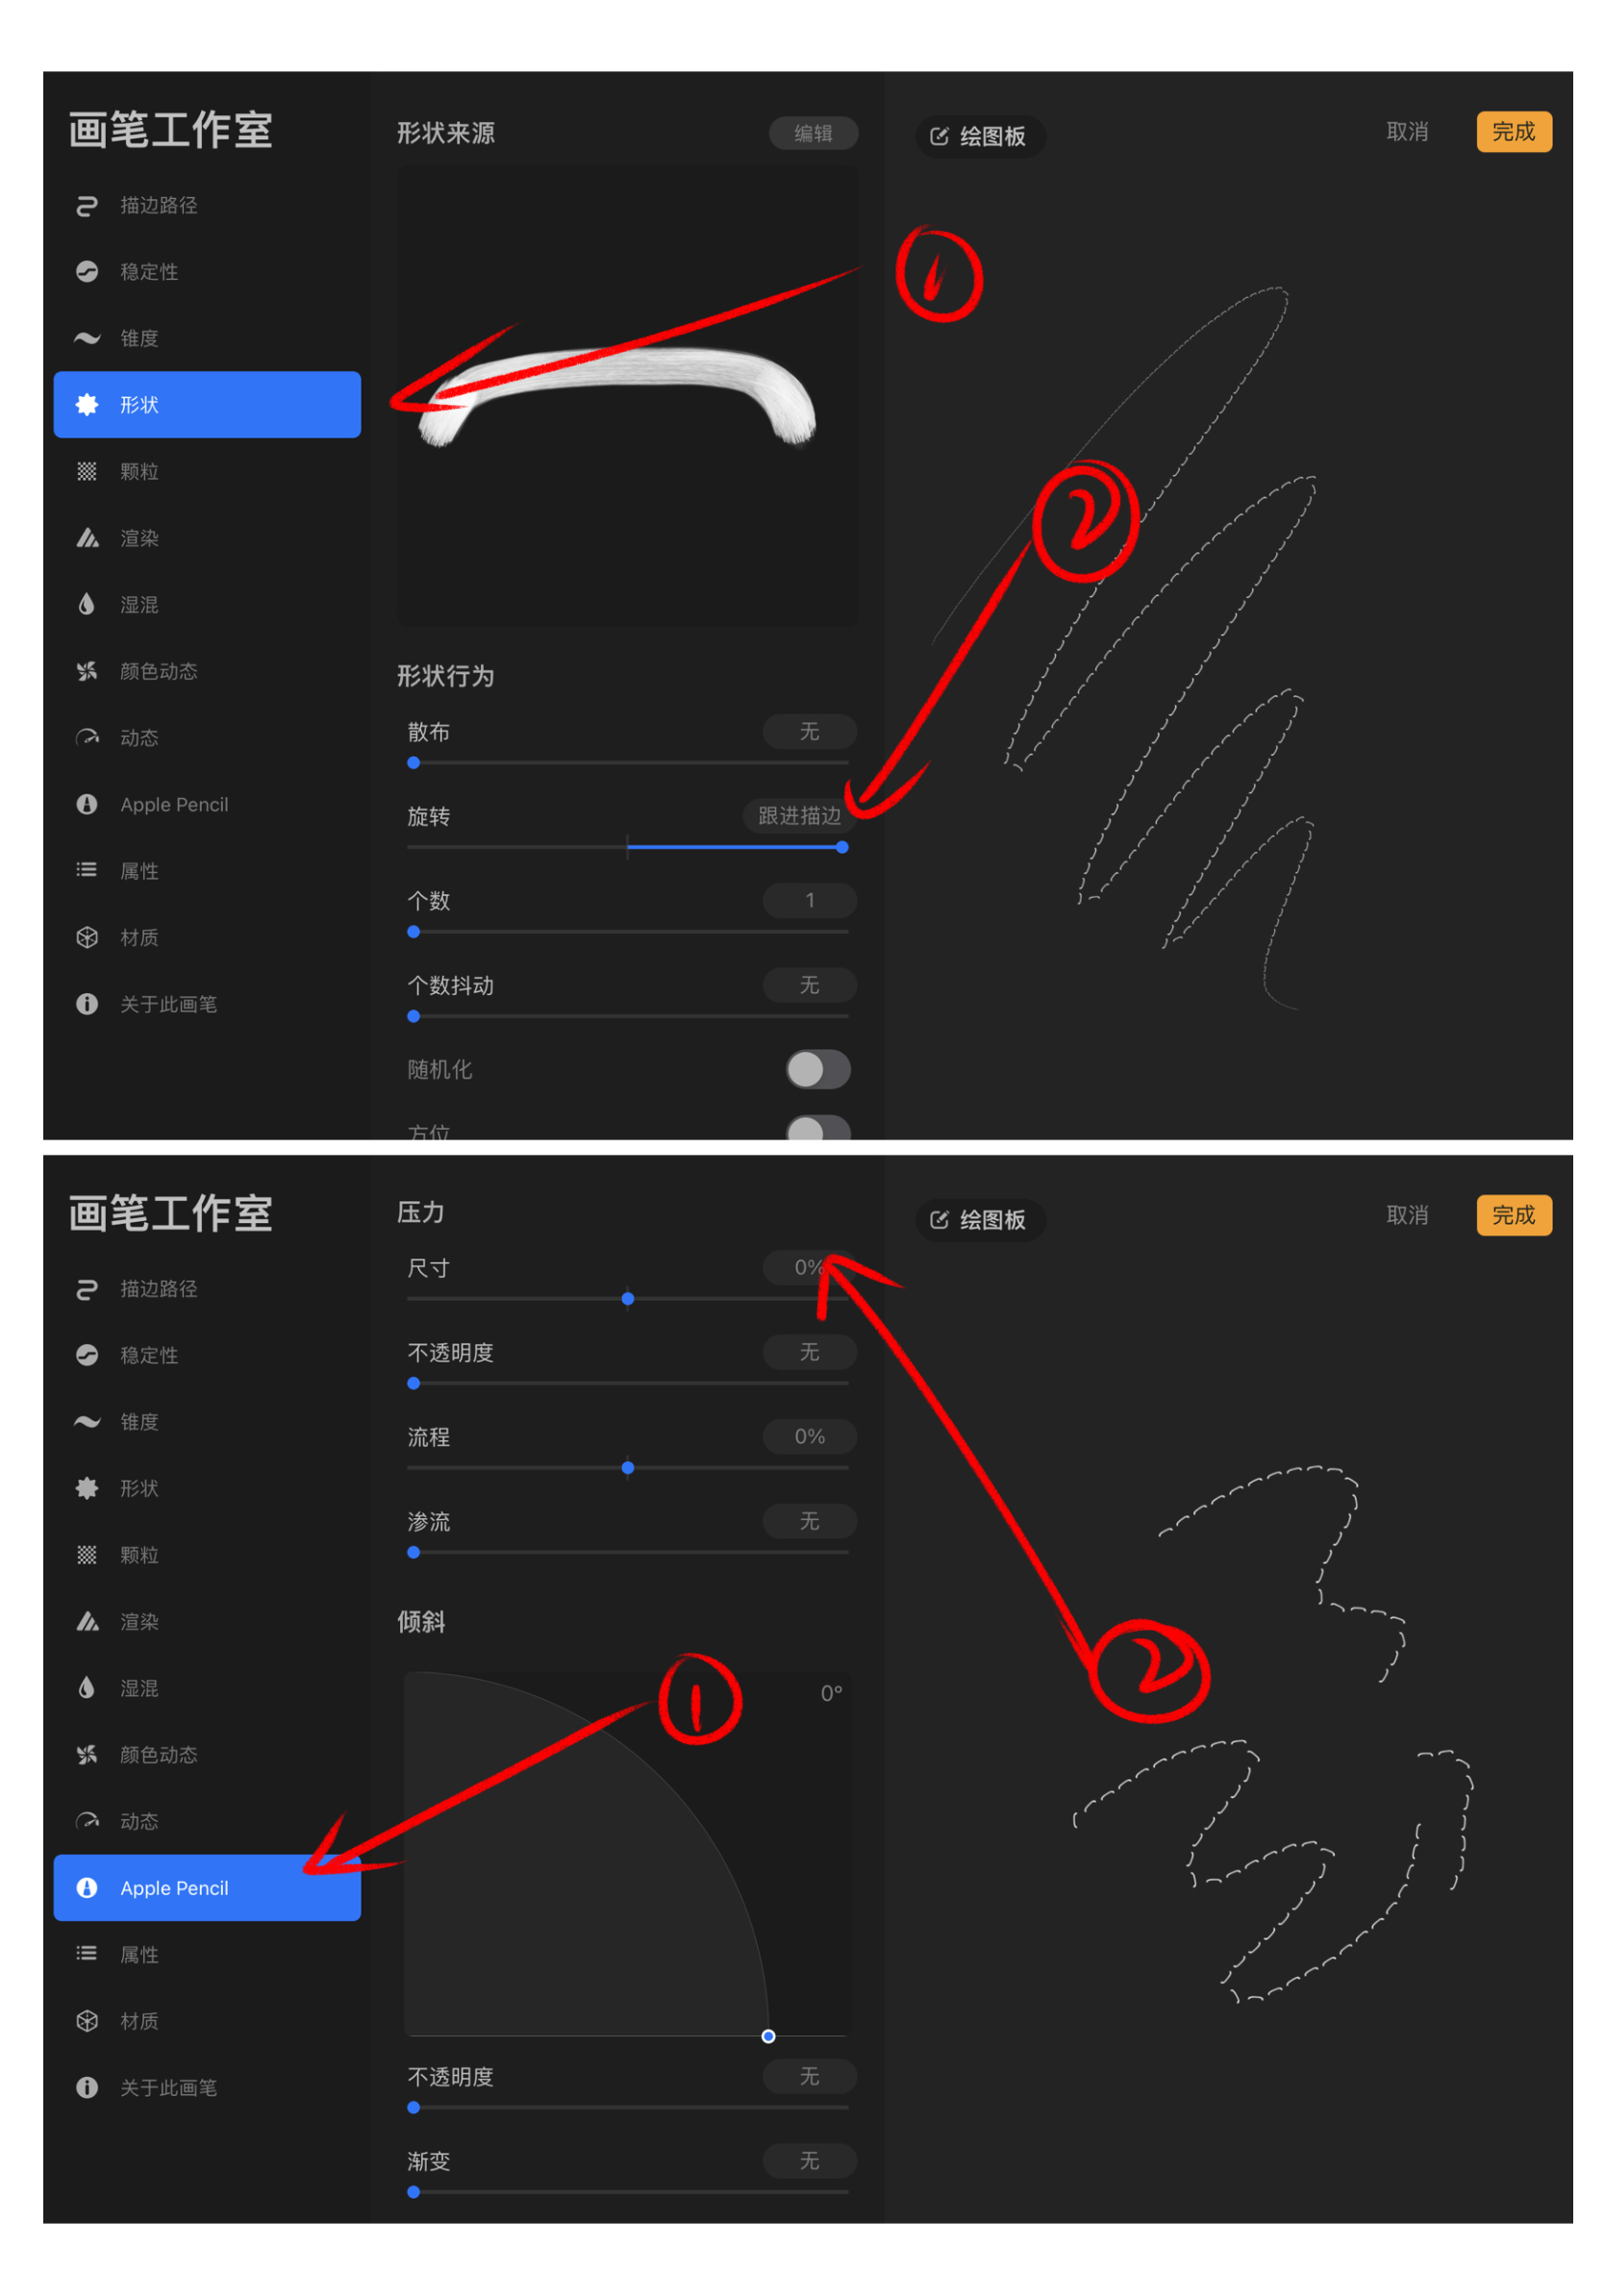
① New Square Canvas
② Select brush with texture
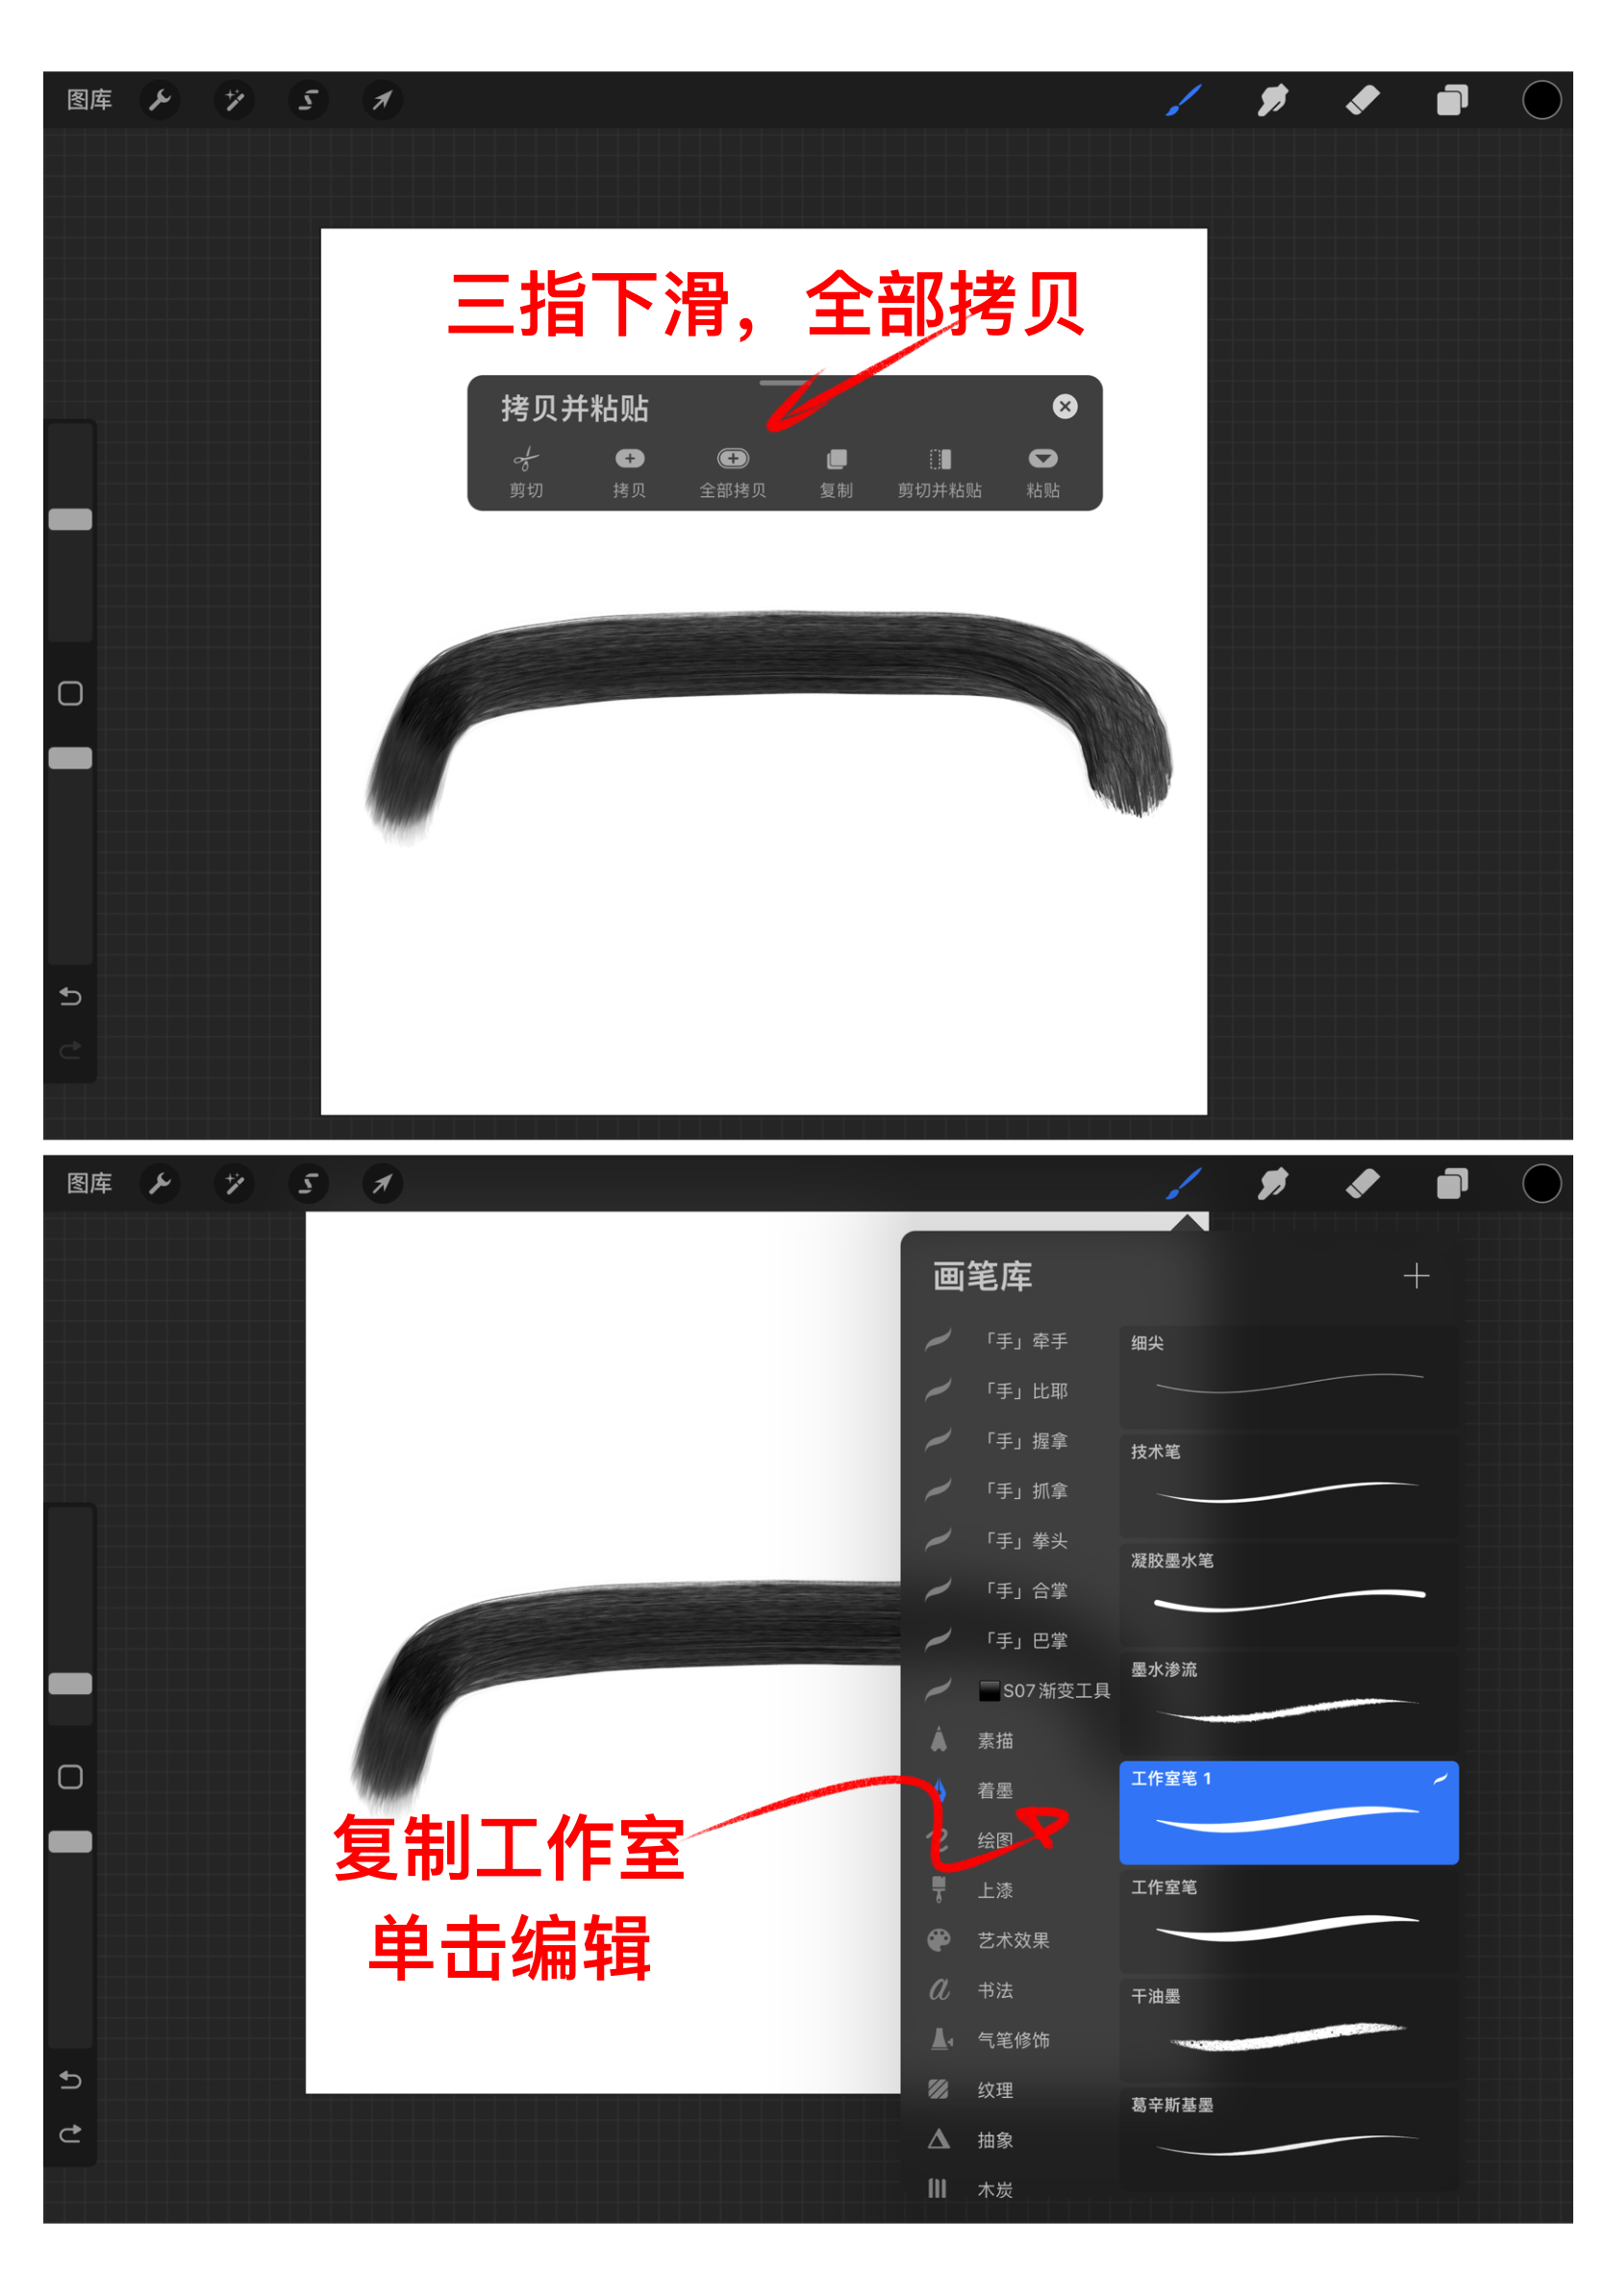
③ Draw a single stitching pattern, and then slide down all three fingers to copy
④ Select the studio brush to copy, click the brush to enter the editing
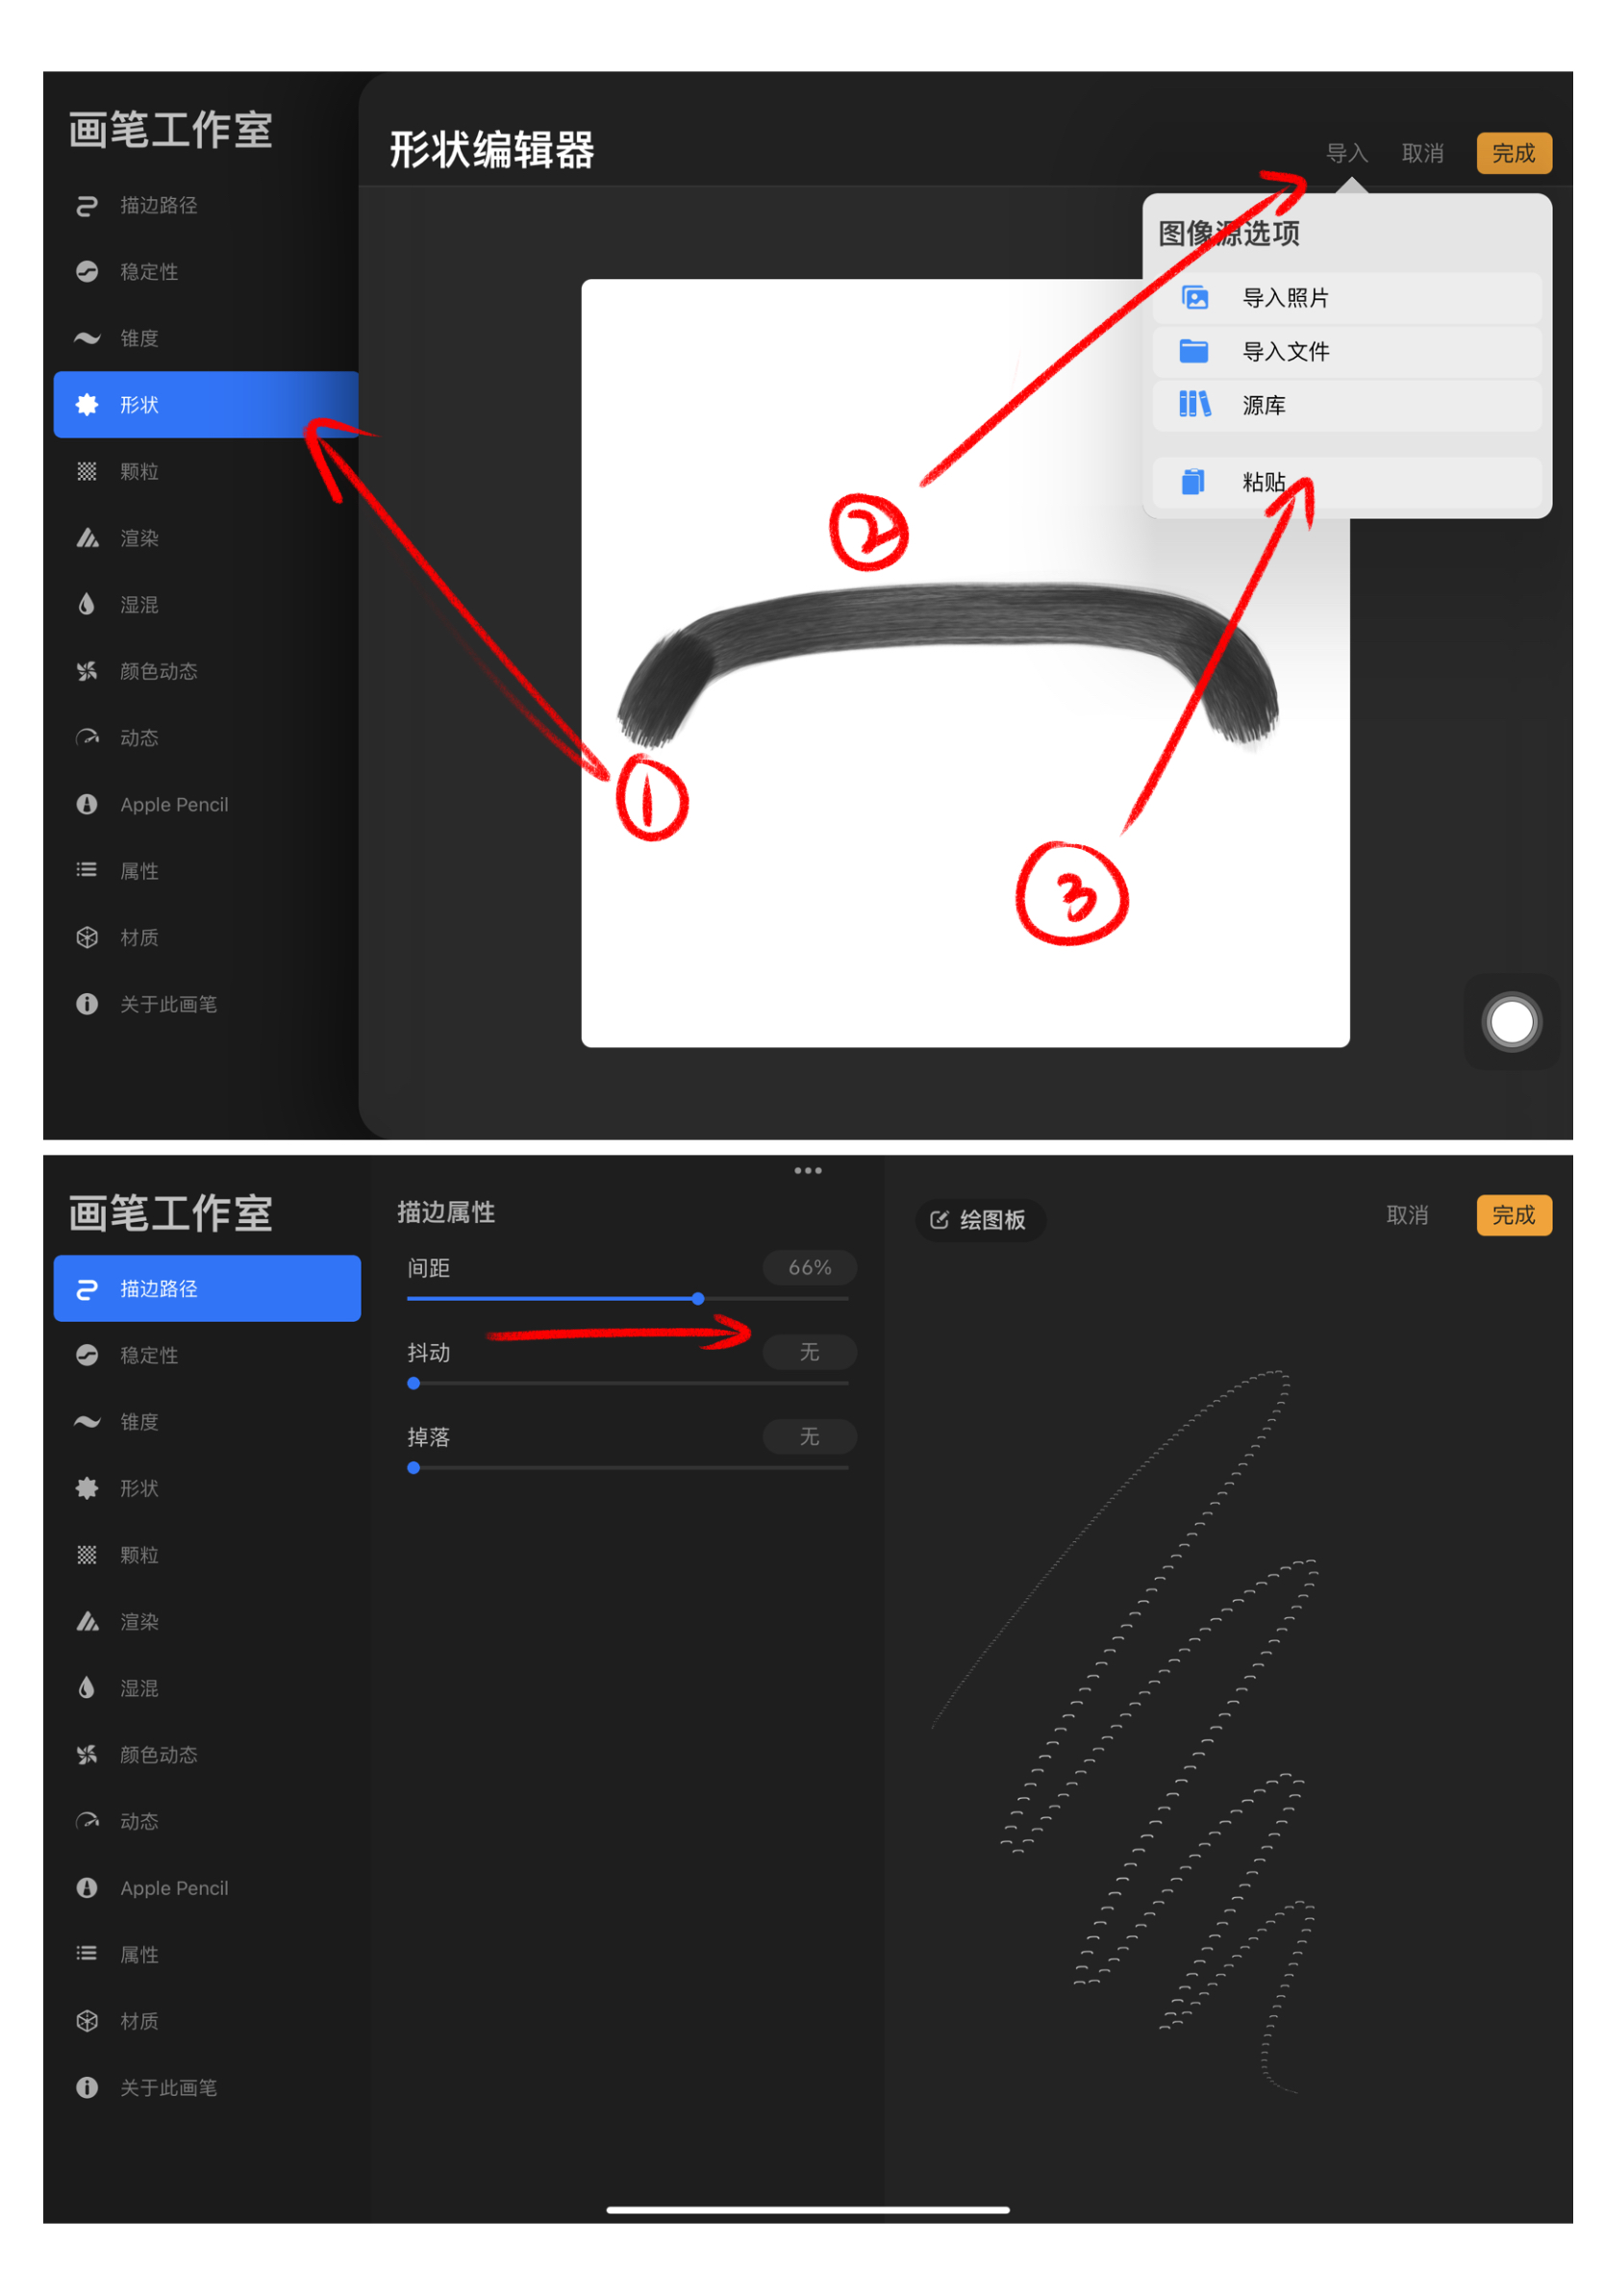
⑤ Select the shape and click Edit above the circular pattern. Then click Import, then click Paste (double-finger click to invert the color), and then click Finish
Select the stroke path. Spacing we can widen
⑦ Click on the shape and say that the rotation is full, and it will automatically become a follow-up stroke.
⑧ Click apple pencil and then adjust the size to 0. Finally, click Finish and the brush will be ready.
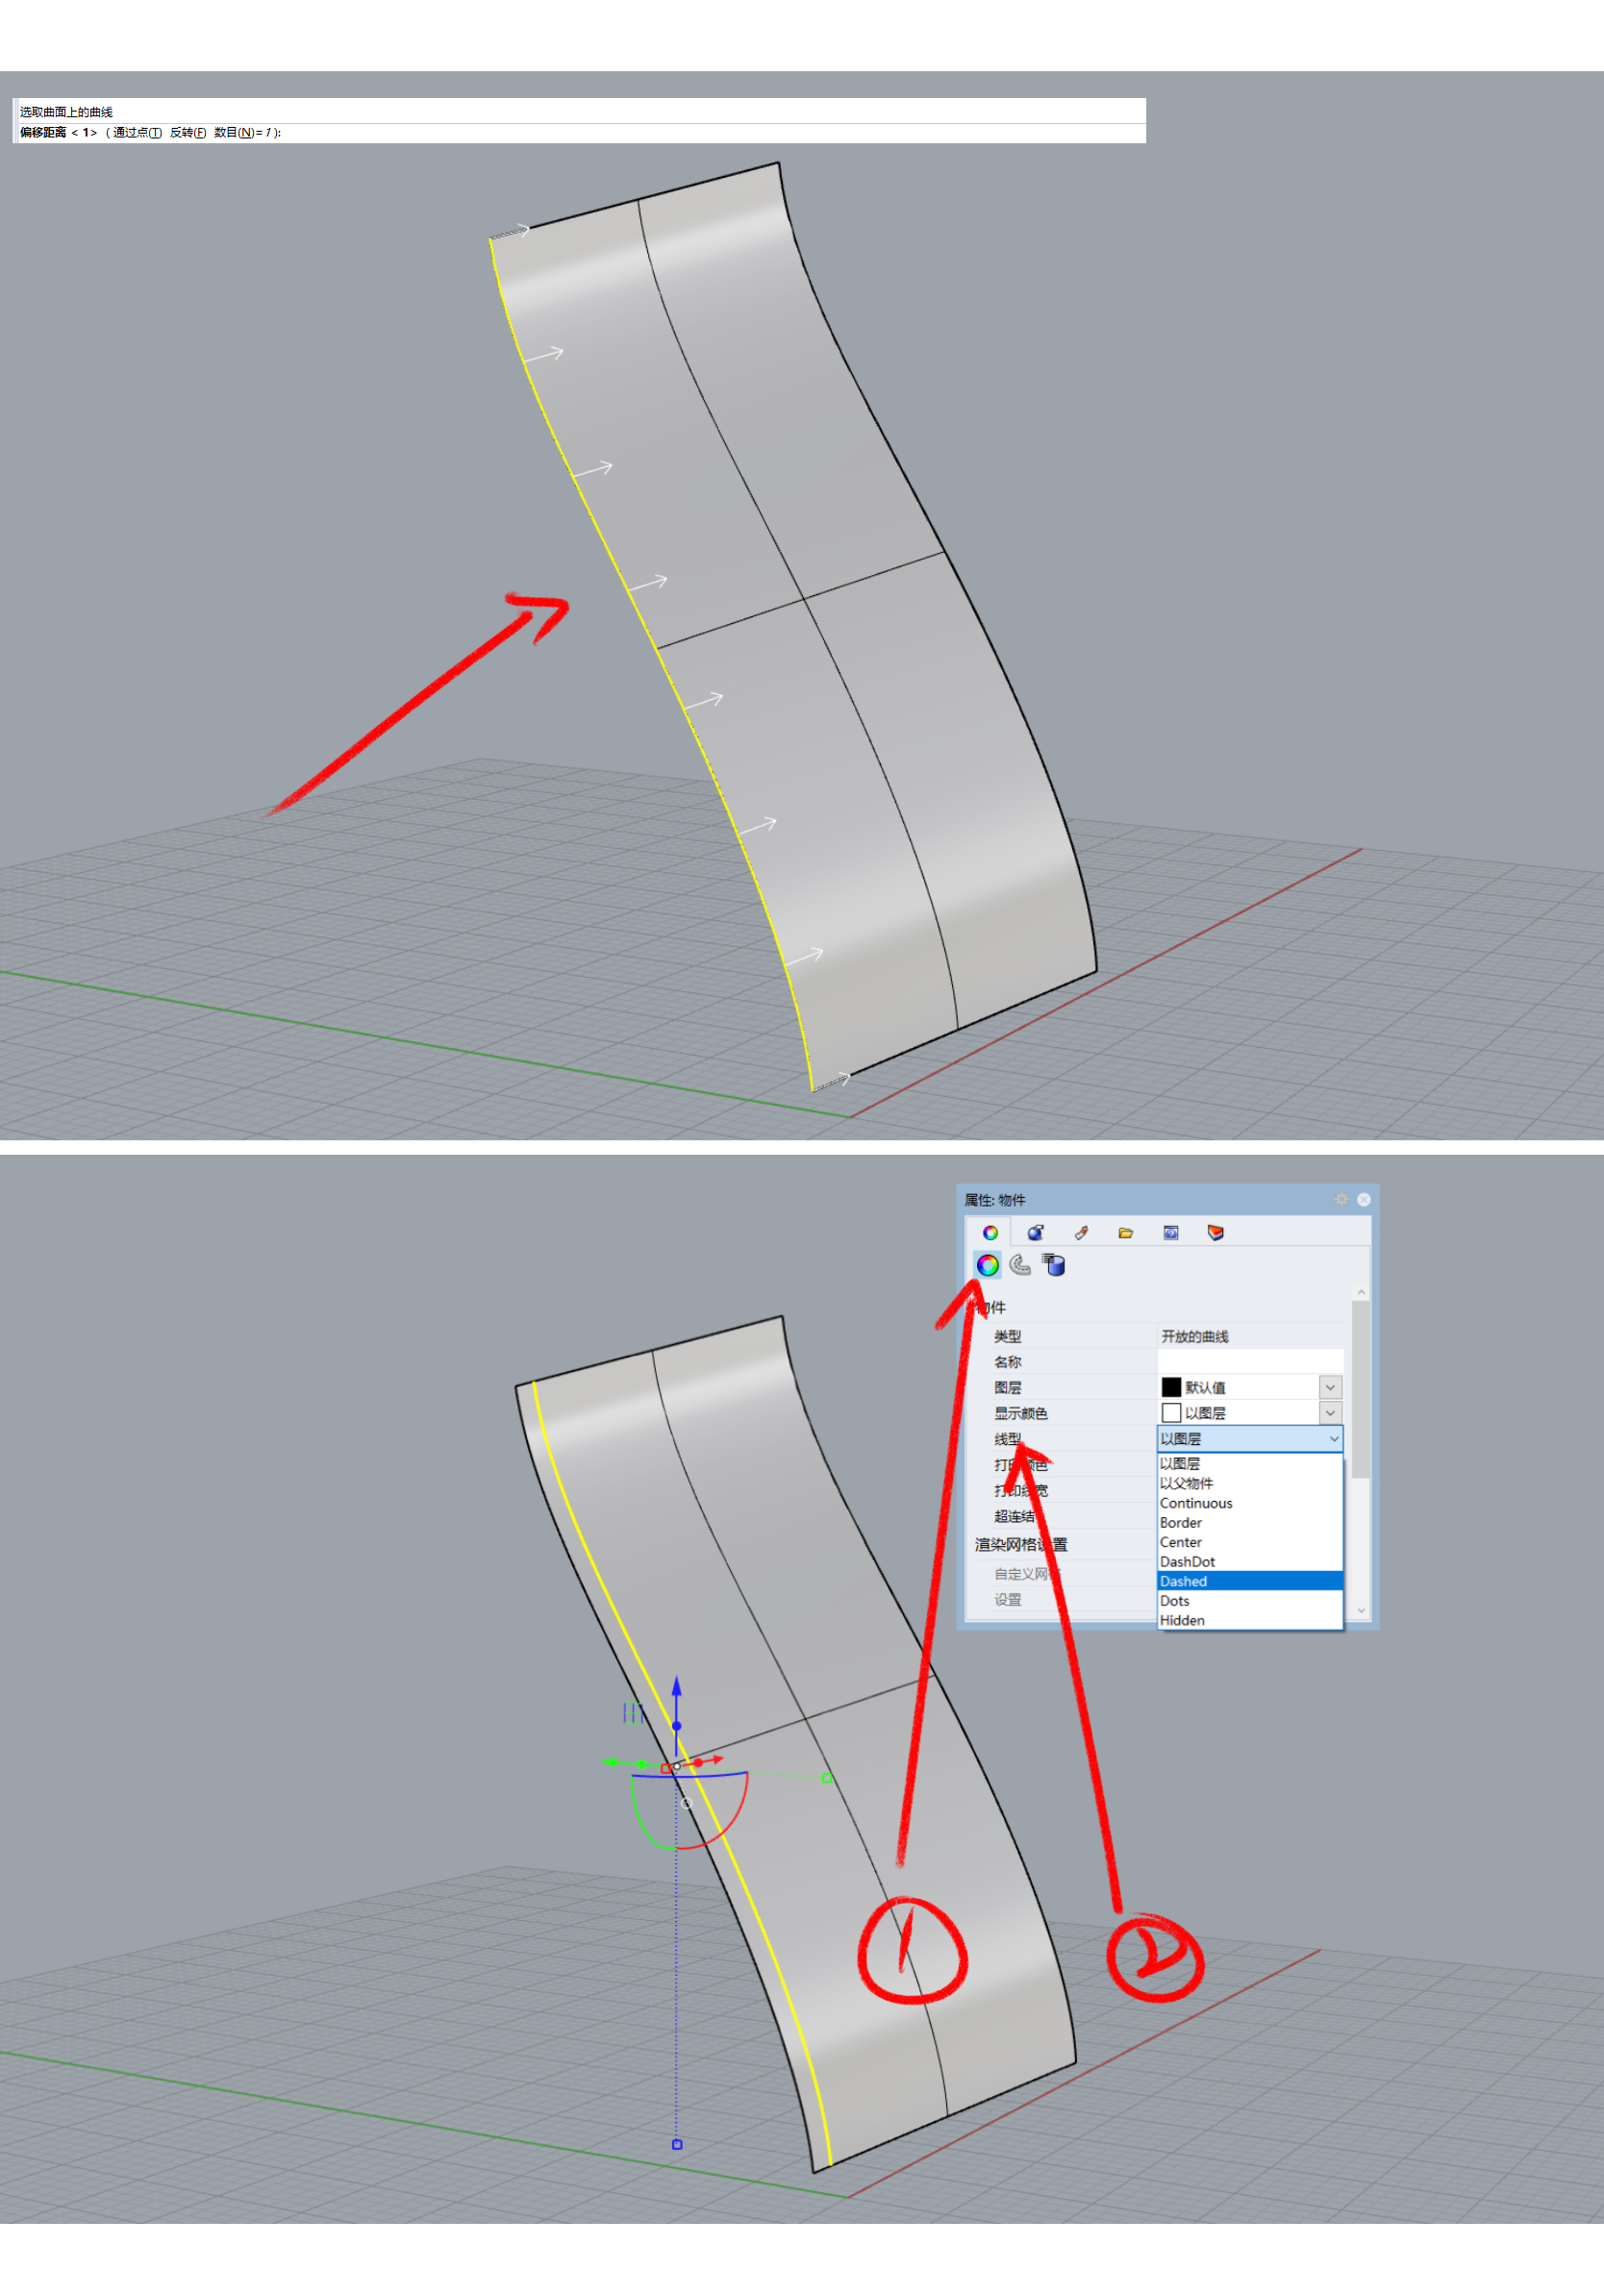
rhino quickly get simple car stitching:
① Select a line on the surface to offset
② Click Rendering in the Properties box, then click Linetype to select dashed
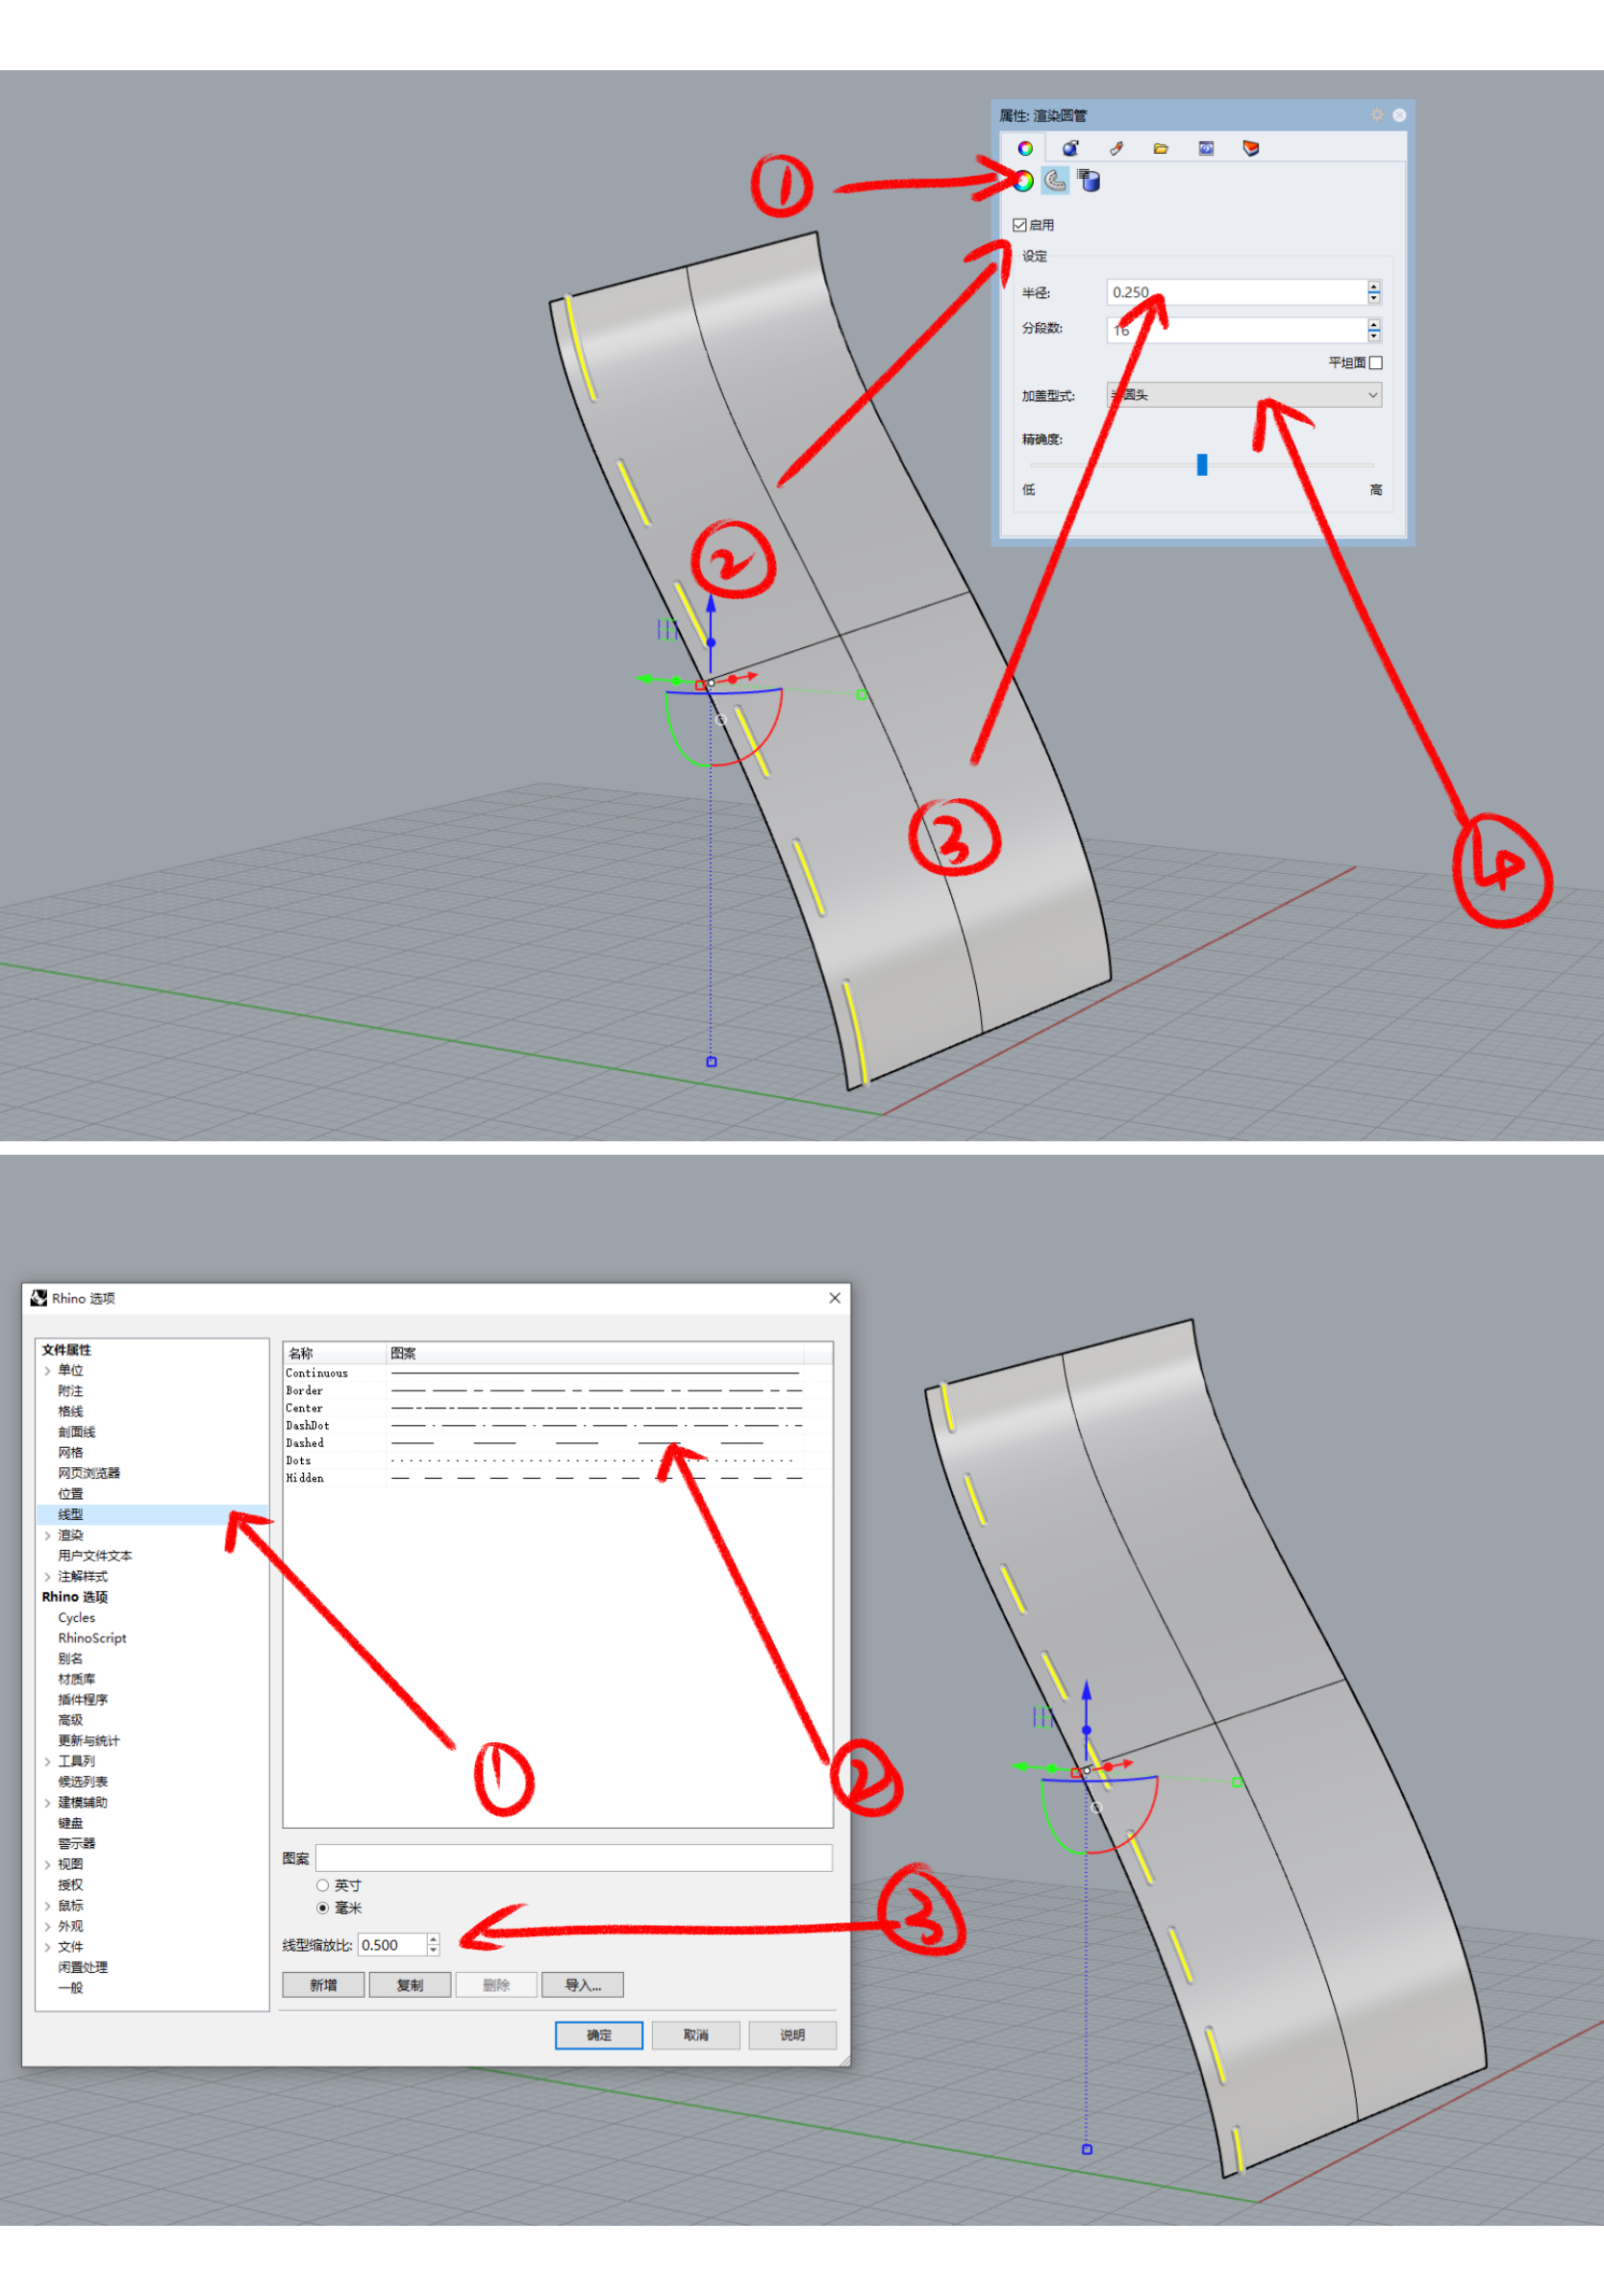
After that, click the tube icon next to it, we click Enable, and then adjust the radius and the form of capping.
④ If the distance is too far, we can click the rhino option, click the line type, and select dashed. The line type zoom ratio below is the distance between adjustments.
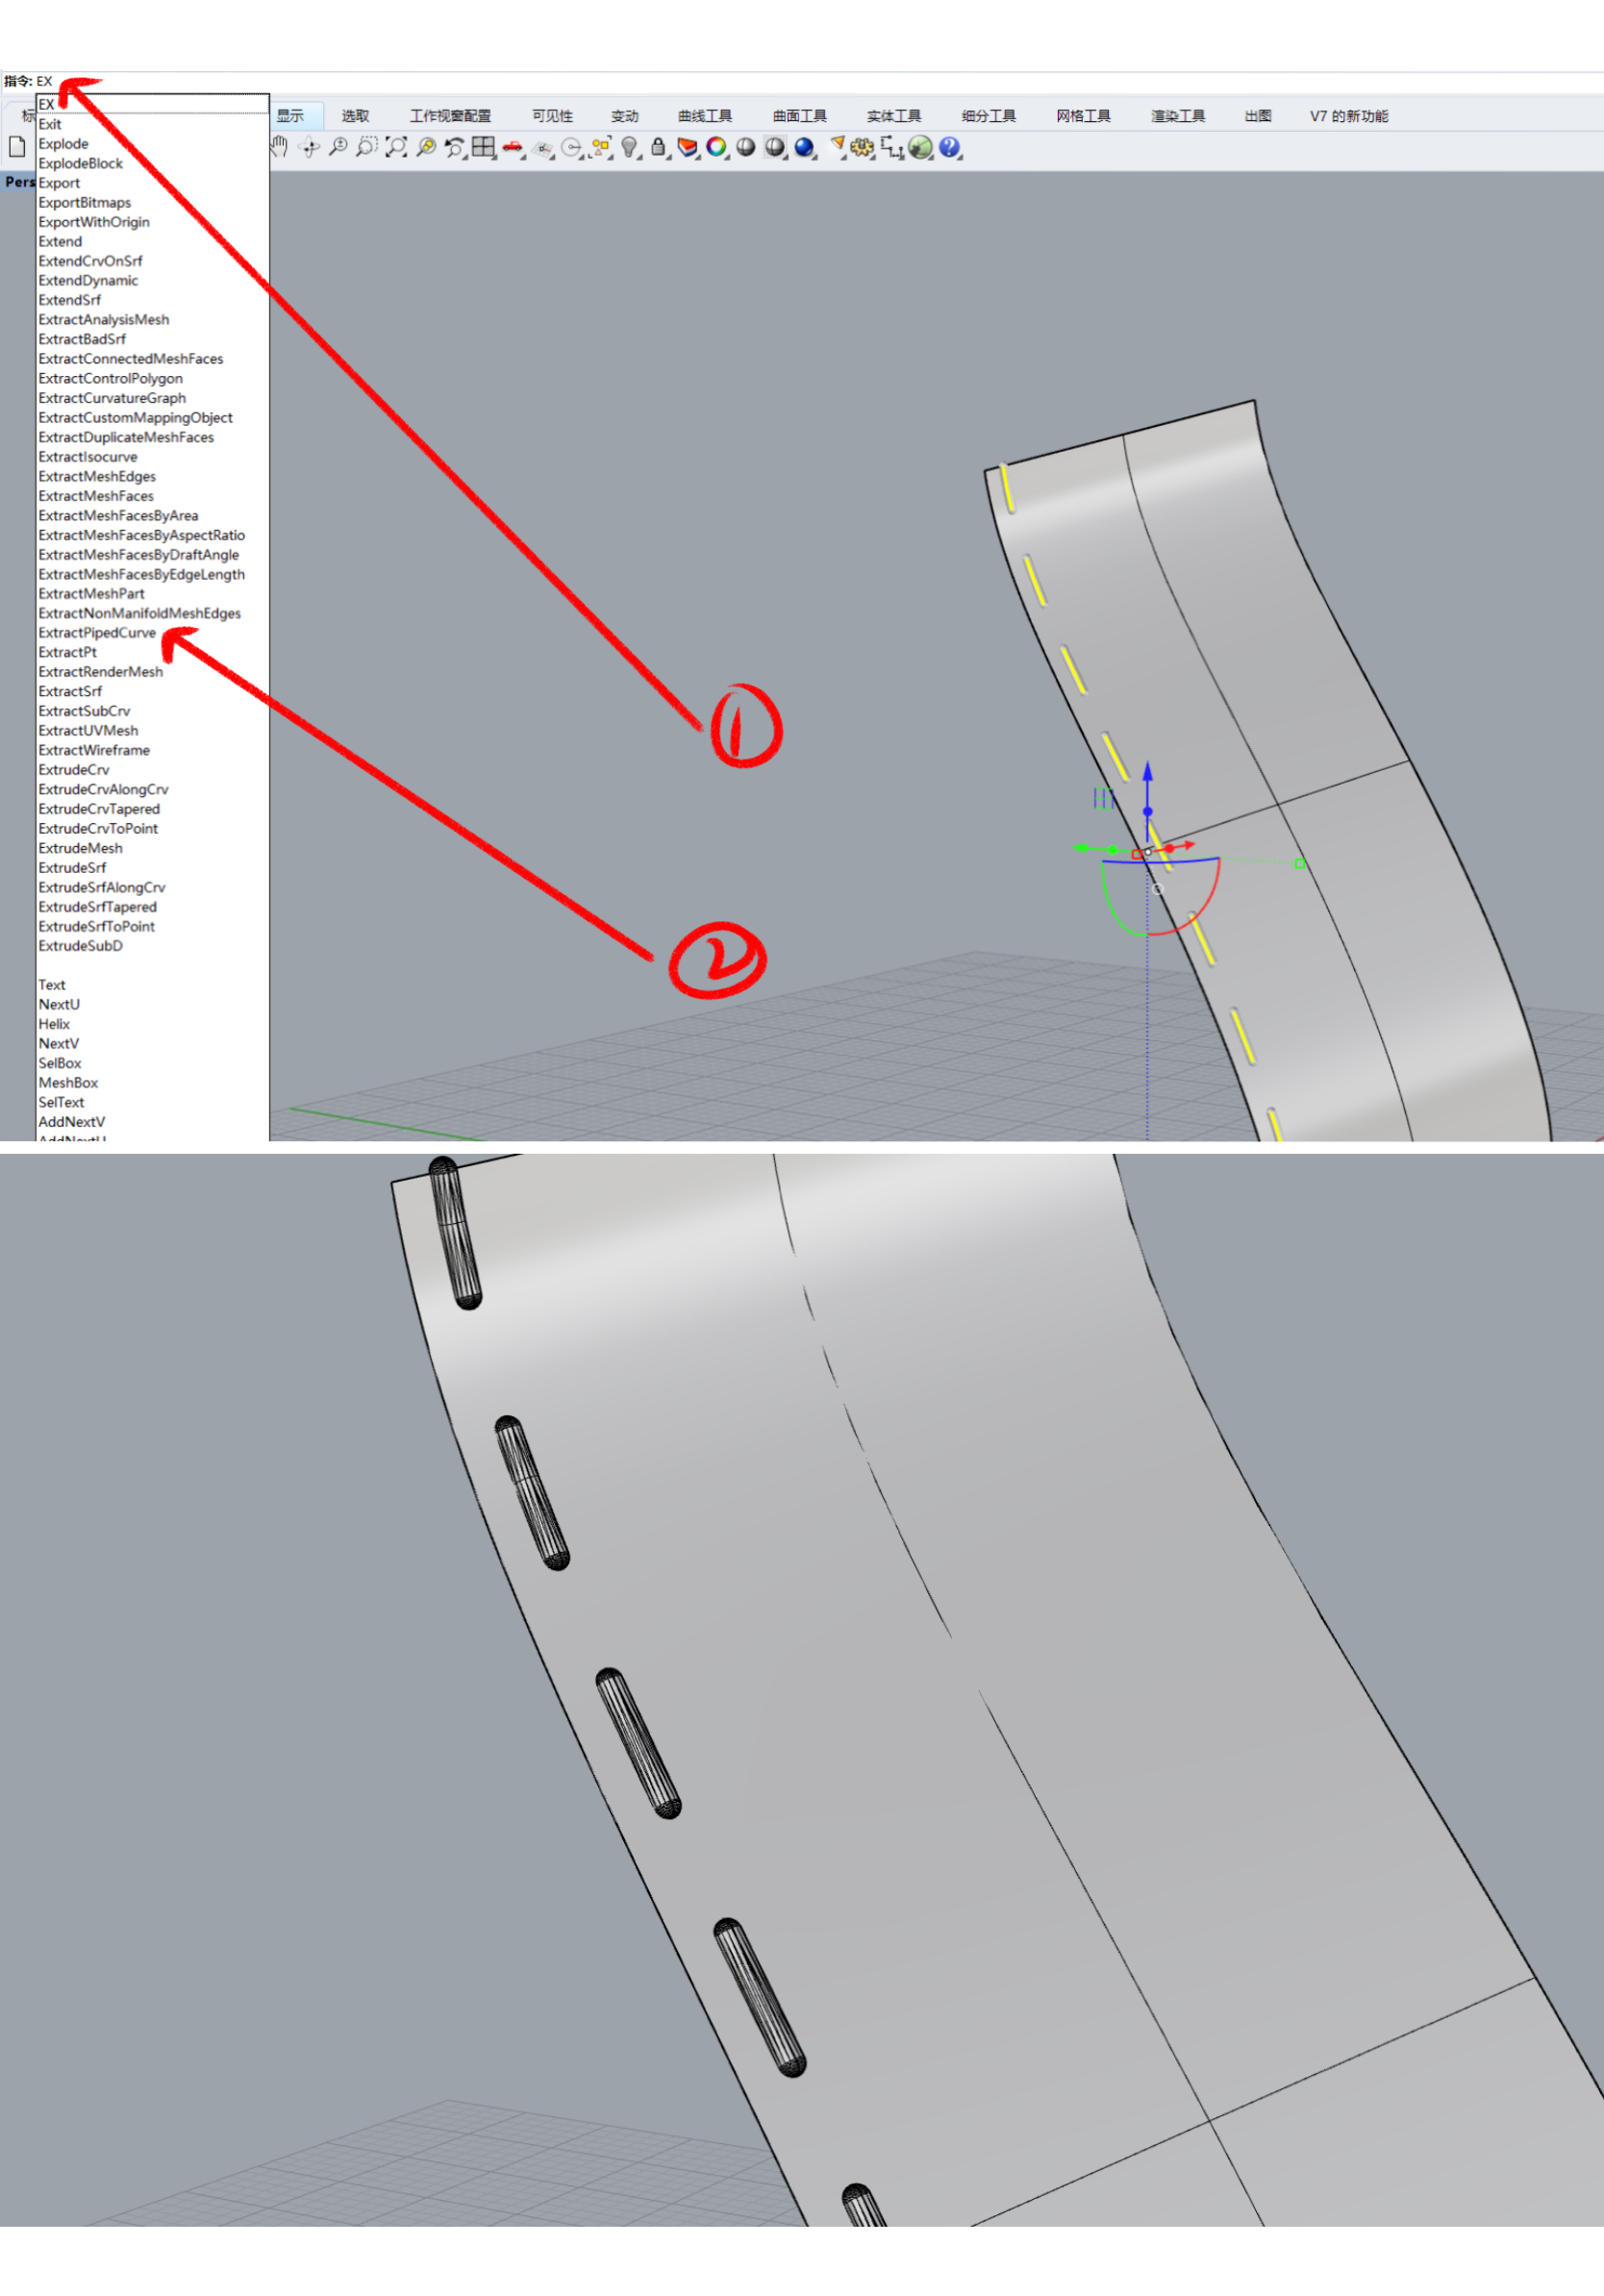
⑤ In the instruction window, we enter extractpipedcurve to materialize the circular tube of the line.
After that, the stitching line will be ready, and when it is put into the keyshot, it will be displayed and pulled.
grasshopper car stitching practices:
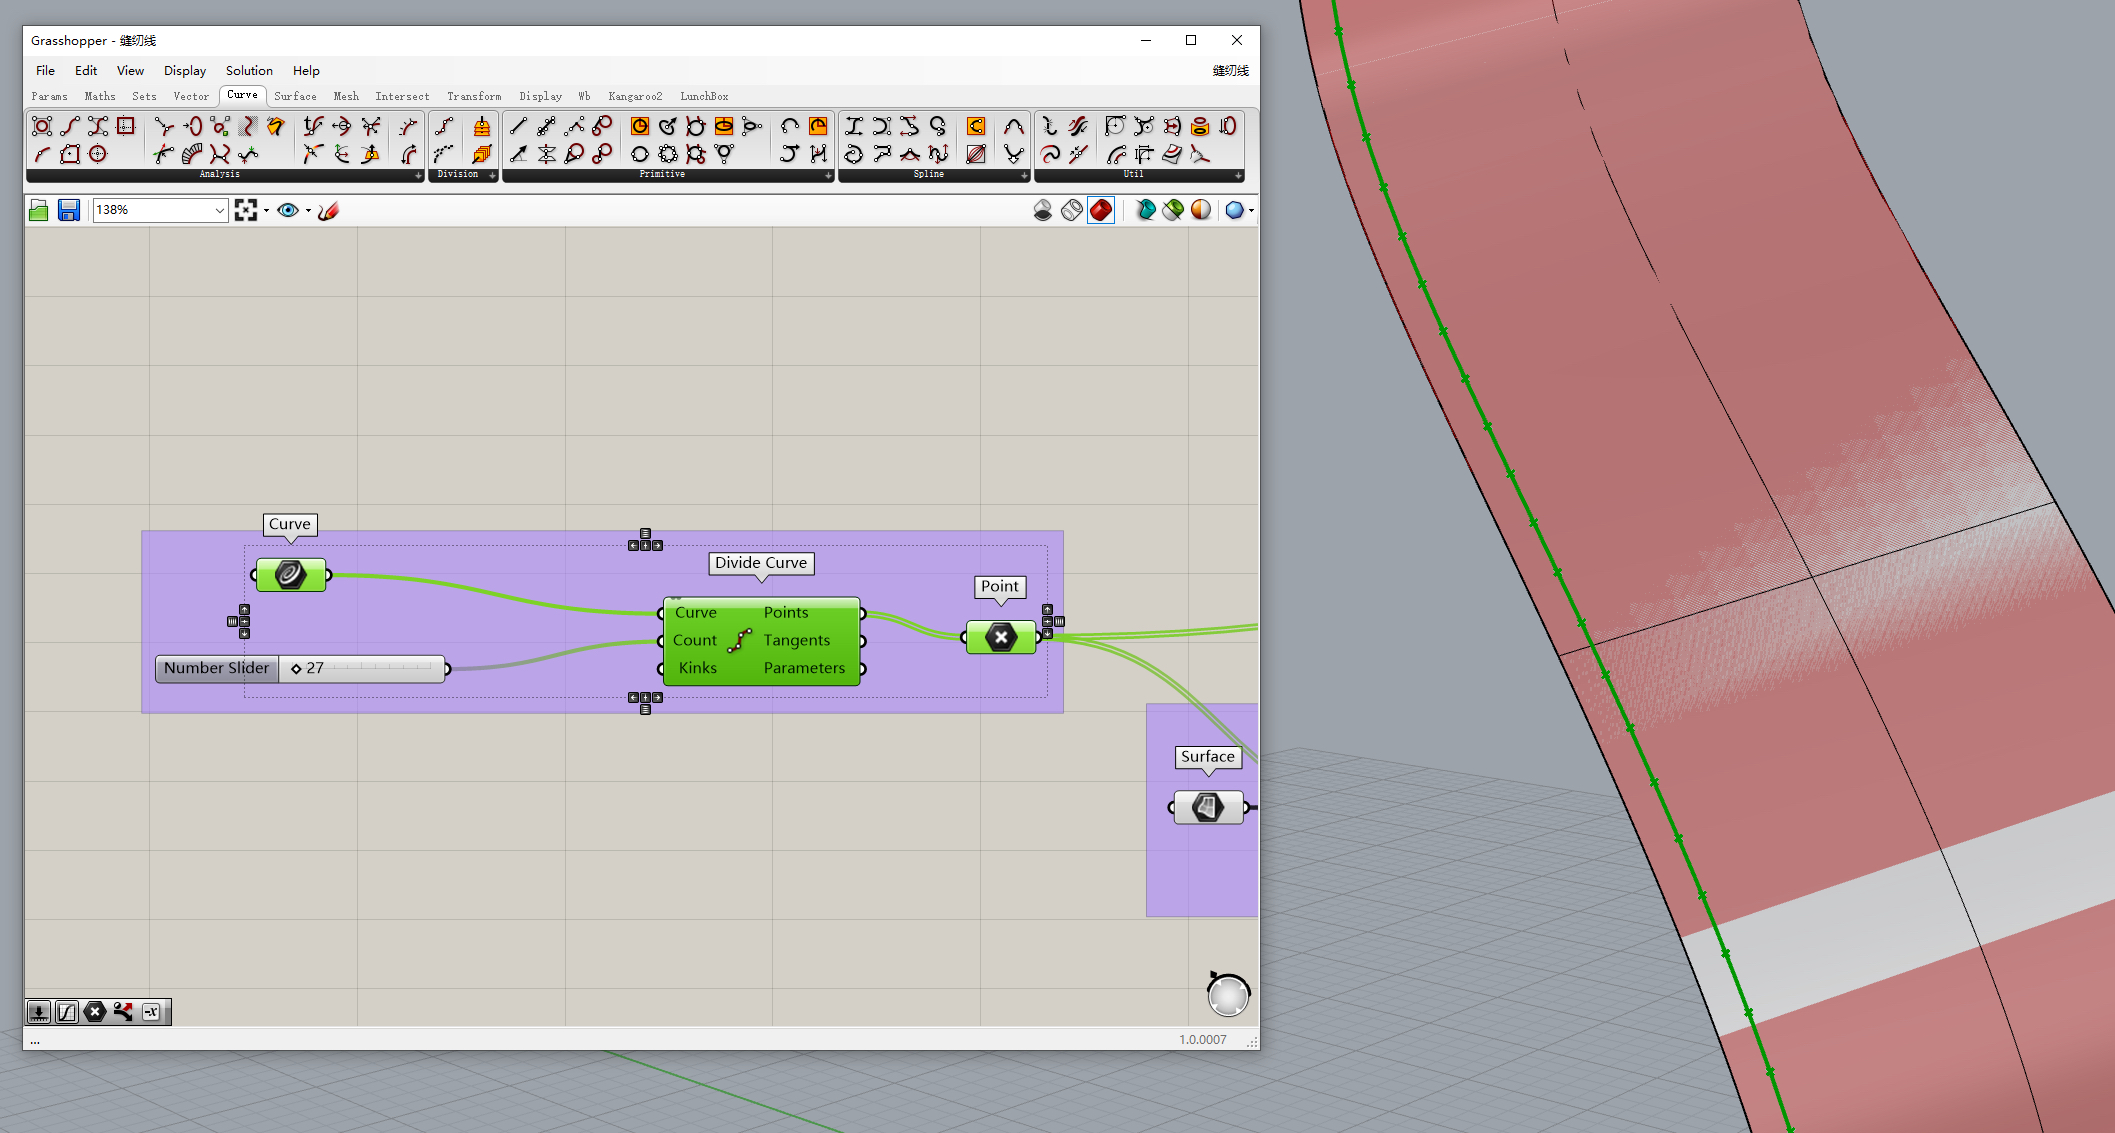
First, I select the line before the offset, and then use divide curve to divide the points.
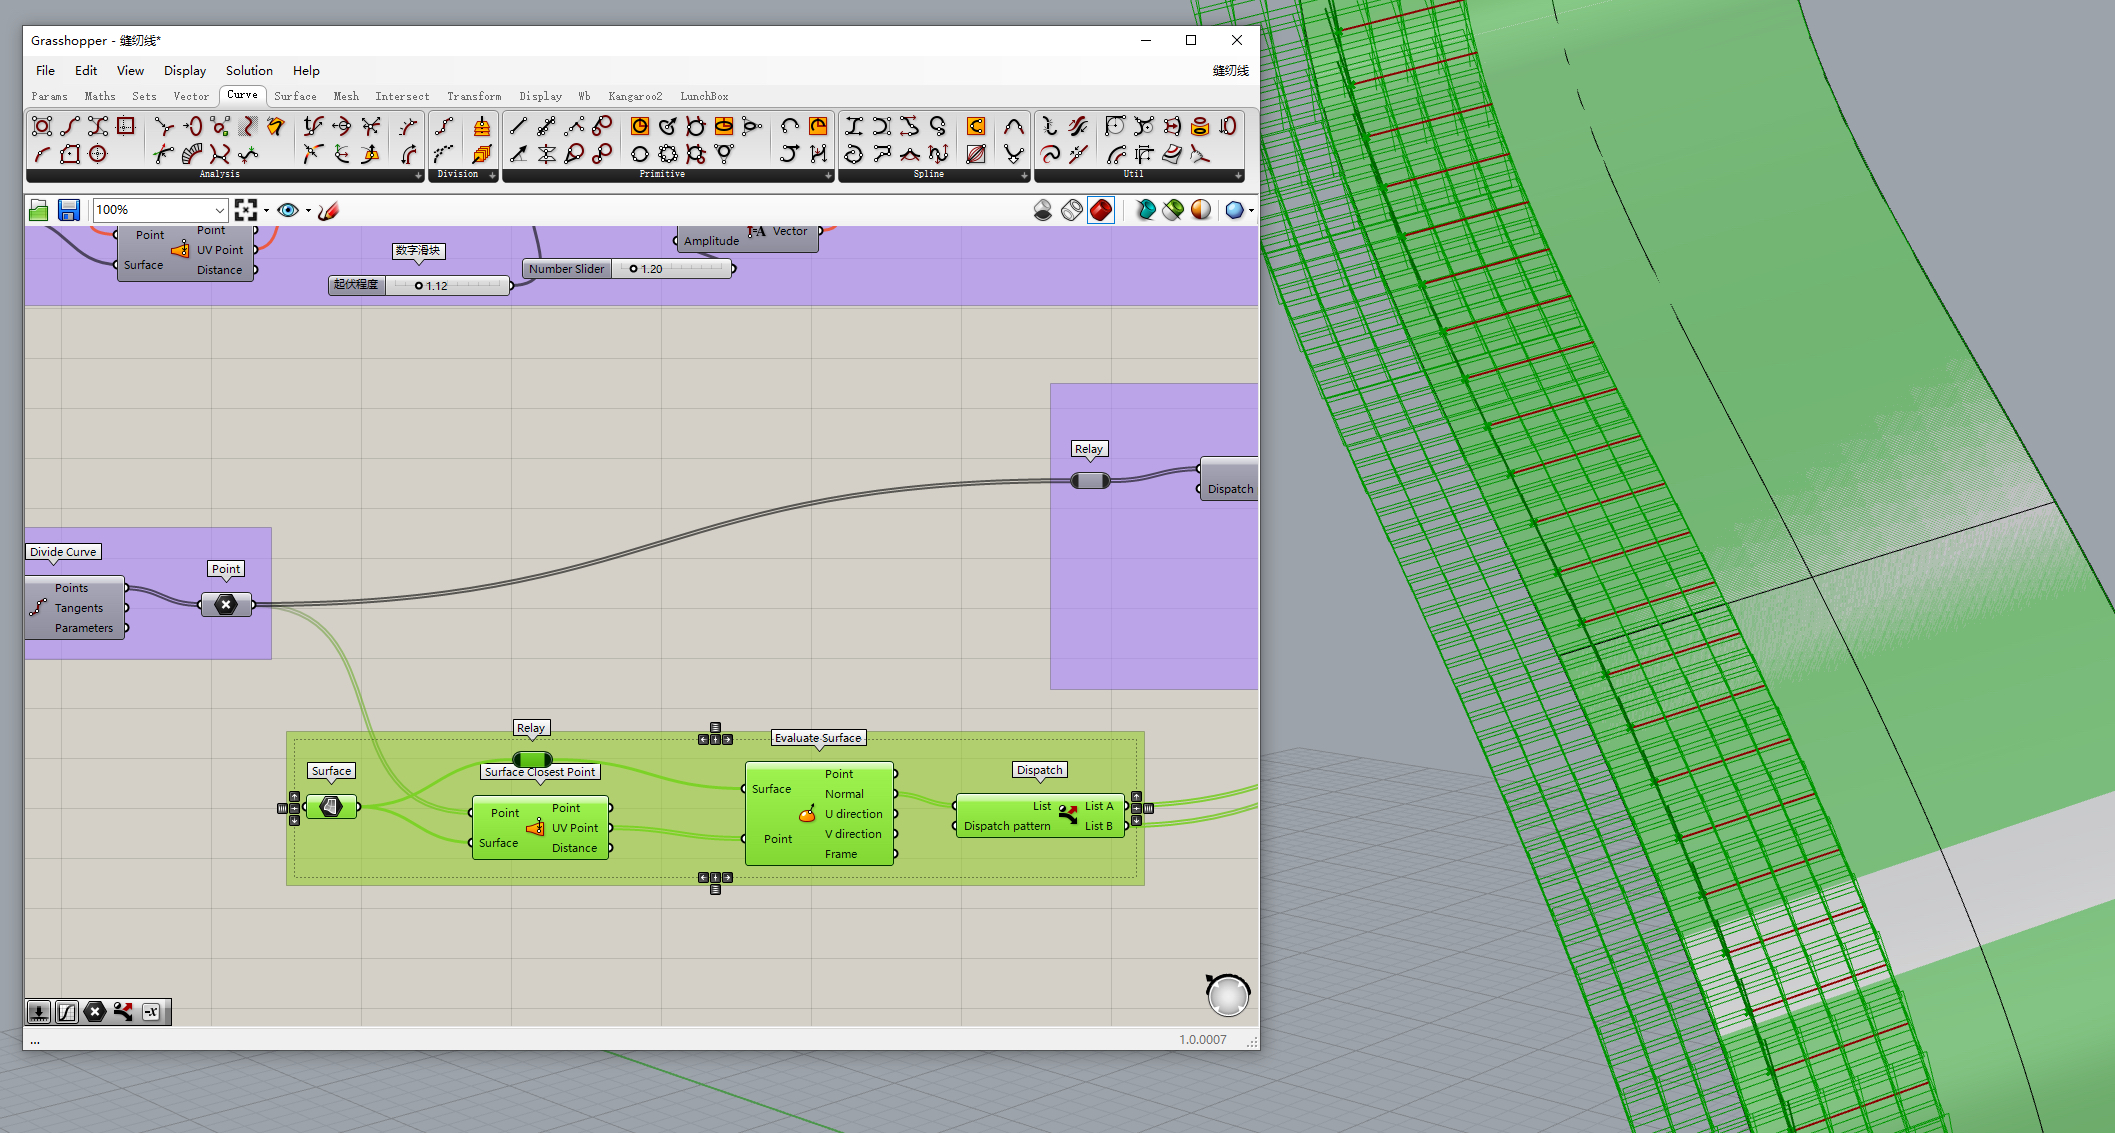
② Surface cosest point to pull the points back to the surface, and then use valuate surface to obtain the normal vector of each point, and then shunt
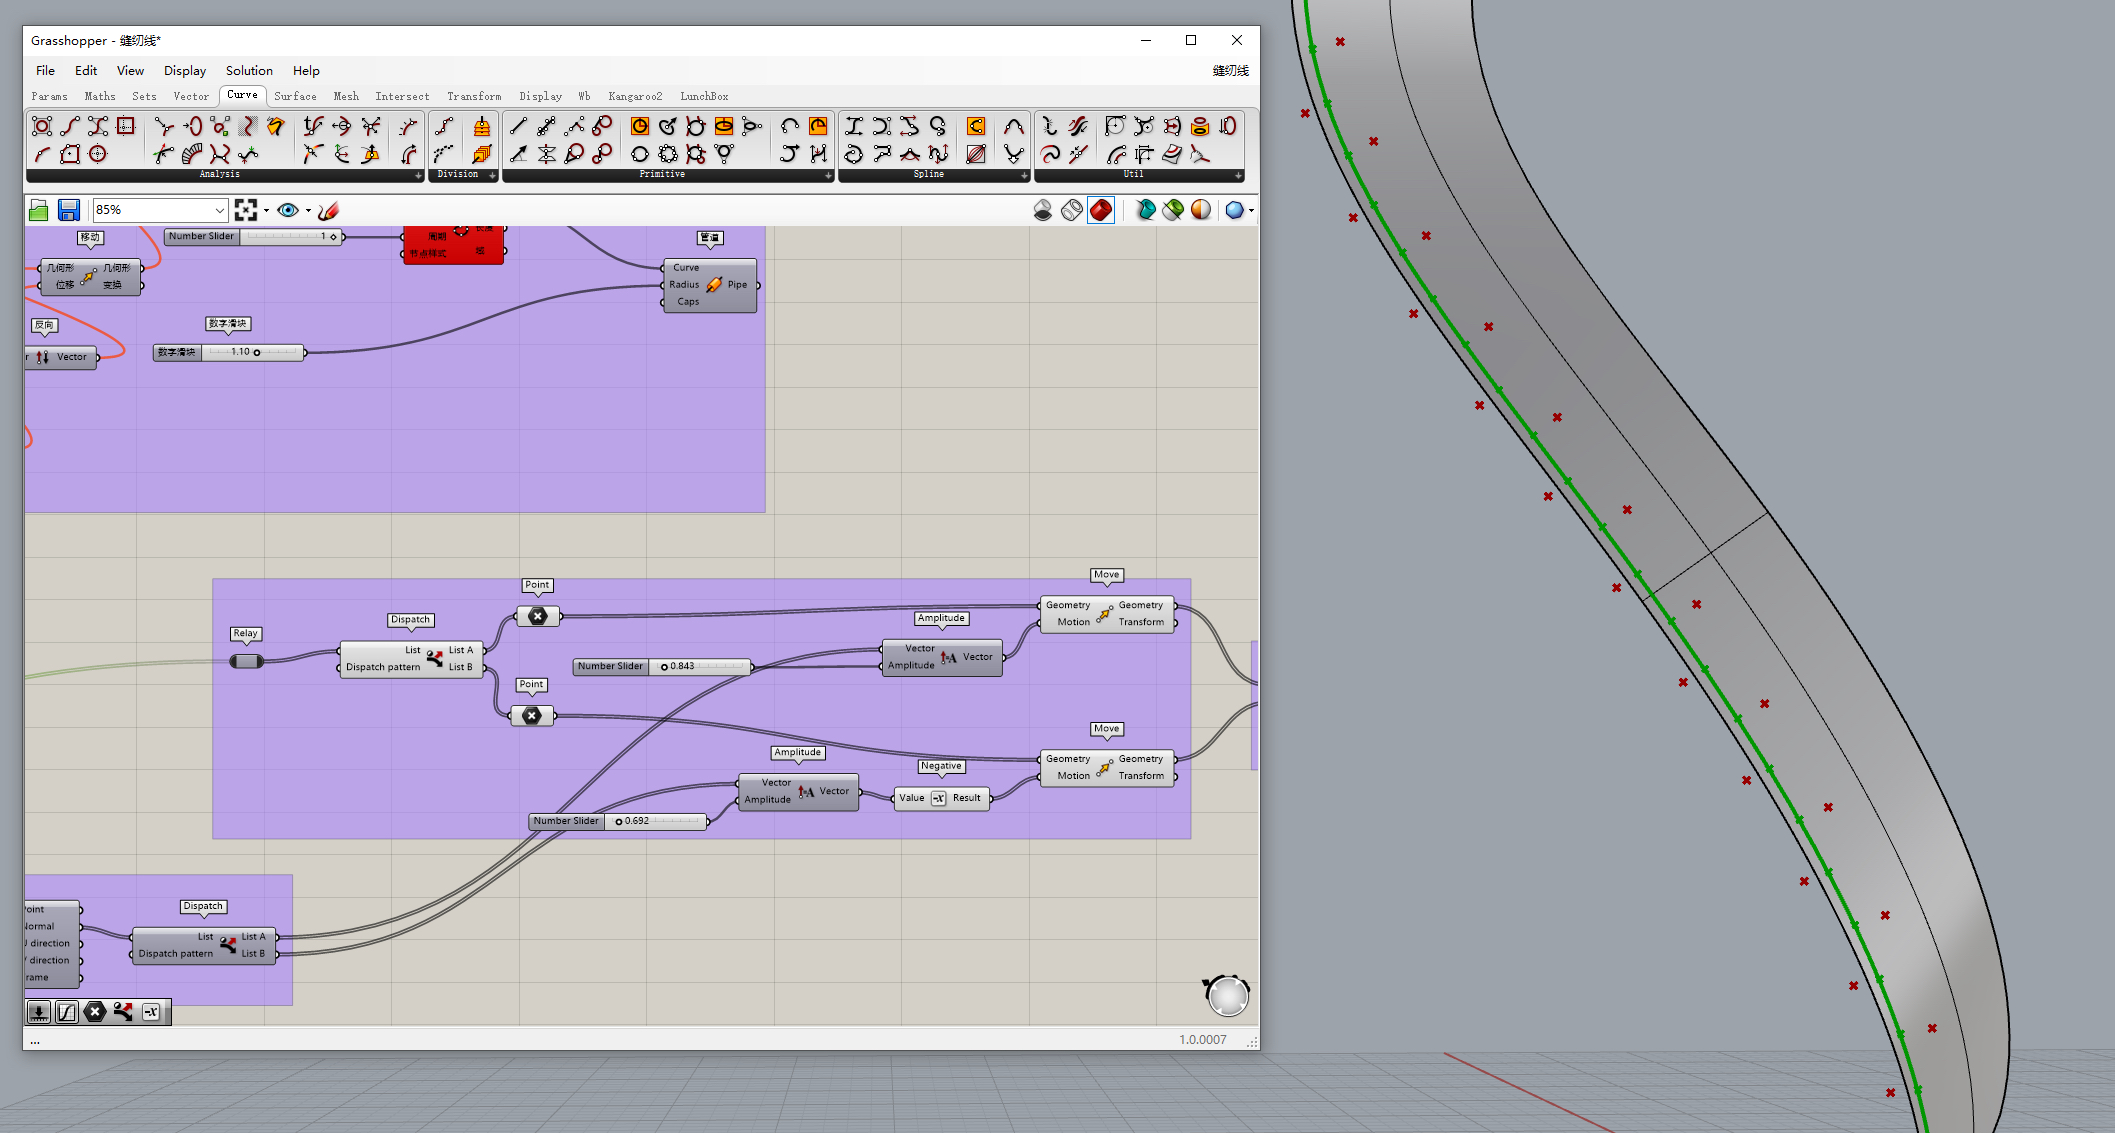
③ The previous points are also shunted accordingly, with a group of points moving in the positive direction of the normal vector and a group of points moving in the negative direction of the normal vector (negative), making a sense of a wave.
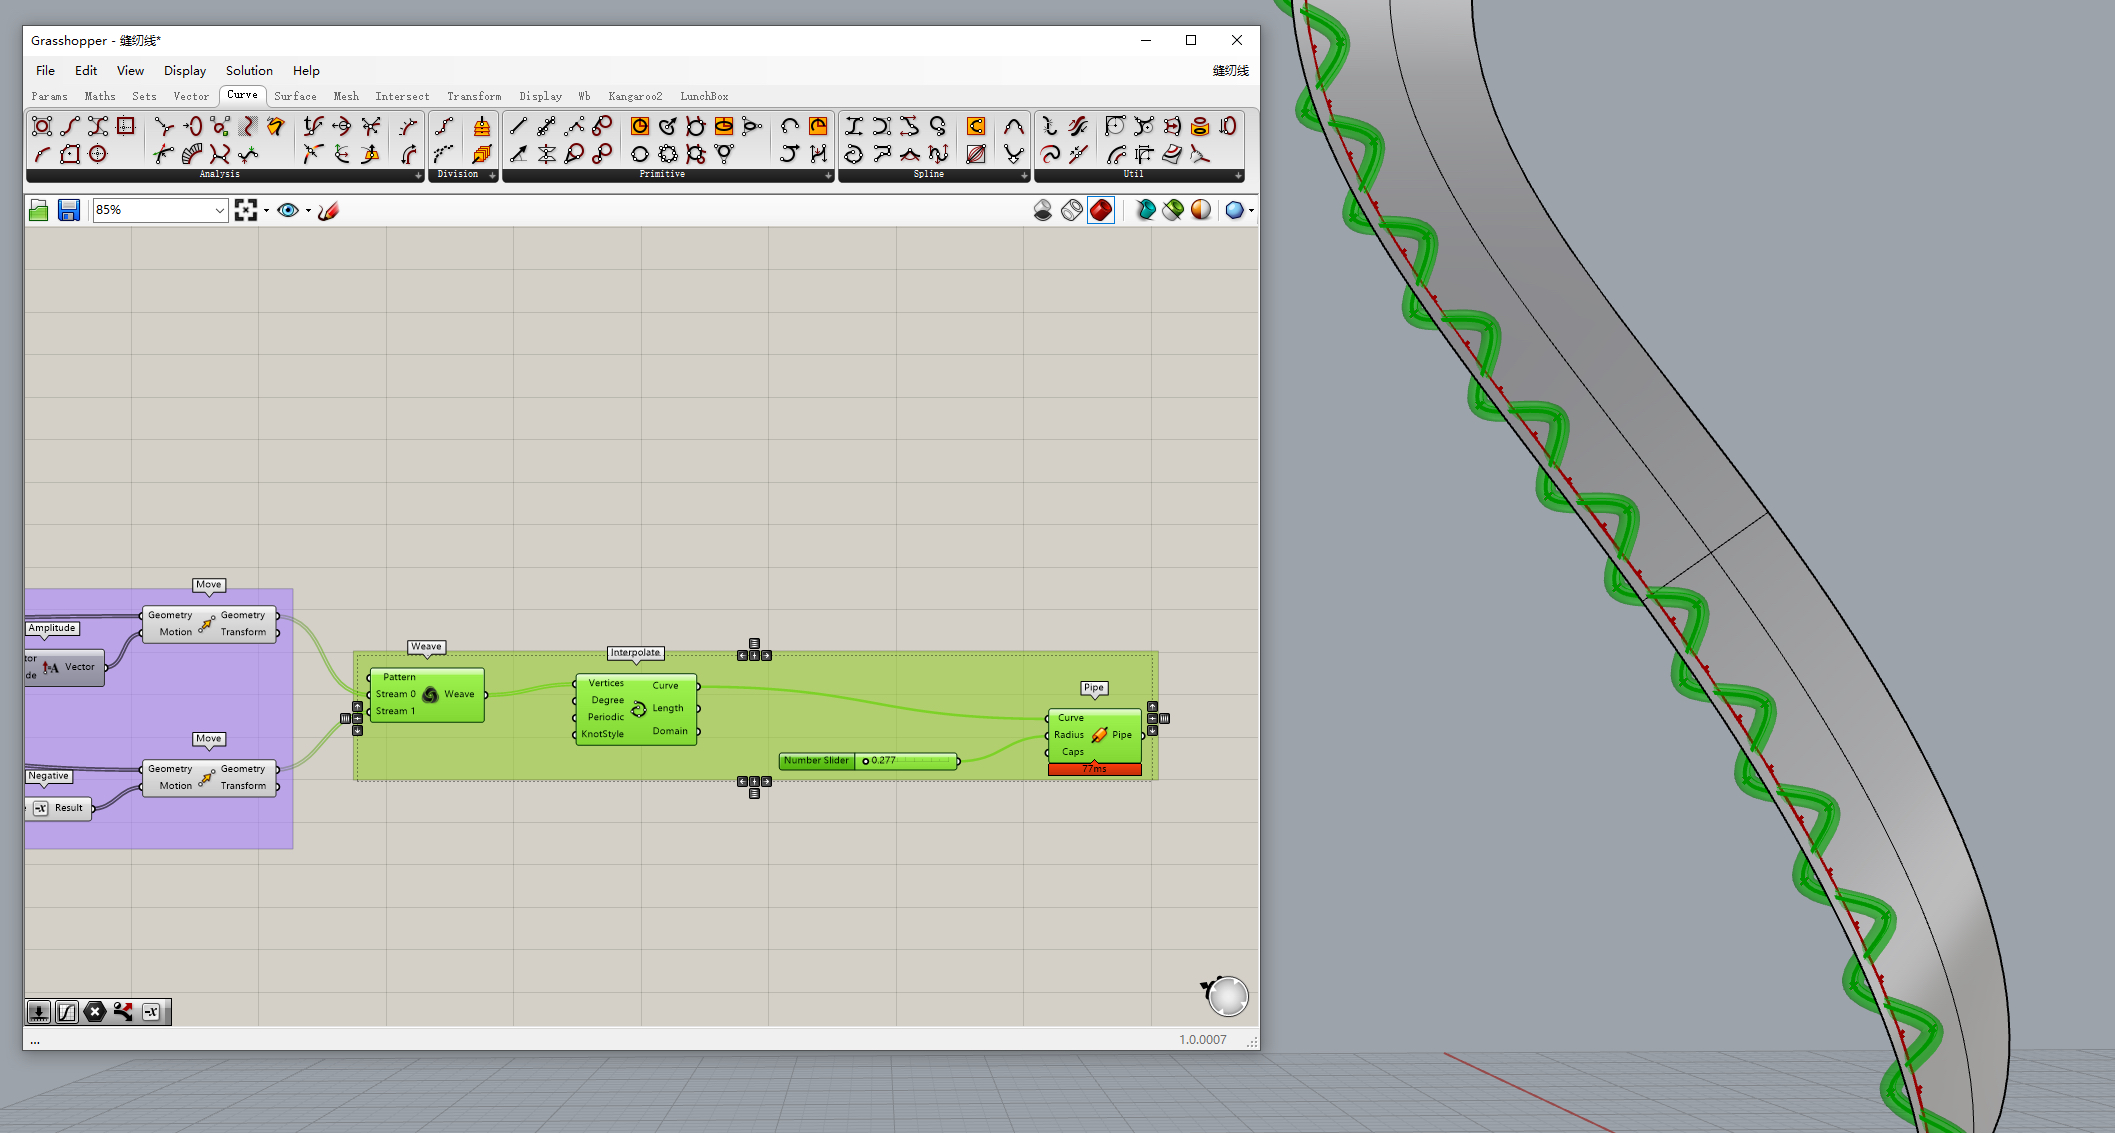
④ Use weave to reorganize the shunt points, and then use interpolated point curves (interpolate) to obtain wavy lines. After that, the round tube can be lofted to get the sewing line we want.
These are some of my personal sewing methods. The battery has been put on the map. I need it myself.
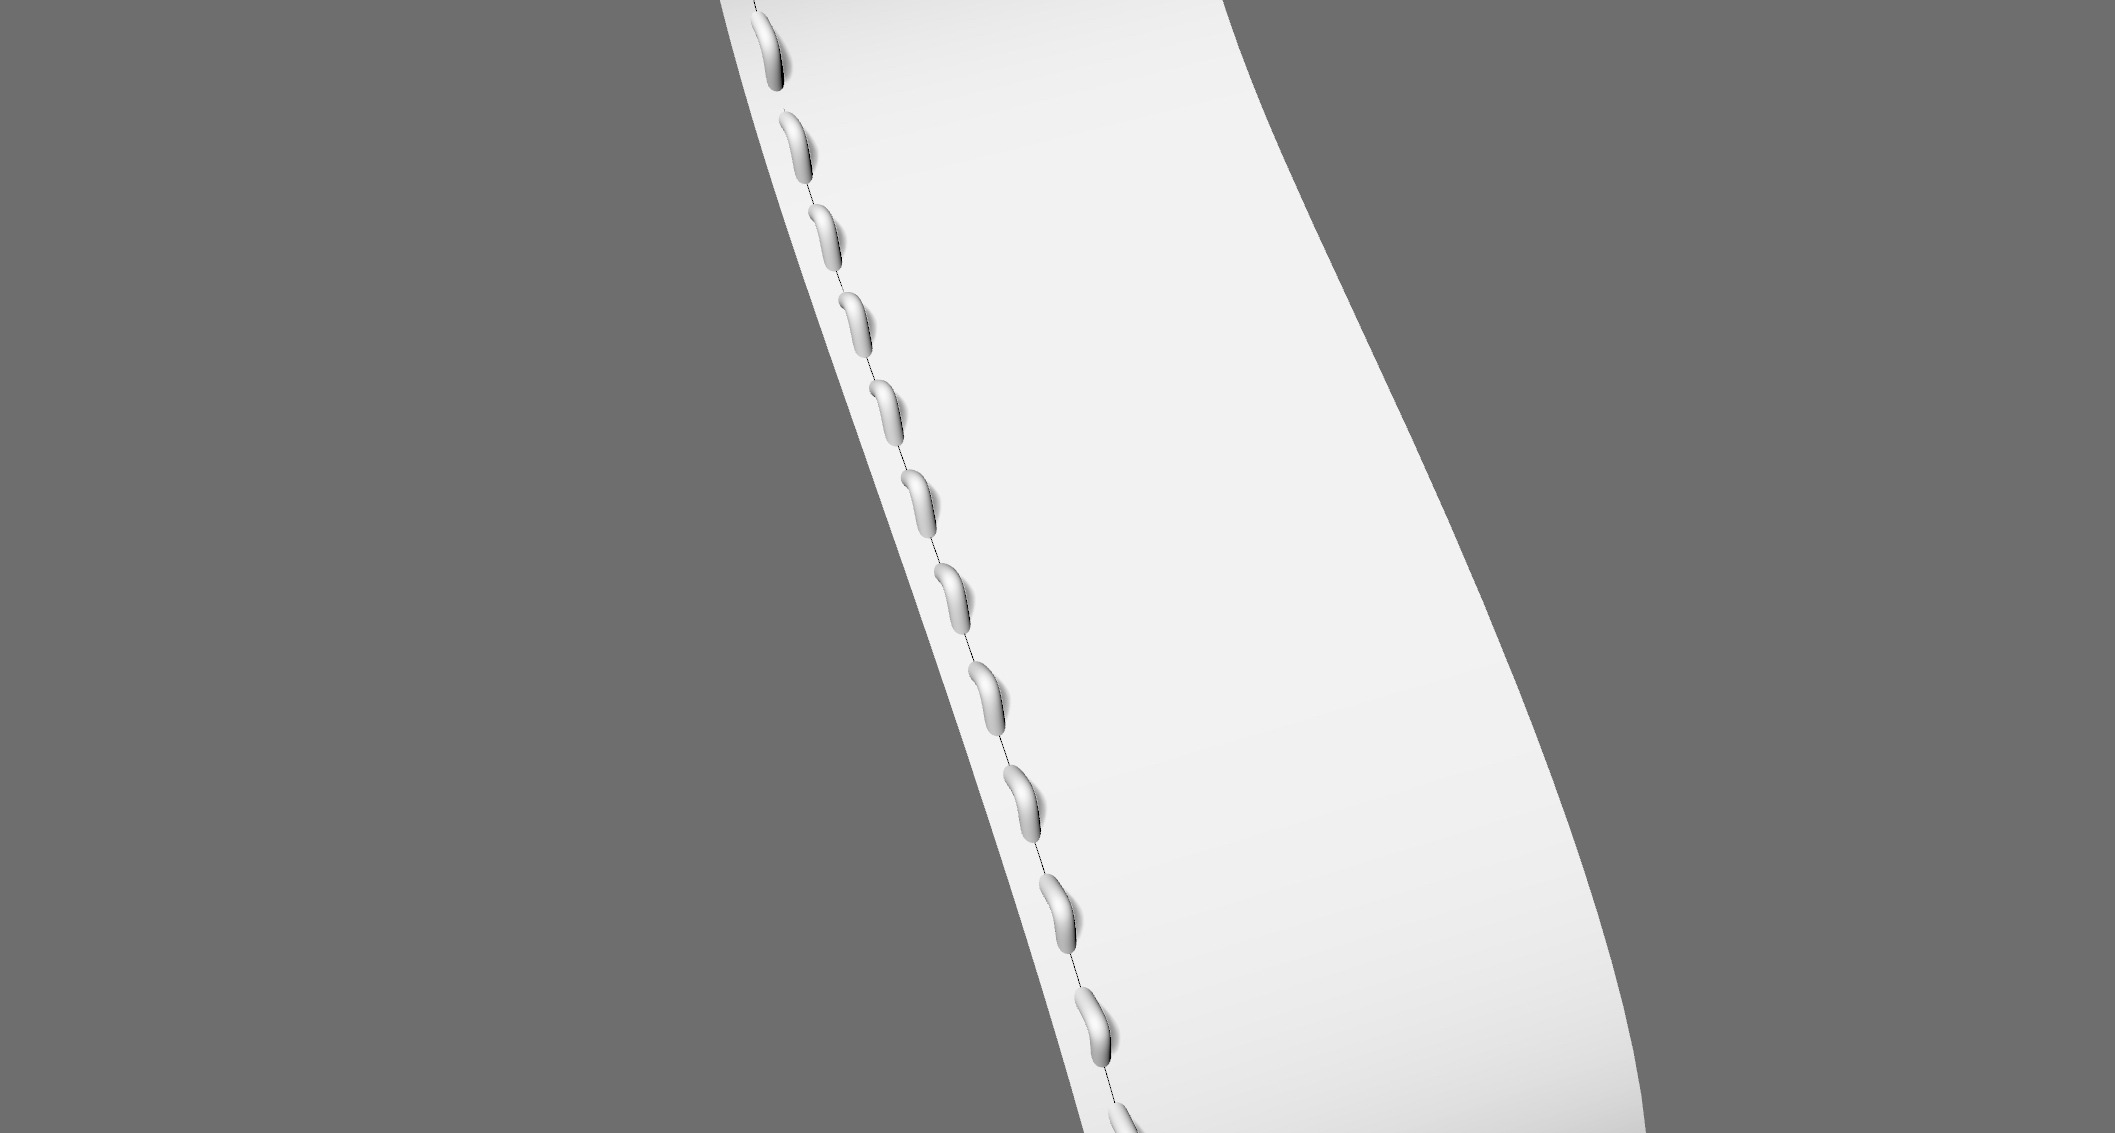

The copyright of this work belongs to Aqun. No use is allowed without explicit permission from owner.

New user?Create an account
Log In Reset your password.
Account existed?Log In
Read and agree to the User Agreement Terms of Use.

Please enter your email to reset your password
If the model is used, Alias has its own sewing thread generation tool. In order to make this introductory GH, it is better to directly learn ALIAS's sewing thread tool. rhino does a good job of exporting the model to alias to make the sewing thread and then back it up. GH is too difficult to learn, and English thinking logic is complicated...
The horizontal trough just needs to be used. Thank you, GH boss!!!!!!!!!!!!!!! I used to use a straight line and then use a foreigner's plug-in Surpik3D to generate a sewing line grid free of charge. The concave model at the edge of the line is simulated. If special texture is needed, UV must be displayed and then the line of the physical model is not made at all. The shading effect is also good.
I can only click on the dotted line to select the stitching line made by the second method. How can I select the solid part to make Boolean with the surface?
For discussion only, relatively fast and less demanding
Rhino I will offset the surface curve-round tube-extended curve array, in fact, it can also be
Thanks for sharing.
Dry goods
Collection