Let's do an interesting rendering! After burning the CPU, don't you render a picture and invite your computer to drink iced coke?
It mainly explains the tips of adjusting the gradient texture, the displacement and the use of geometric nodes of bubbles, the usage of sun & sky, and the play of rainbow light (to take the first set)

It is not easy to set up a dog for work. If there are any deficiencies, please let me know. If you feel good, I hope you can leave a compliment or comment, or pay attention to me. I will continue to cheer up and make some good and attentive tutorials. Thank you!
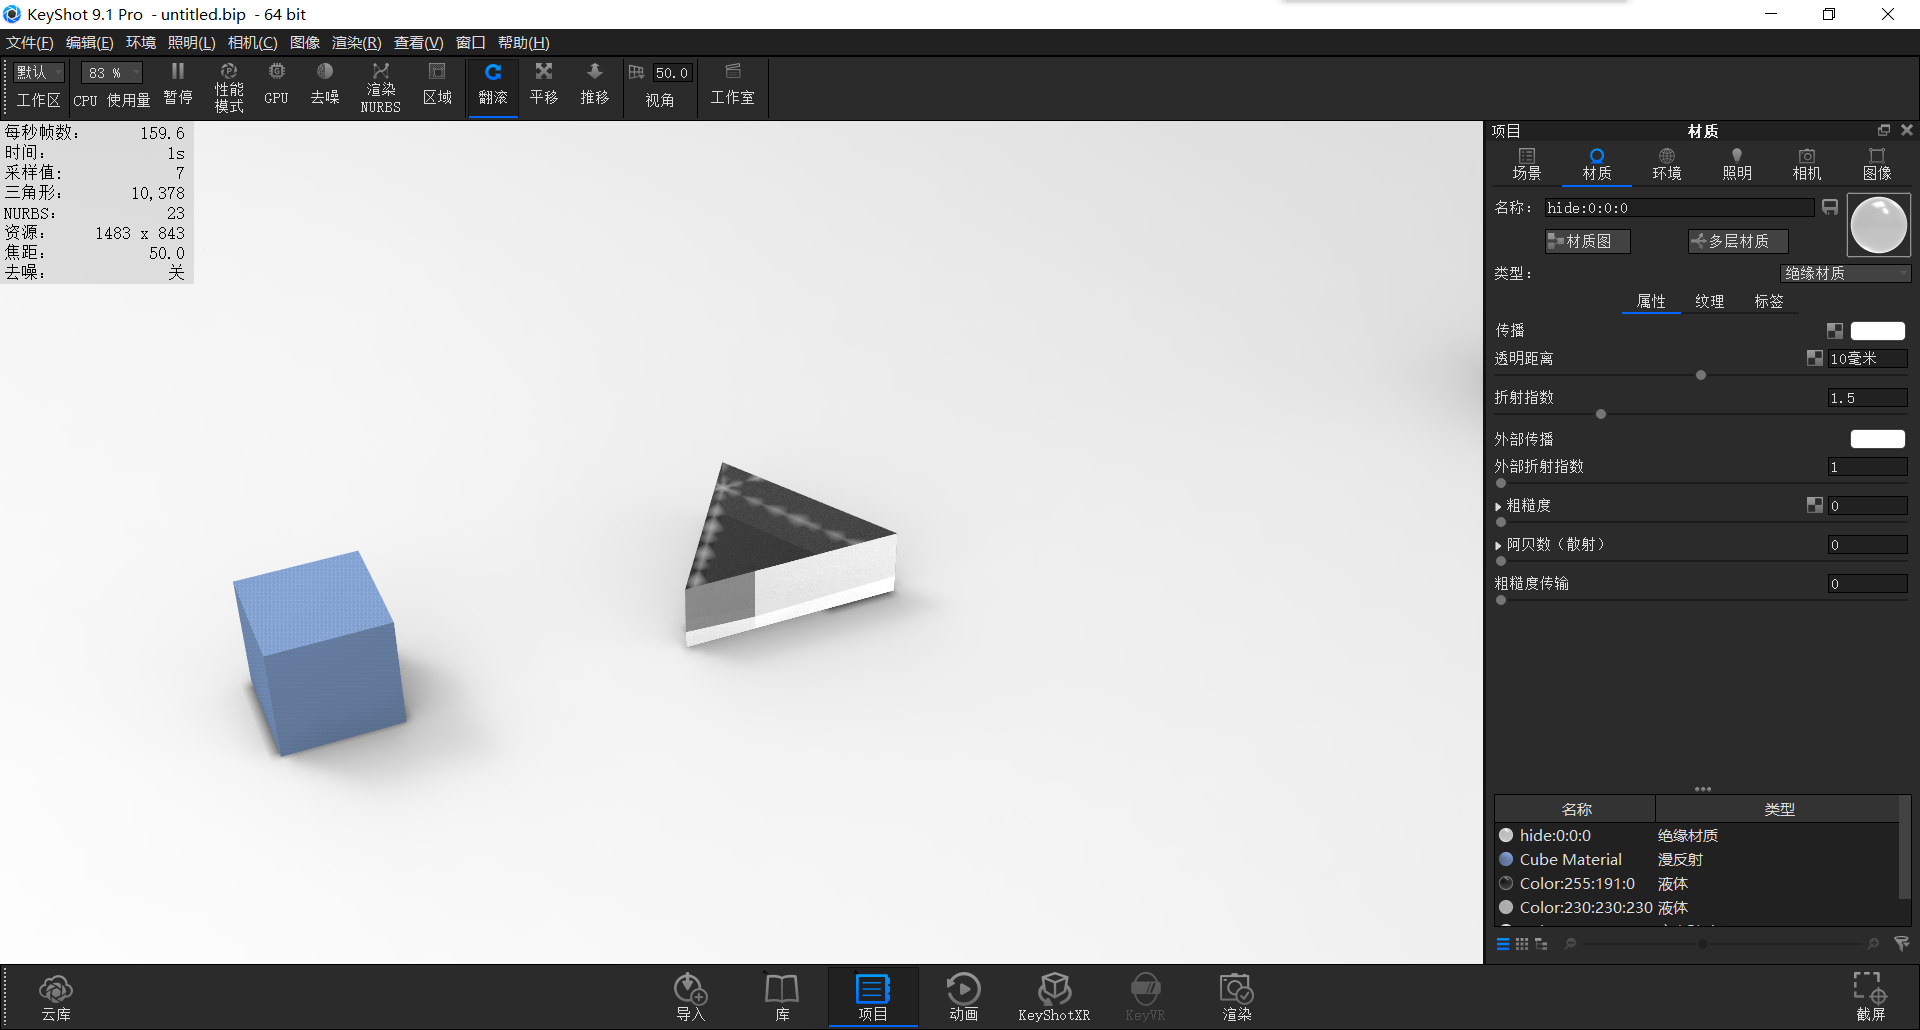
At this time, we find this prism in the scene menu, right-click on the center and fit the model, place the model in the middle of the camera, and give insulation material to change the propagation to white. And press ctrl 3 to add a cube
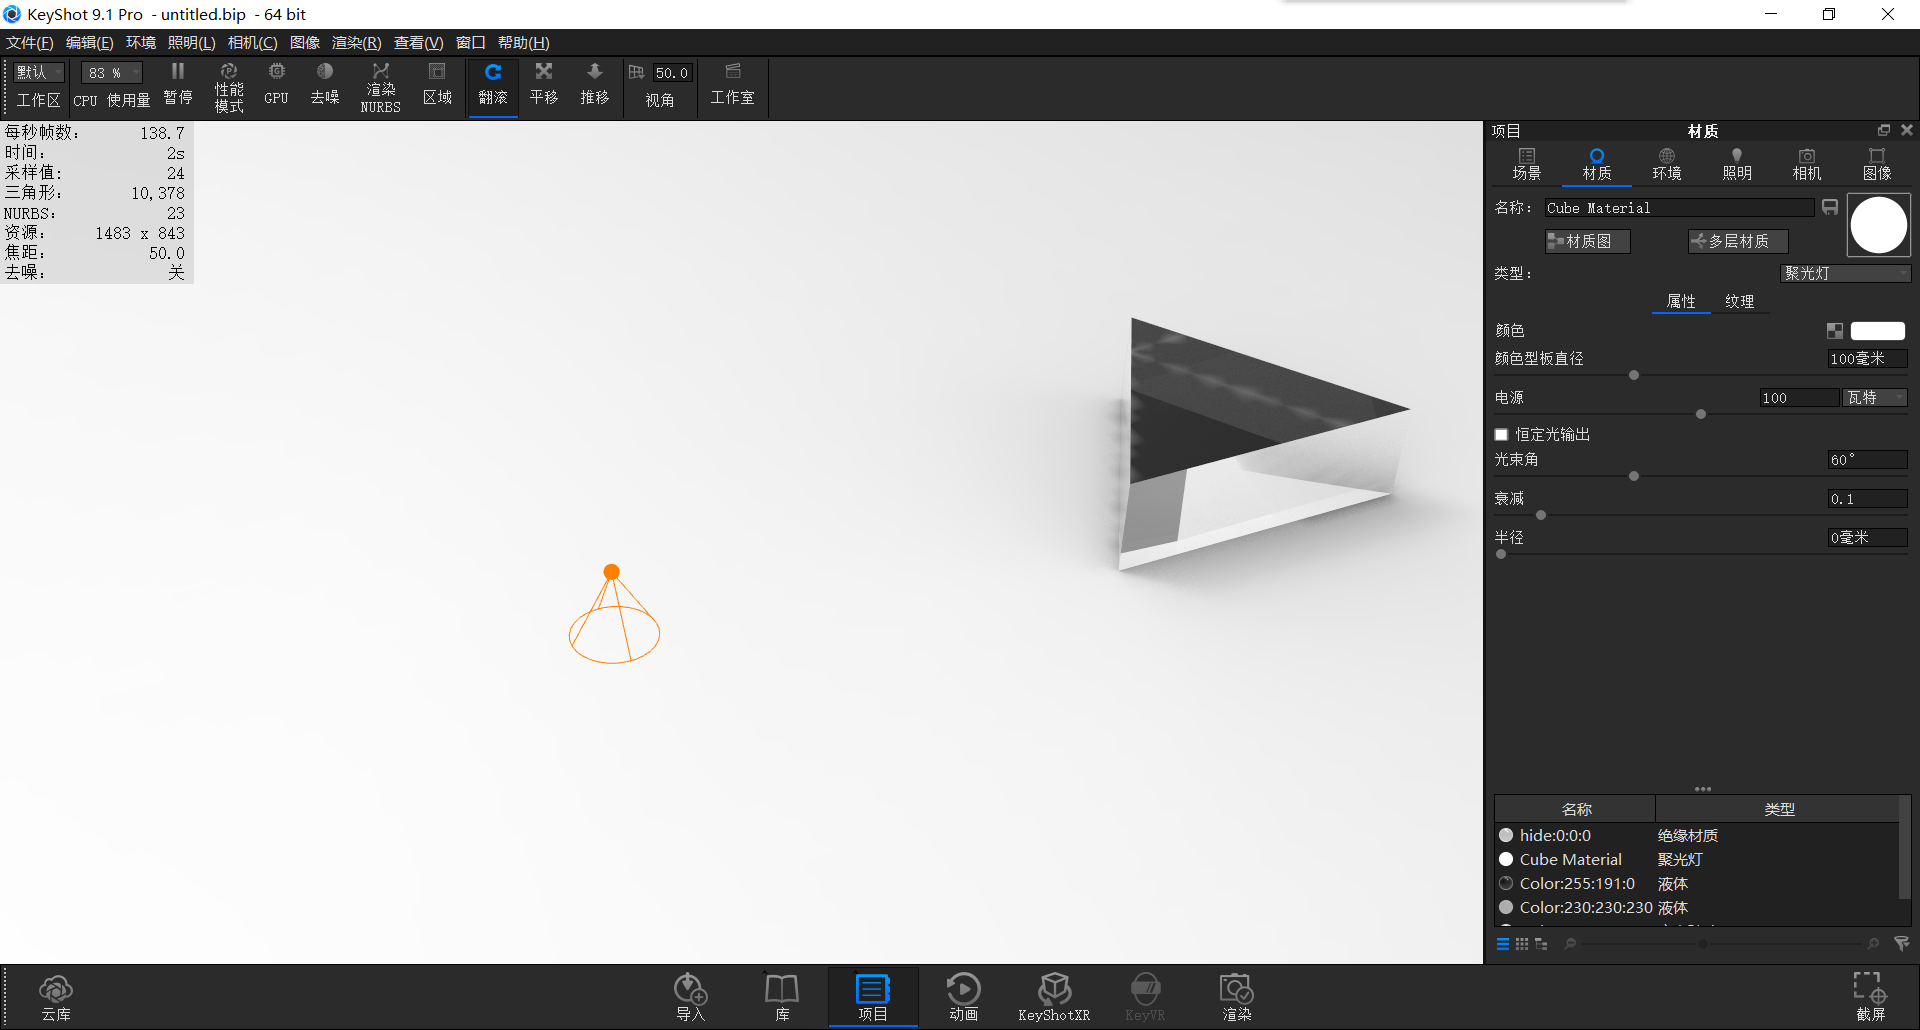
Give the cube a spotlight material
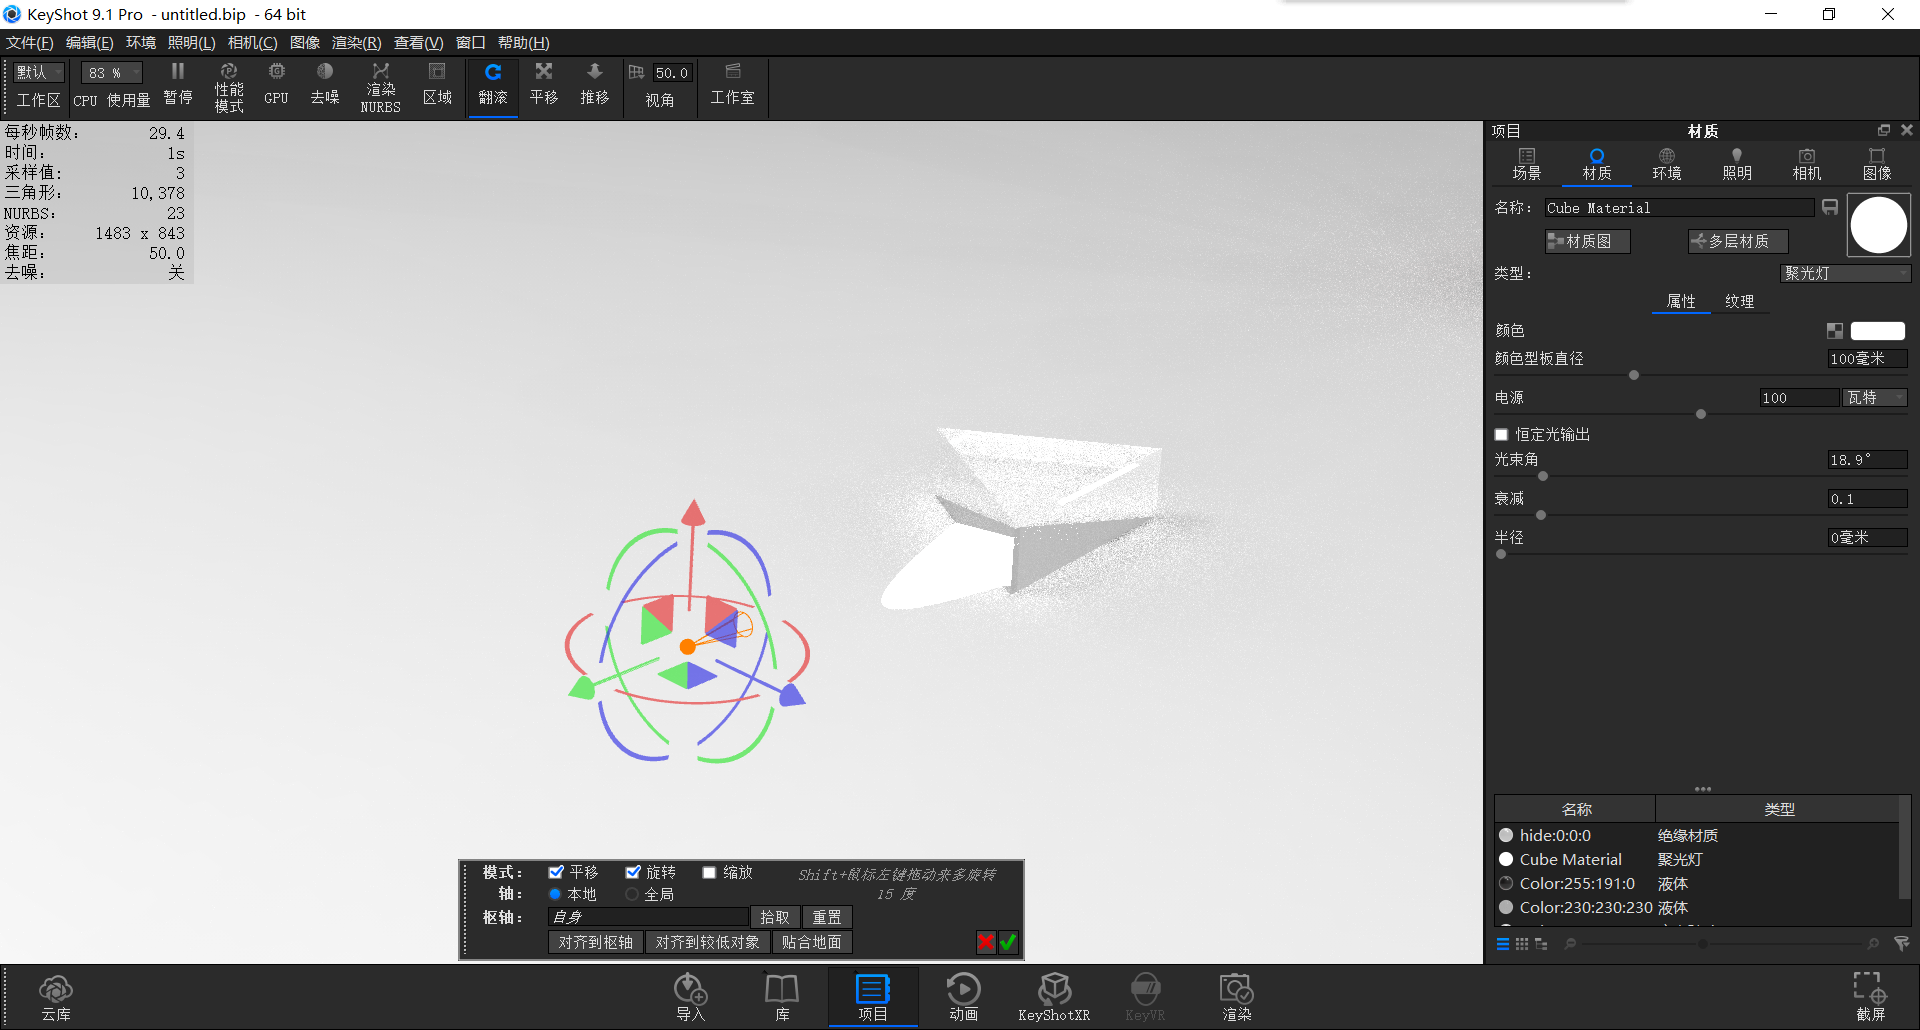
Turn down the beam angle of the spotlight, and move the position of the spotlight so that it is almost parallel to the triangular prism to illuminate the triangular prism (the product mode can be opened in the lighting, and the product mode will turn on the ground light, so that we can see the light of the spotlight on the ground for easy adjustment)
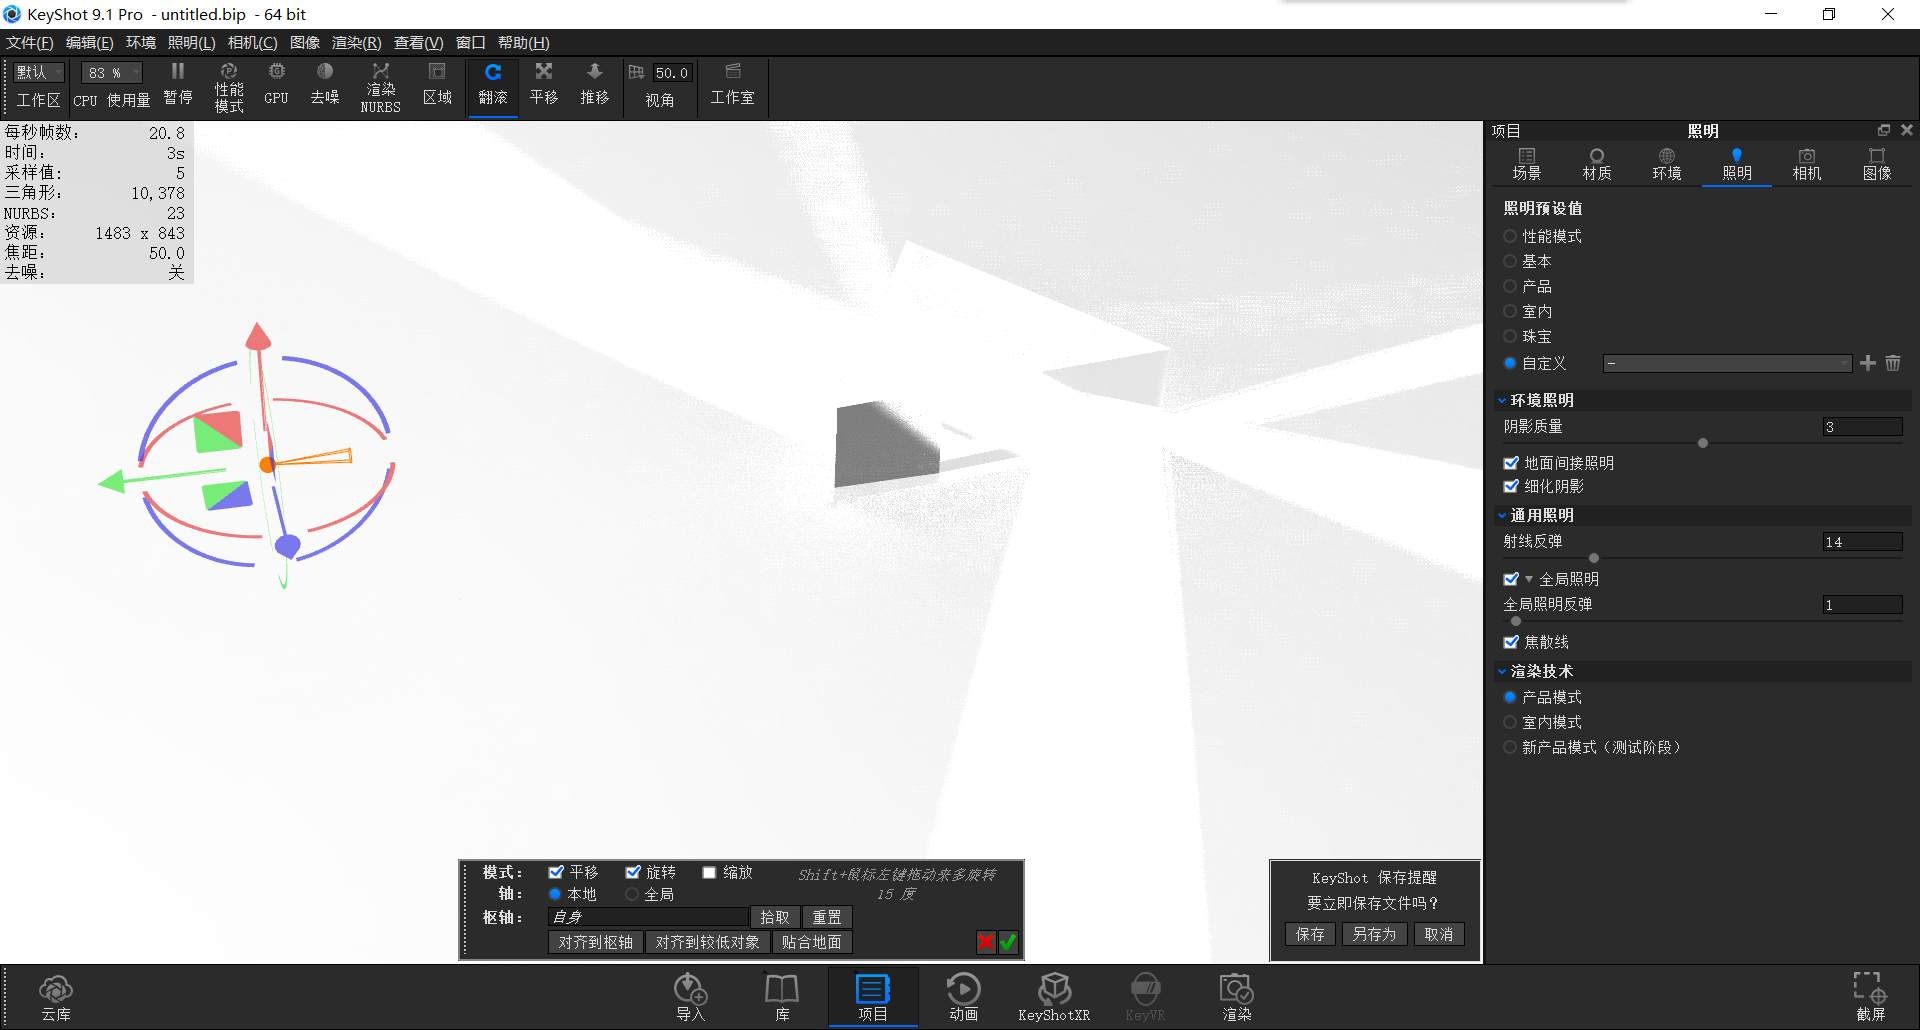
Then we open the focal line at the point of the illumination, and at this time we find that the prism starts to reflect the light.
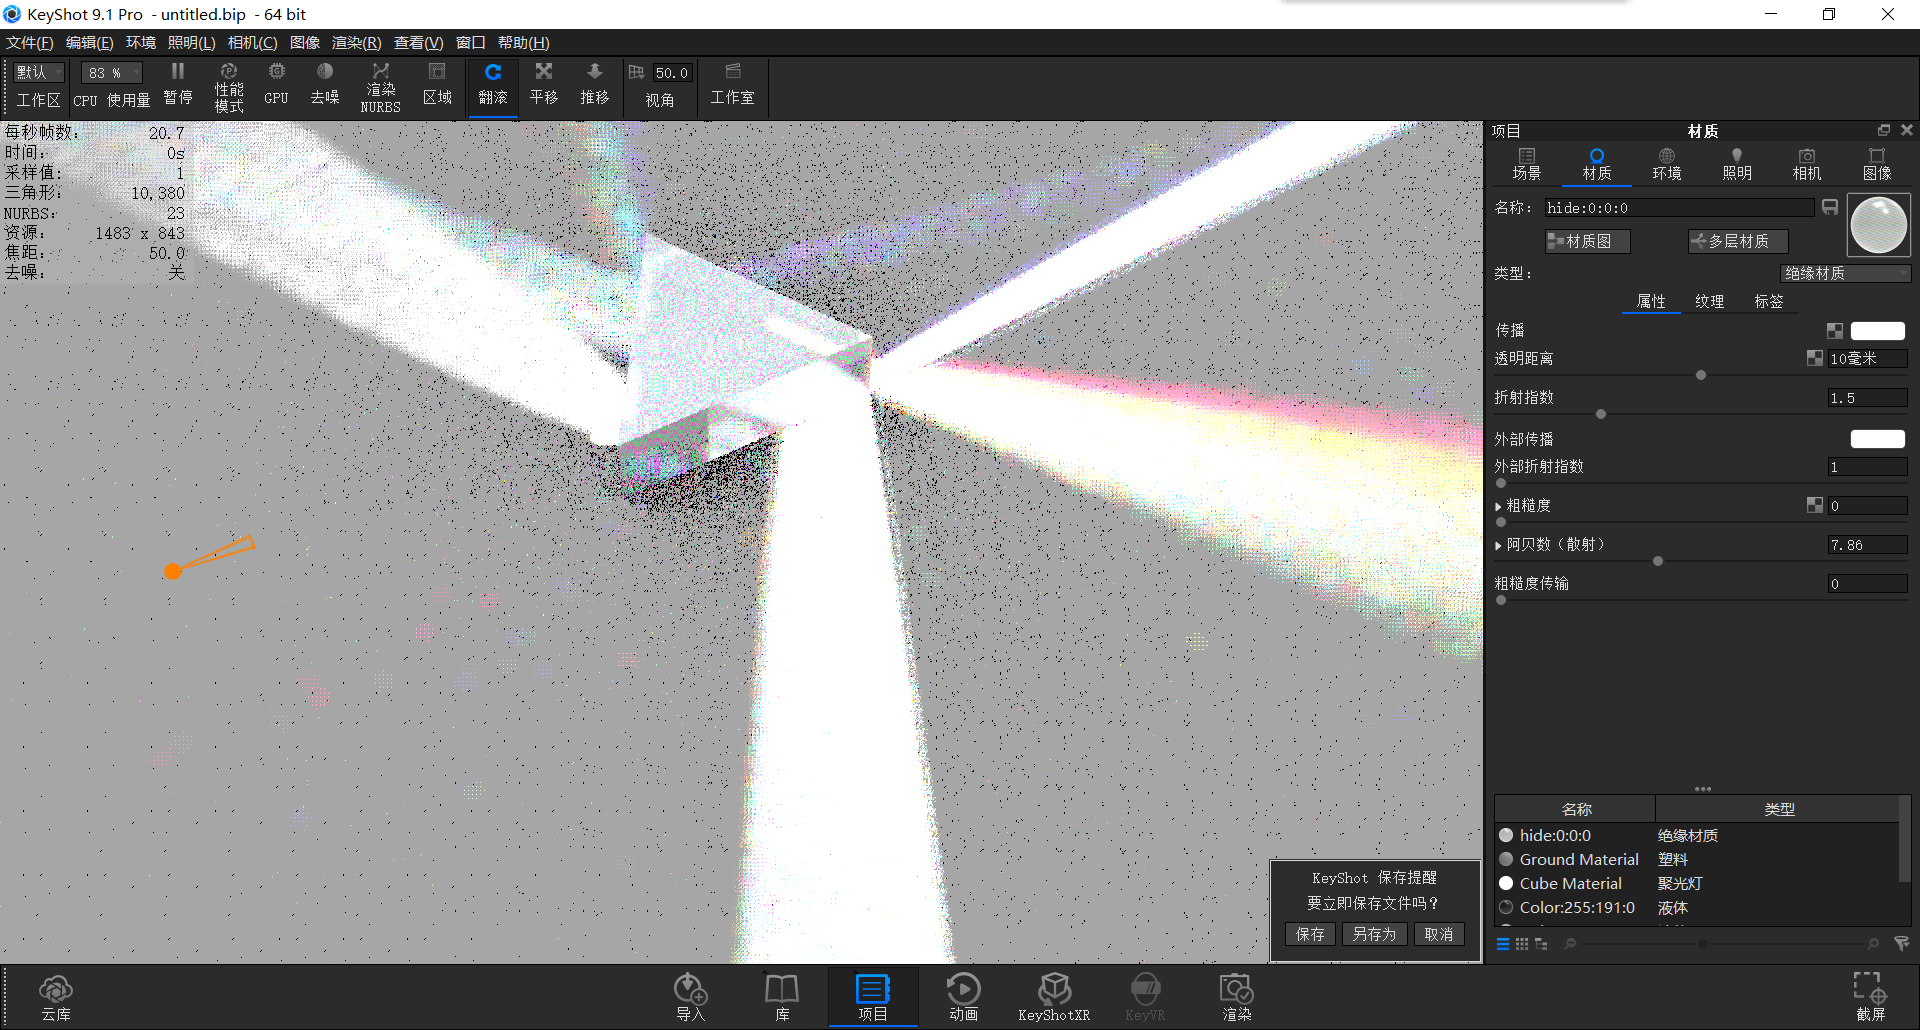
At this time, we went back to the insulation material and changed the Abbe number (the Abbe number was the dispersion coefficient of the material, which can be Baidu specifically). At this time, we found that the prism actually emits rainbow light.
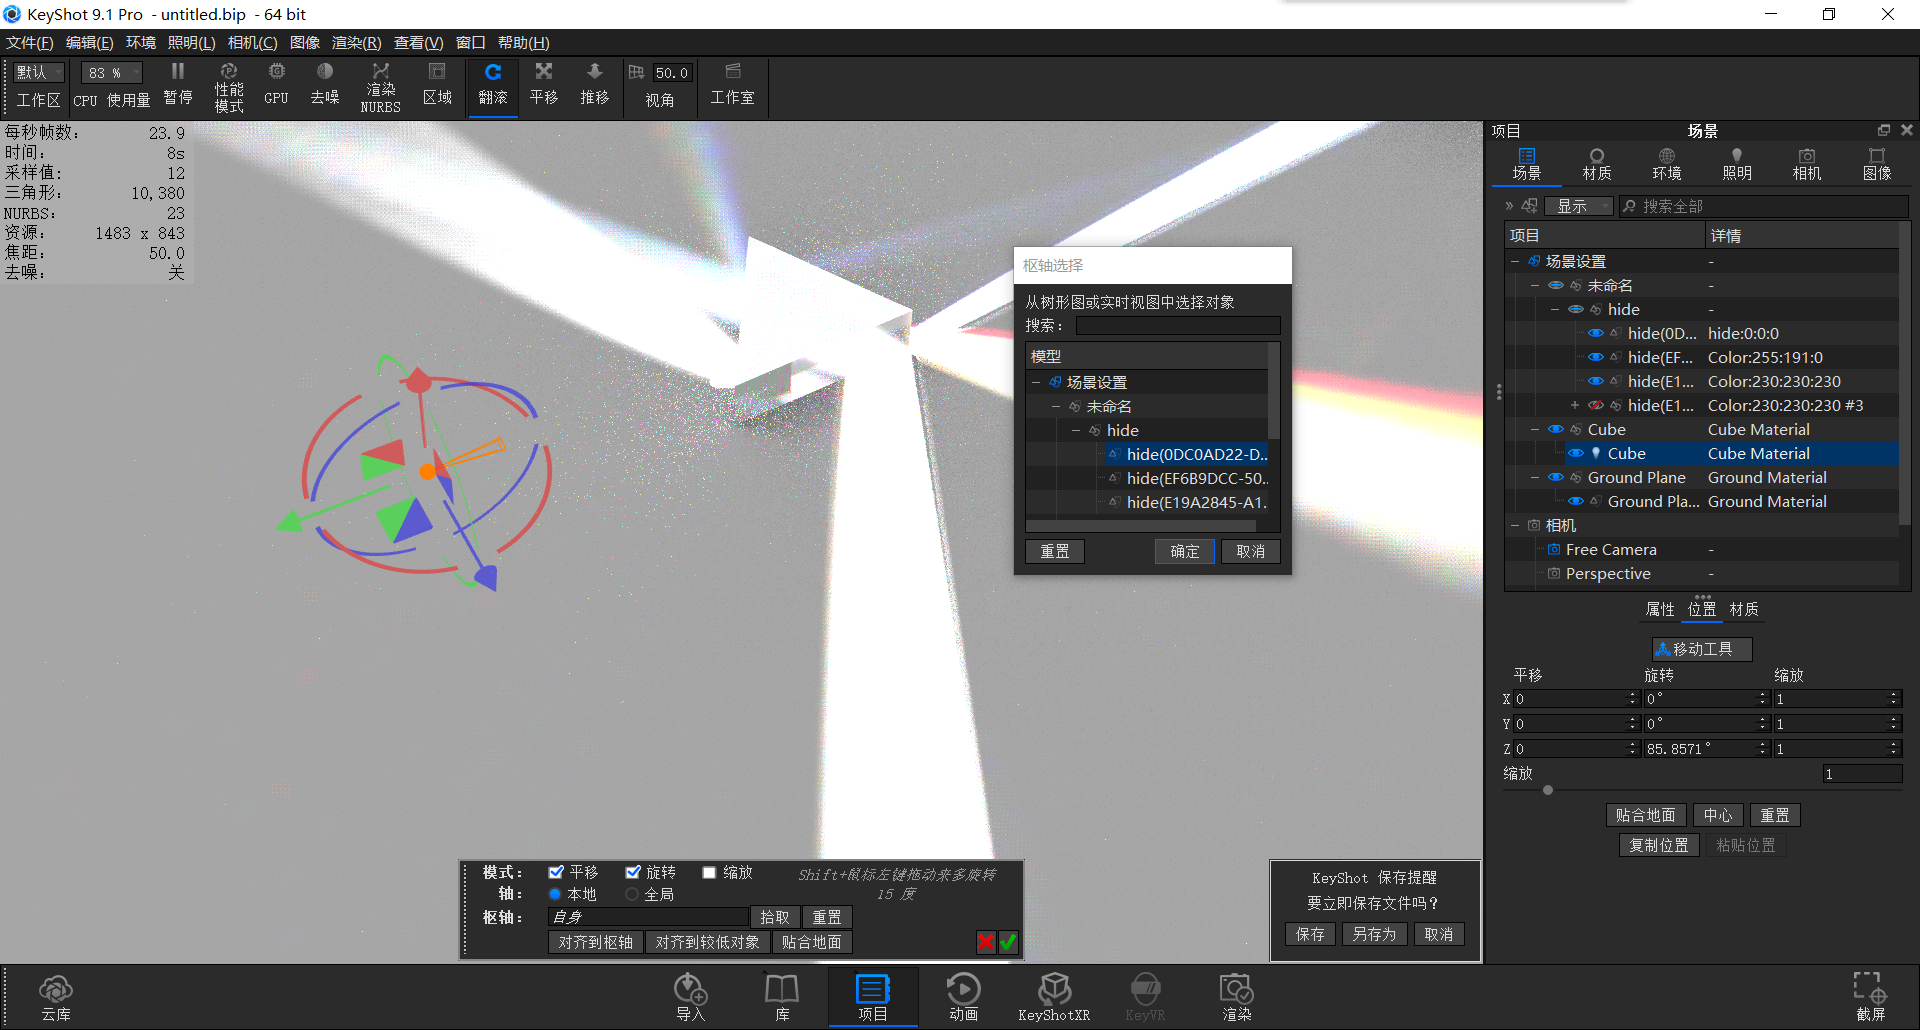
At this time, we open the scene, click the spotlight, ctrl D to open the mobile position menu, click pick in the bottom pivot box, pick up the prism, so that the central axis of the spotlight is the position of the prism
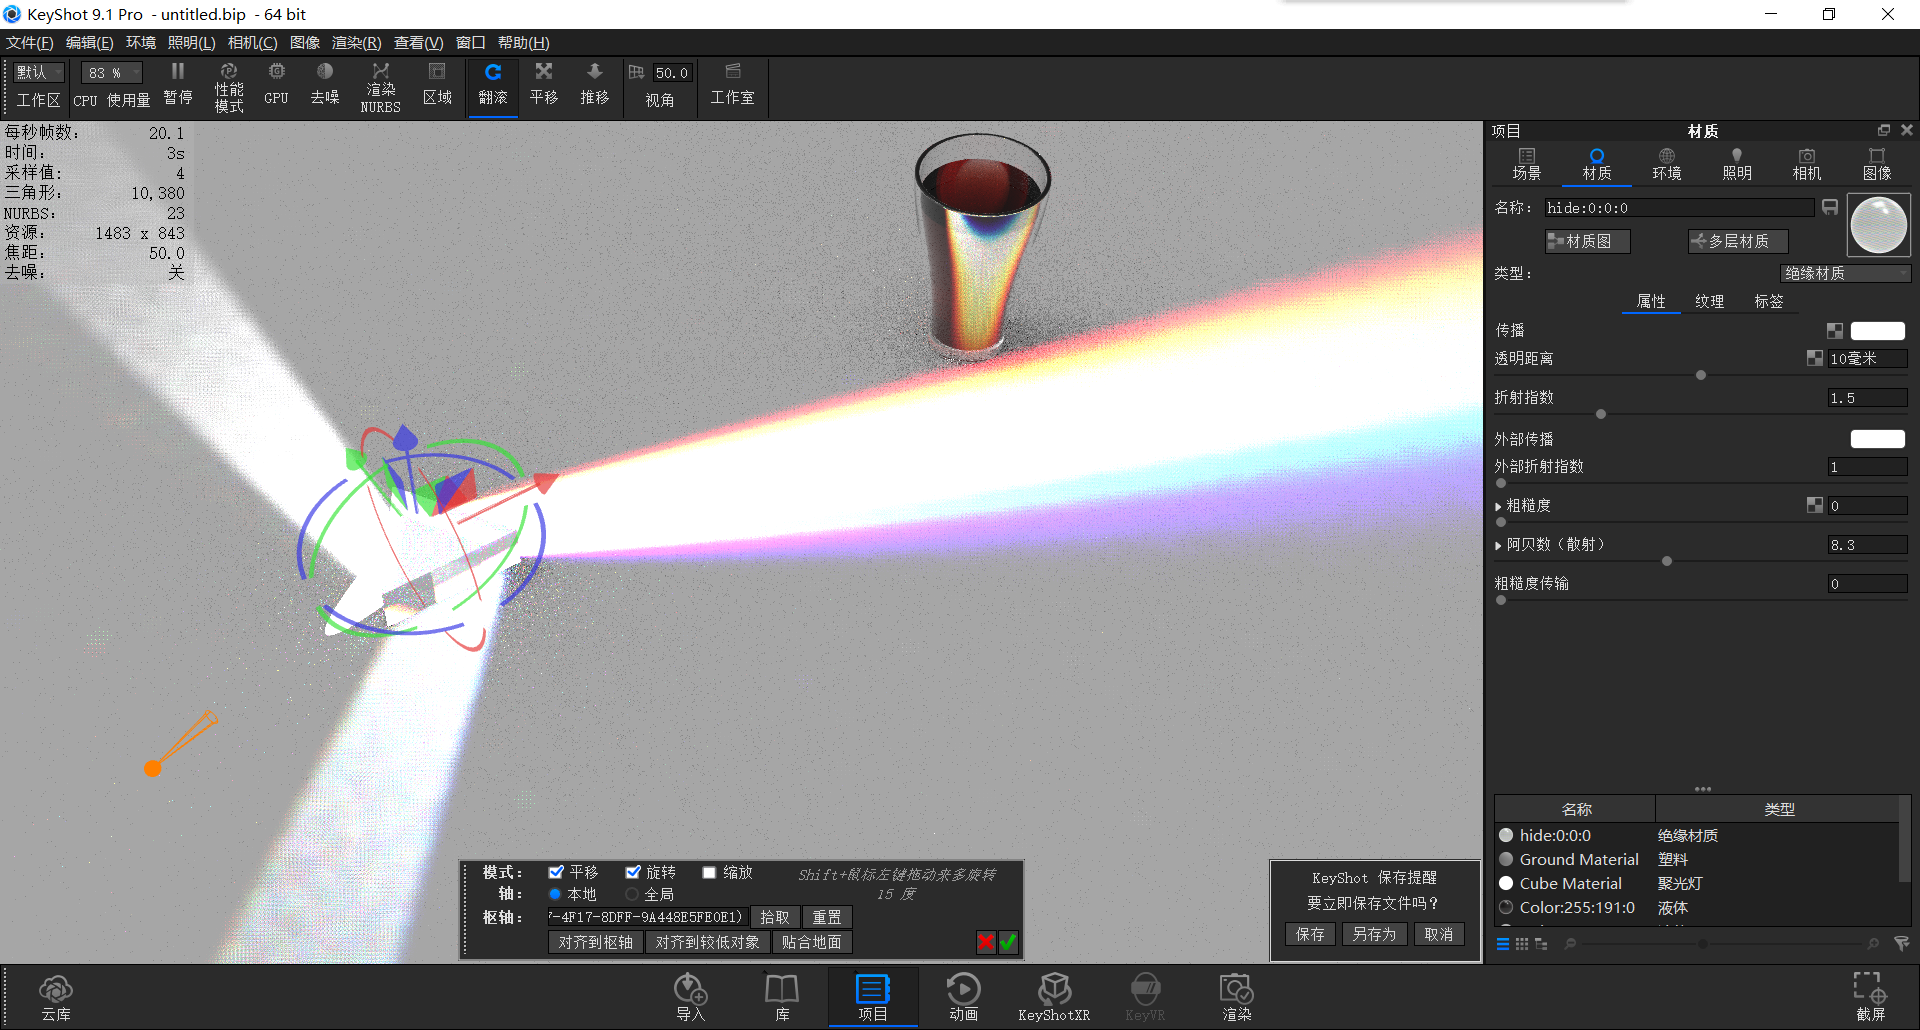
At this time we rotate the angle, the spotlight will rotate around the prism, then find the appropriate angle, and constantly change the Abbe number to adjust the dispersion effect
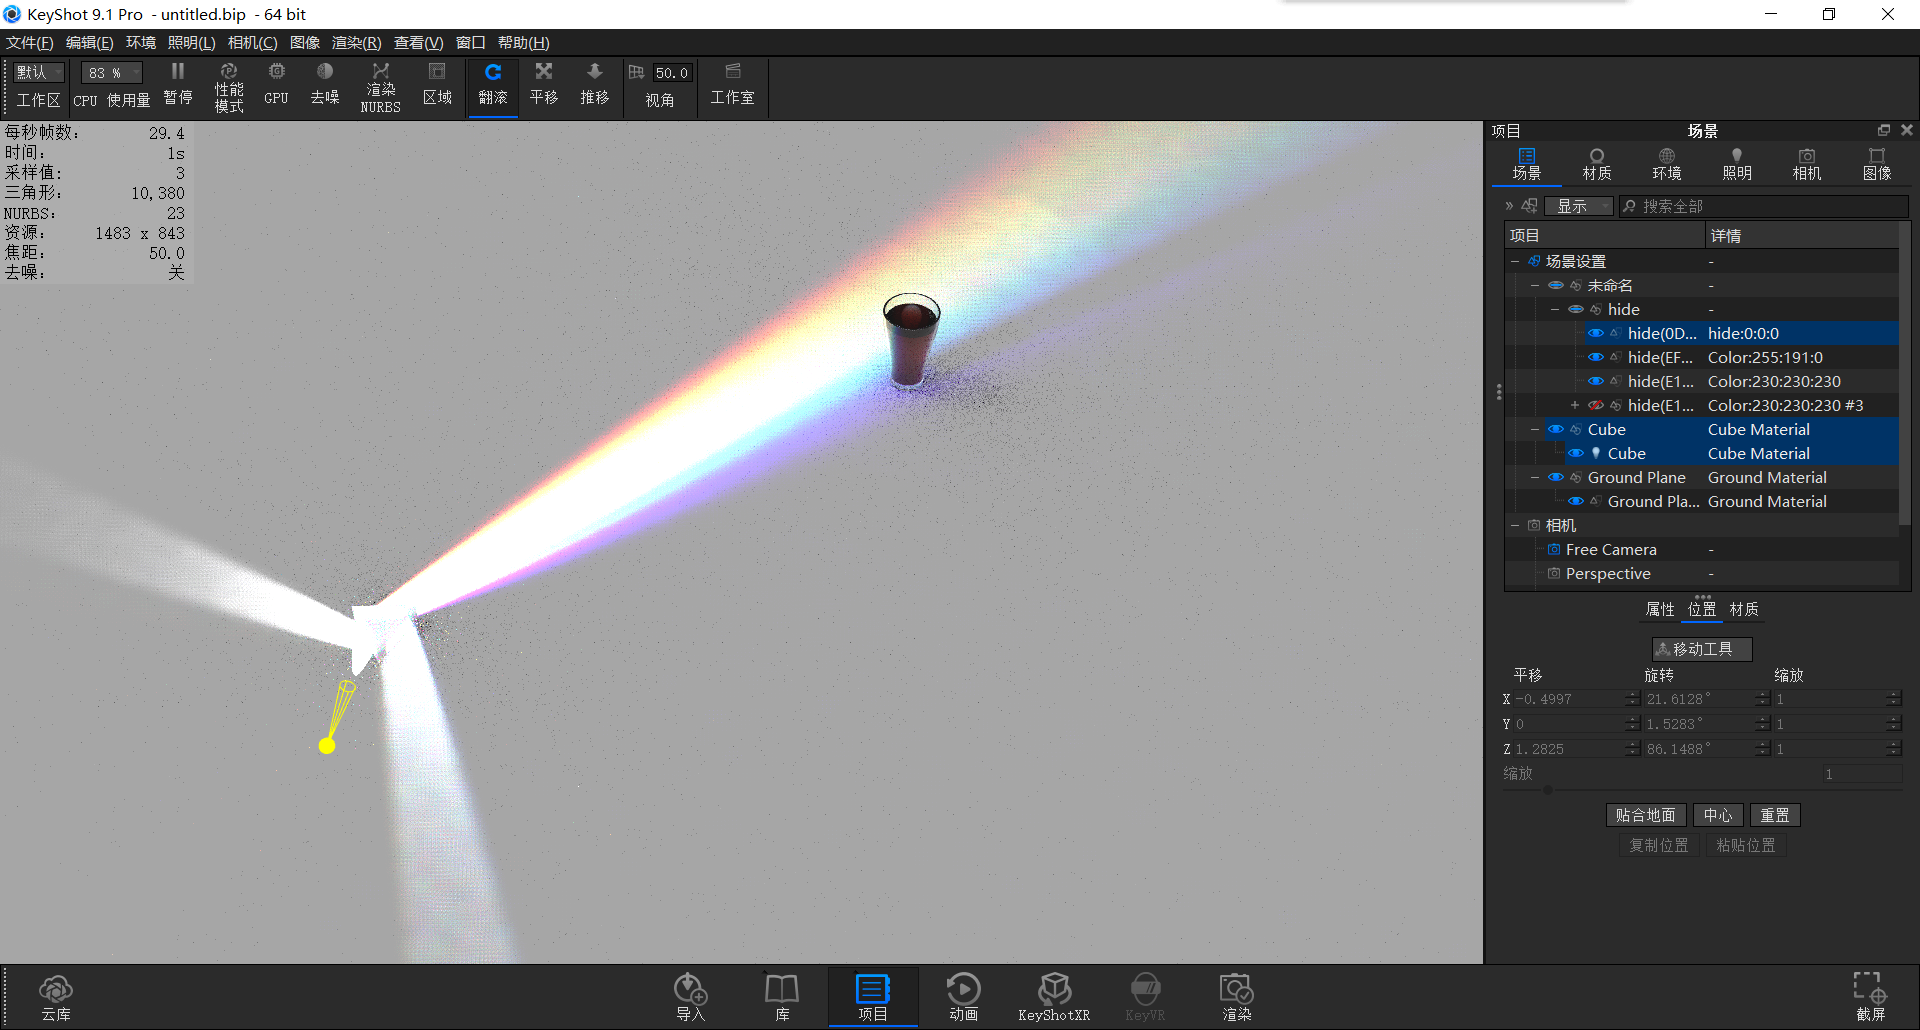
We select the prism and spotlight at the same time, and move the position together, away from the cup, so that the effect is better (because away, the brightness of the rainbow decreases, the saturation increases, and it is more gorgeous and beautiful) (the dispersion element has three points, open the caustic line, Abbe number value and light intensity and angle)
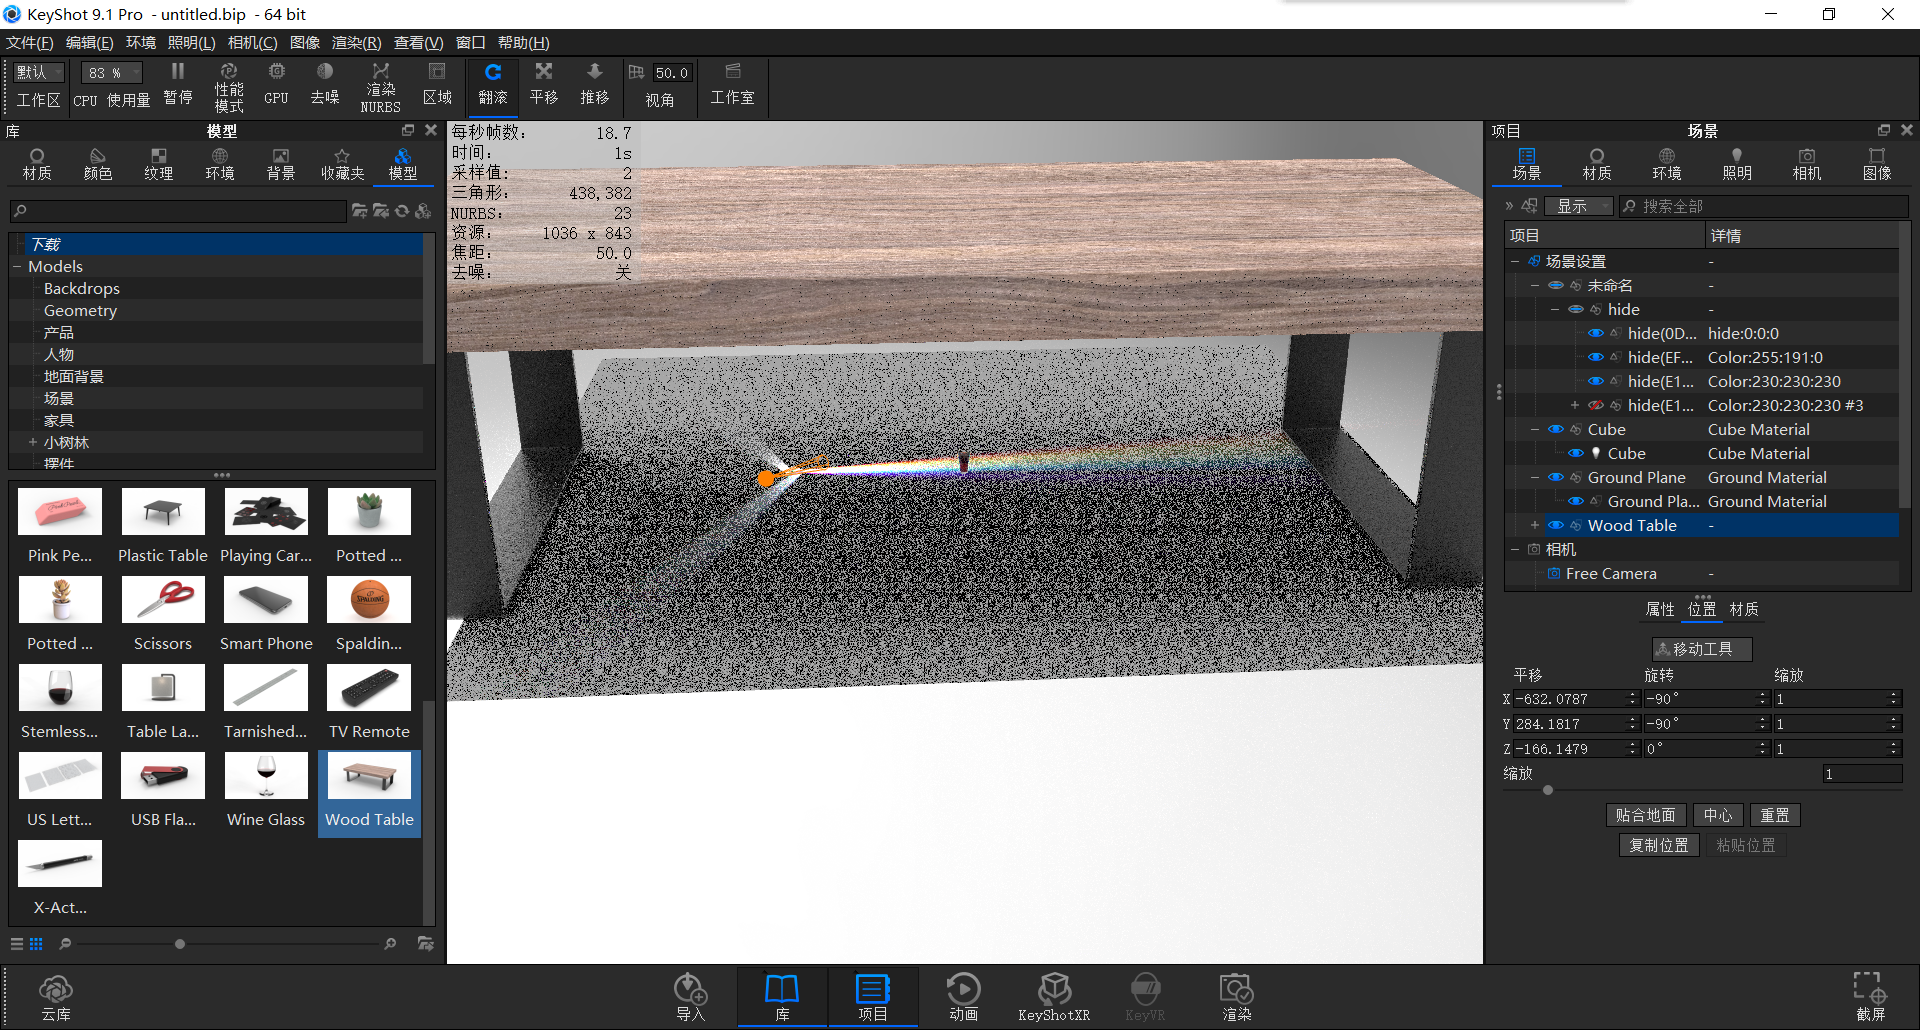
Turn off the prism and spotlight, open the model library in the library panel, and add a table (downloadable in the cloud library)
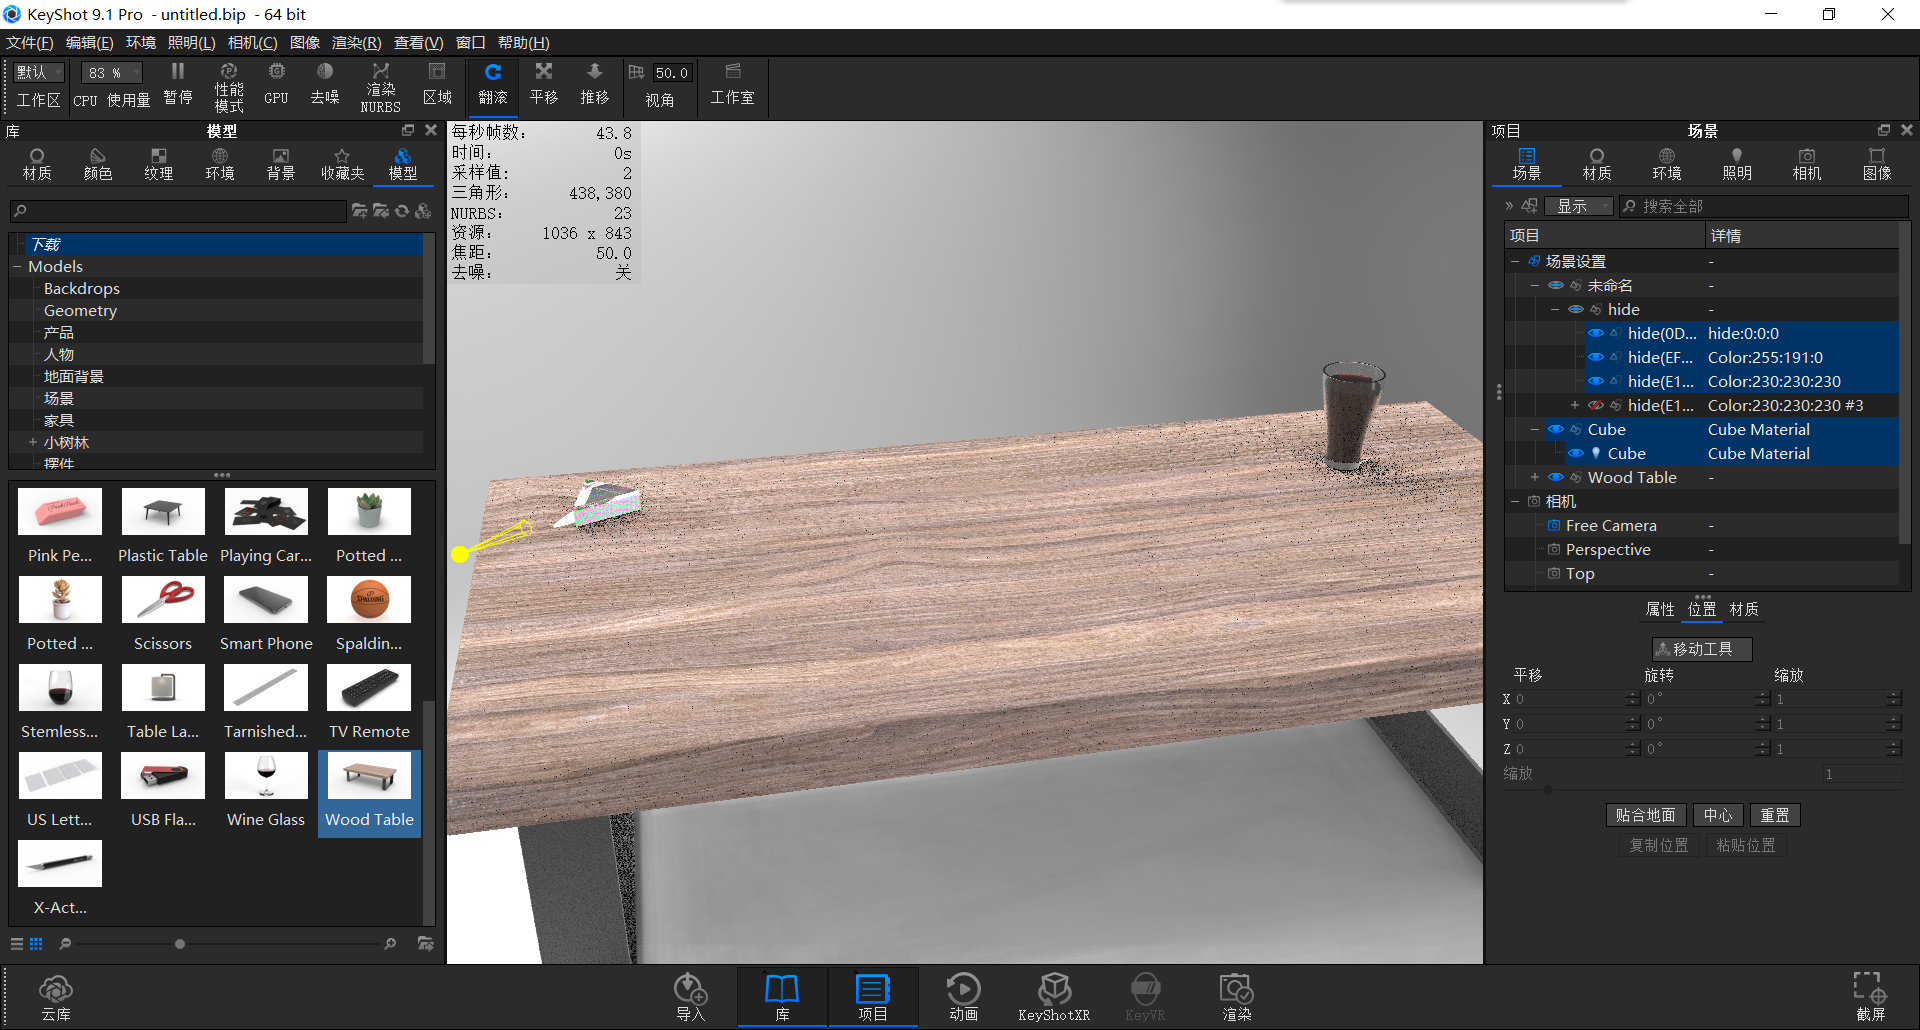
Change the size of the object to make it proportional
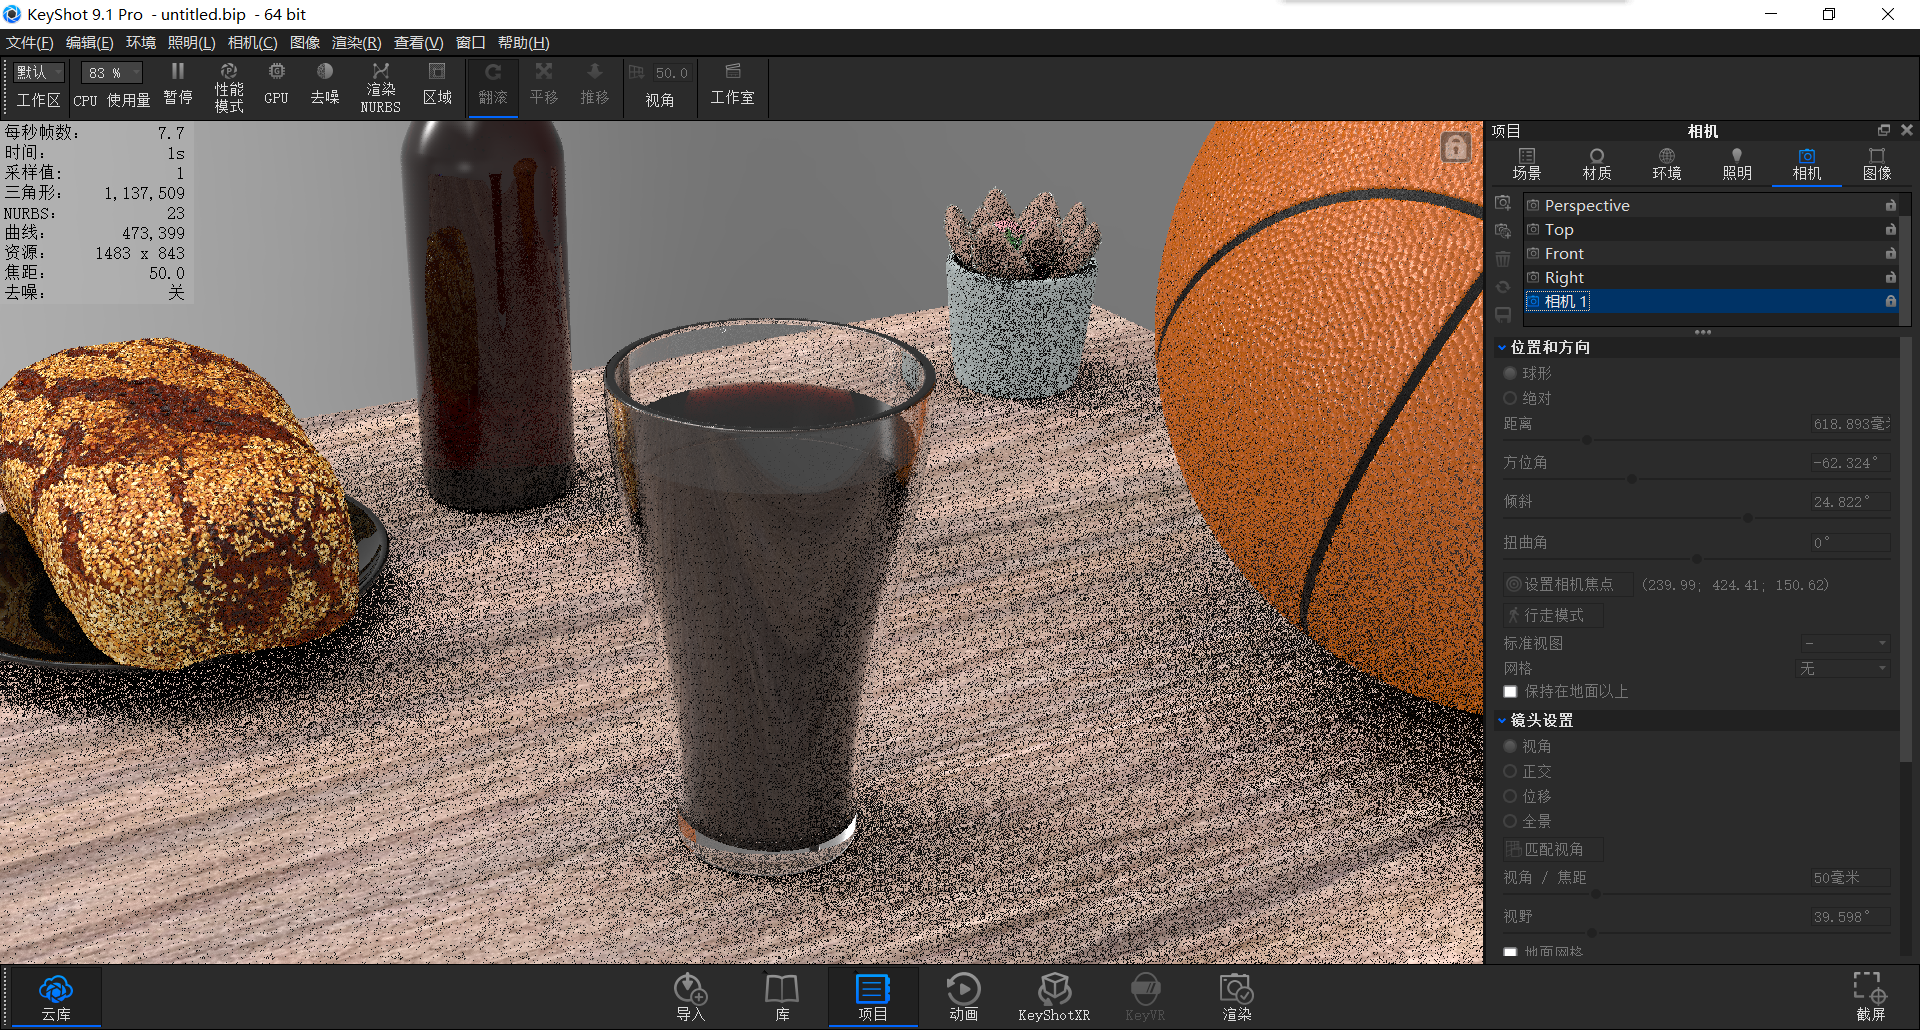
Then we continue to add models to enrich the scene.
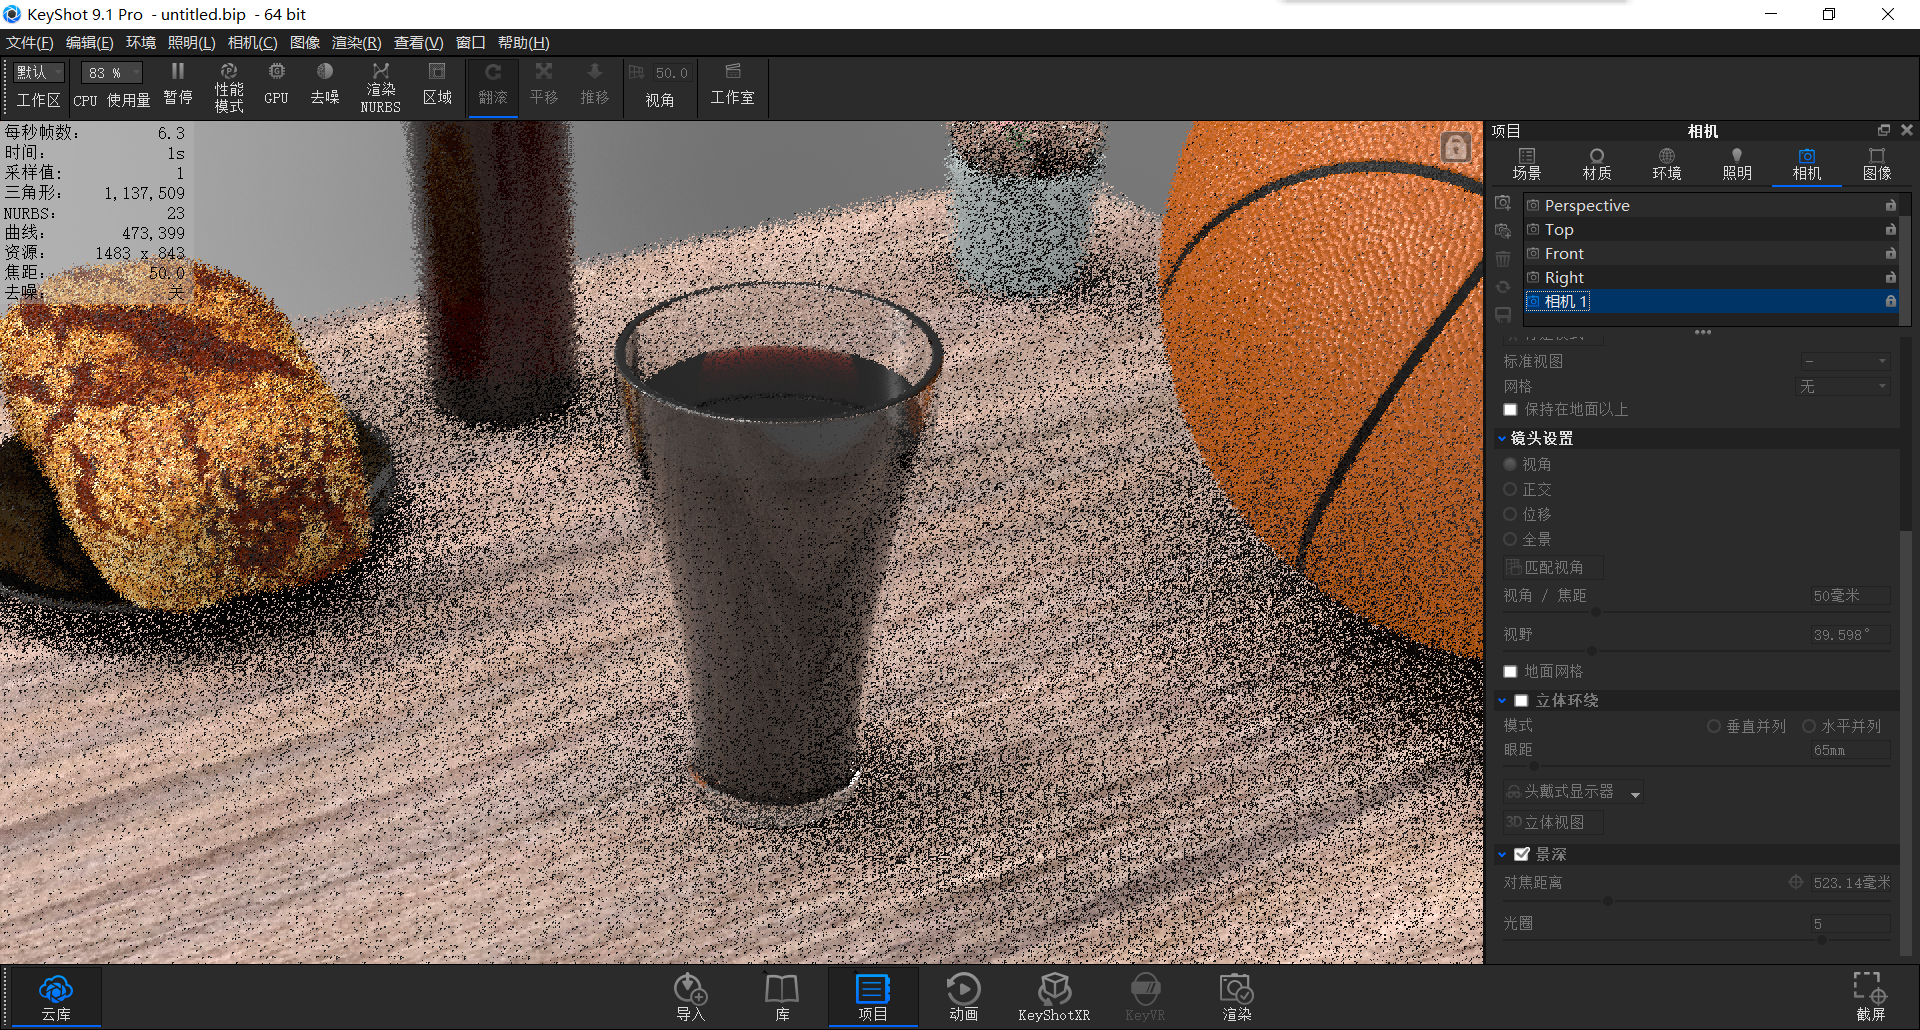
Add a camera, turn on the depth of field, adjust the aperture size and focus position (this process needs to be tried continuously), then save the camera and lock it, switch the camera to free, turn off the depth of field to reduce the computational load
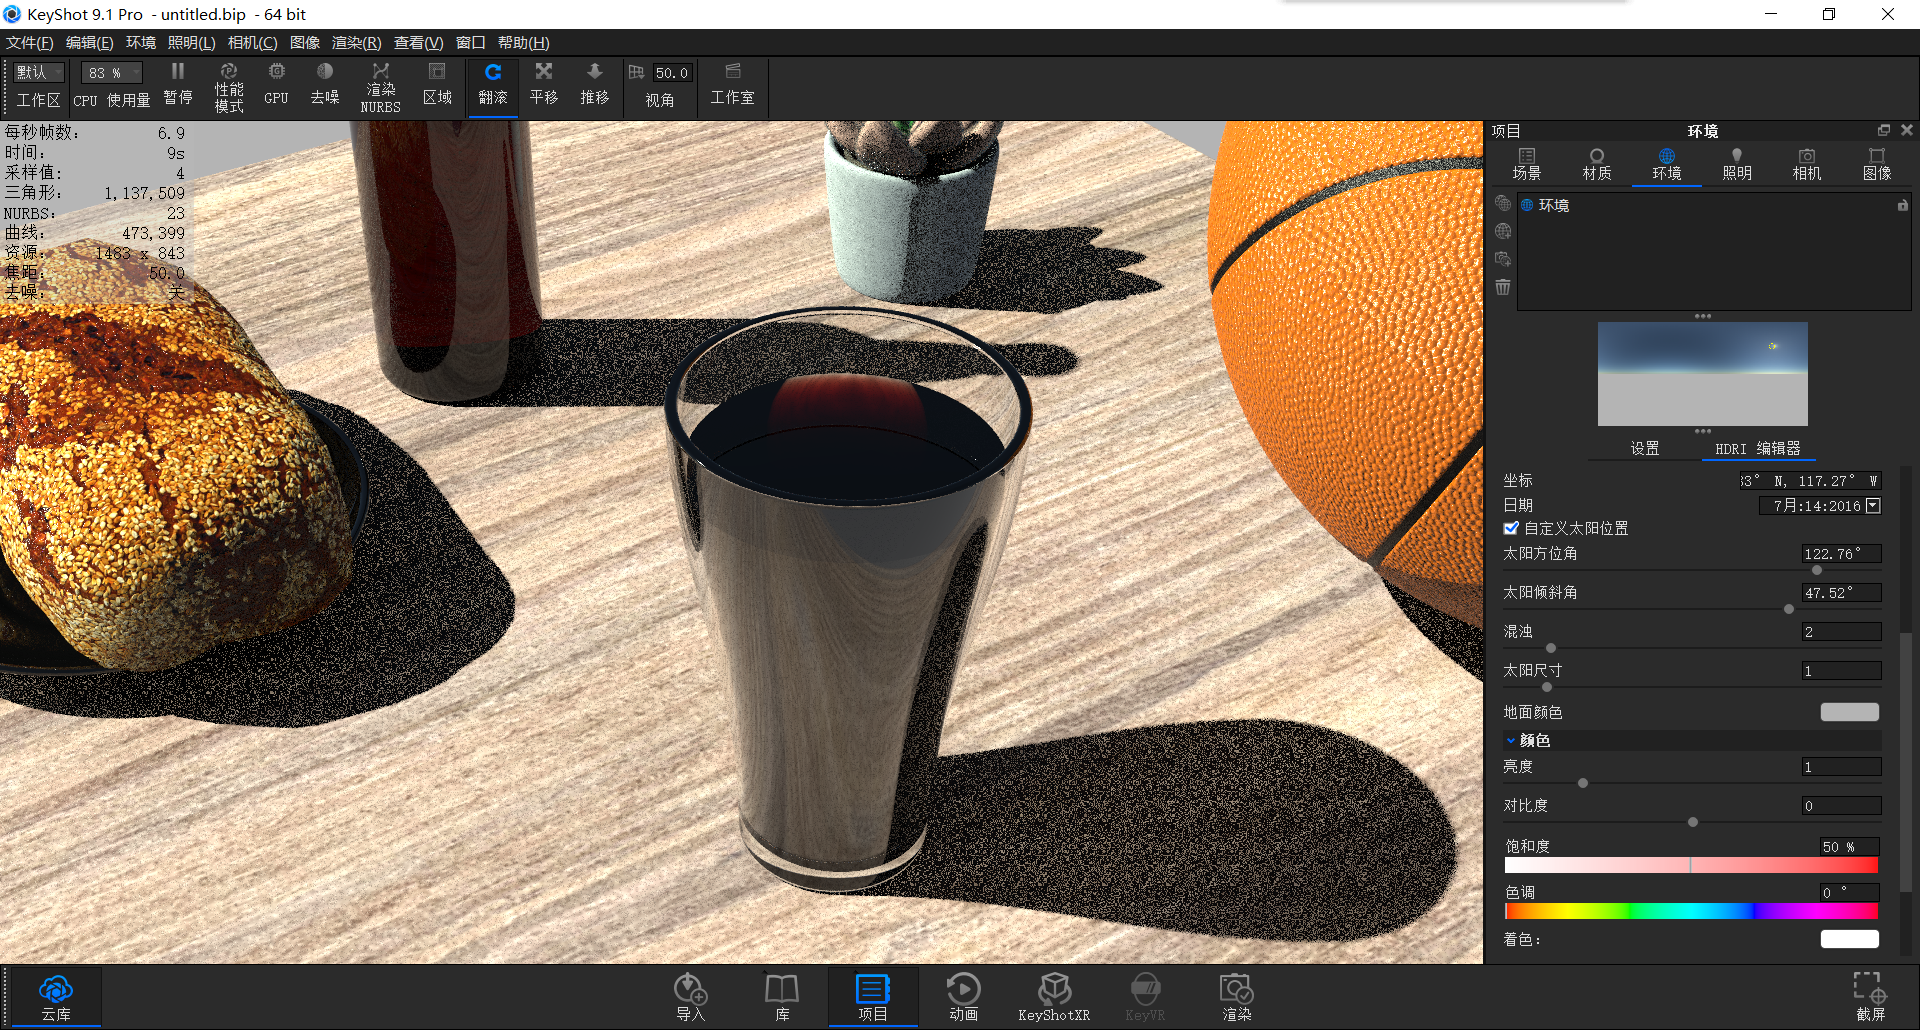
Click to customize the sun position, change the sun, and find the right angle.
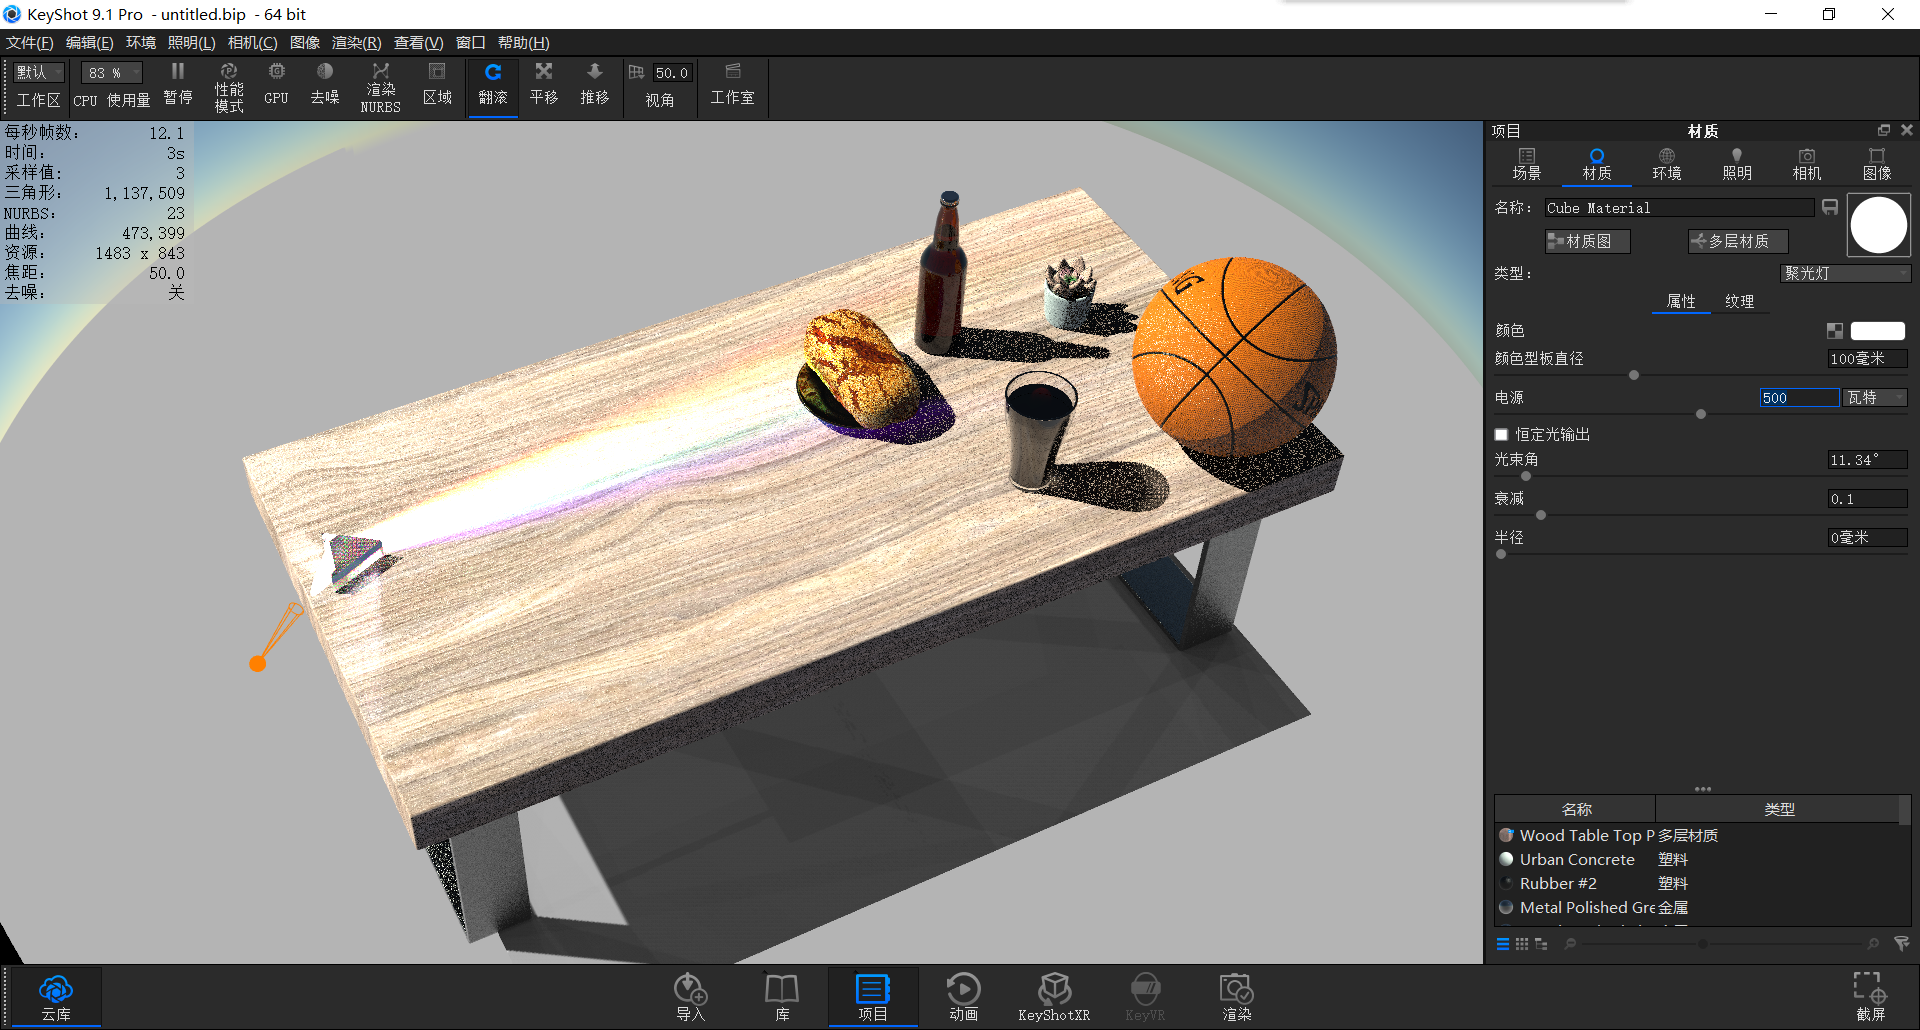
Turn on the prism and spotlight
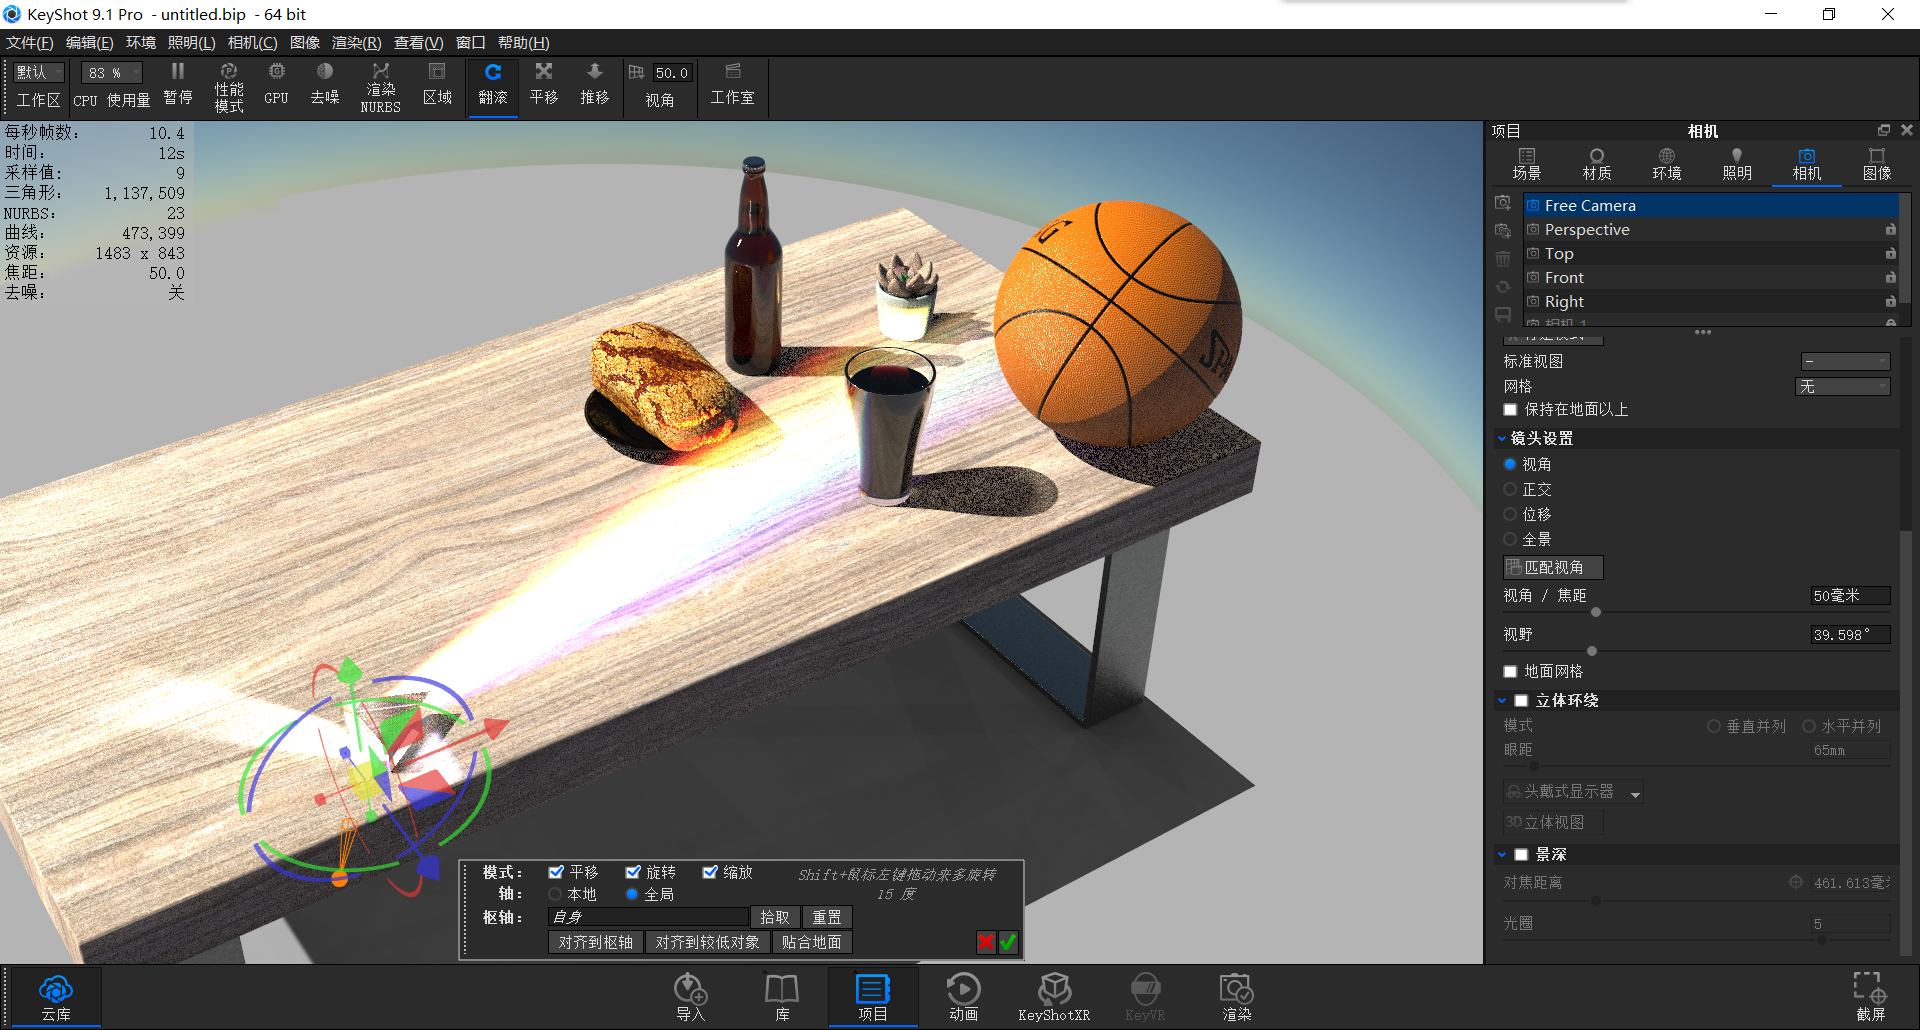
Adjust position to appropriate angle
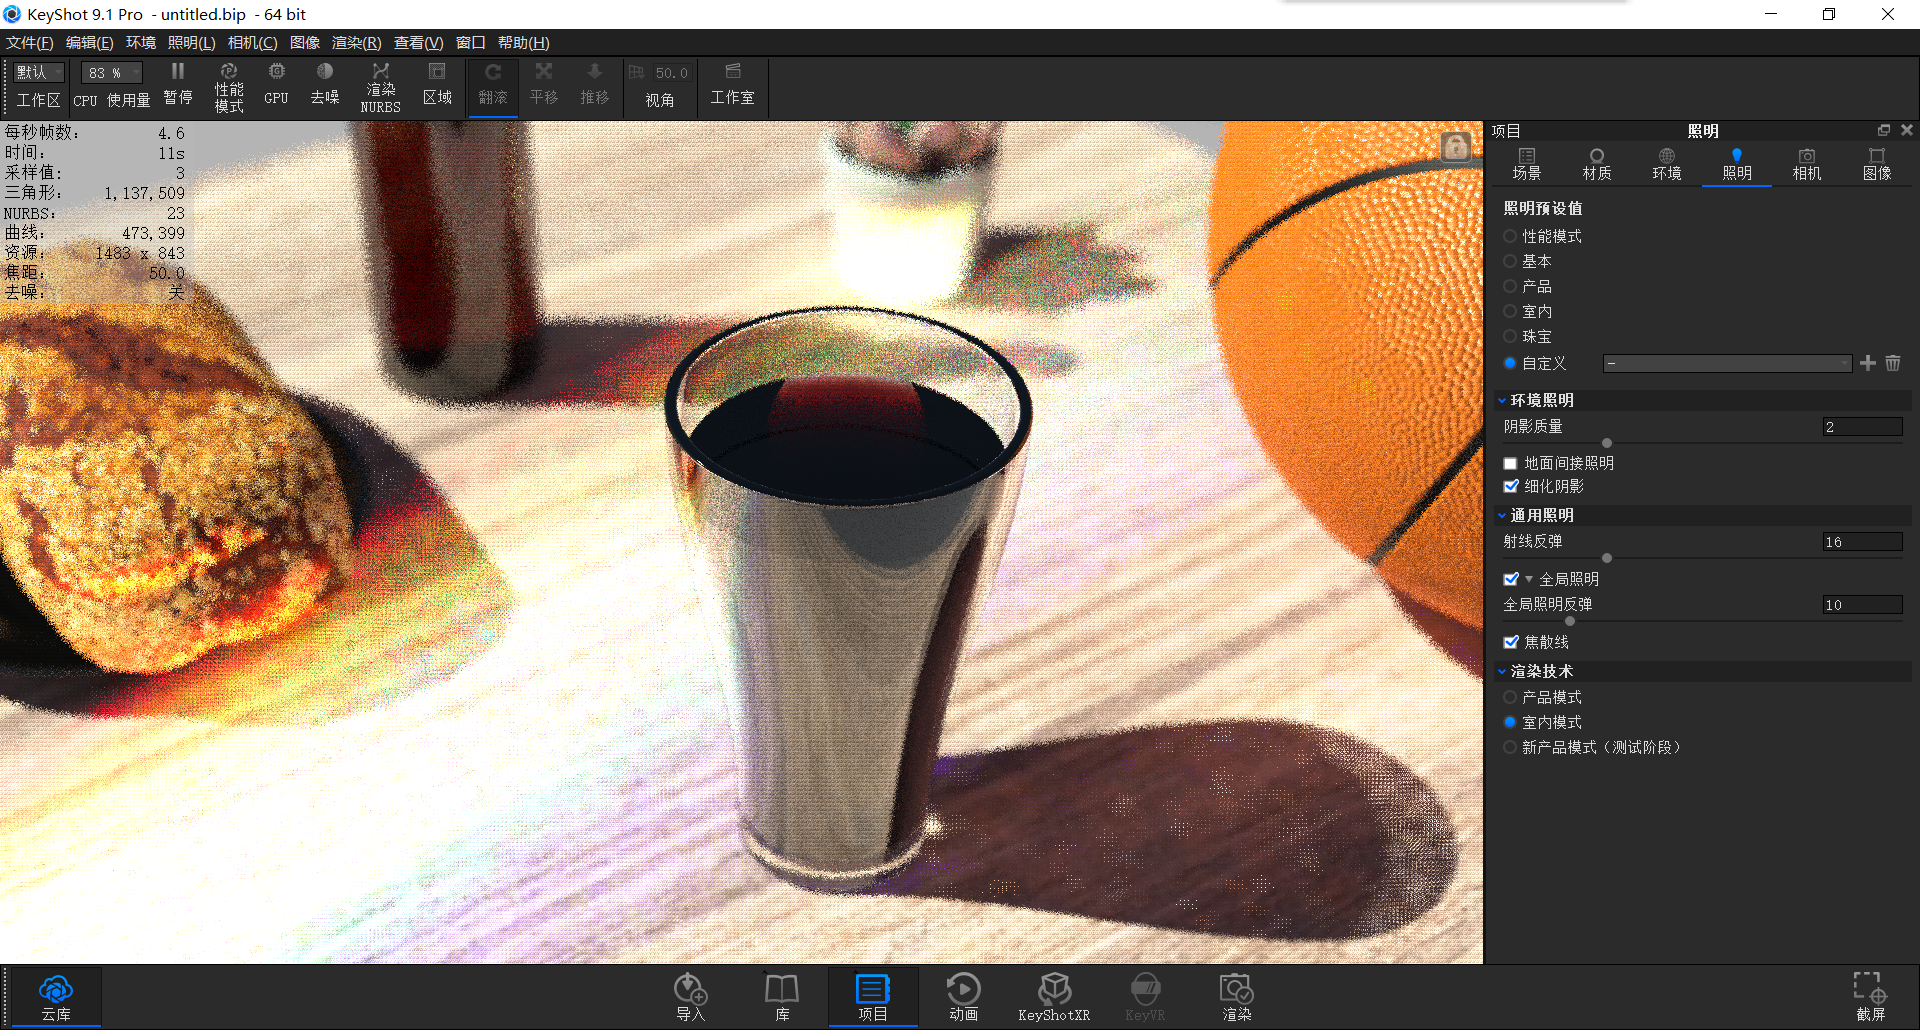
Open the lighting panel, click on the room, and then turn on the caustic line (after turning on the caustic line, it will become a custom mode)
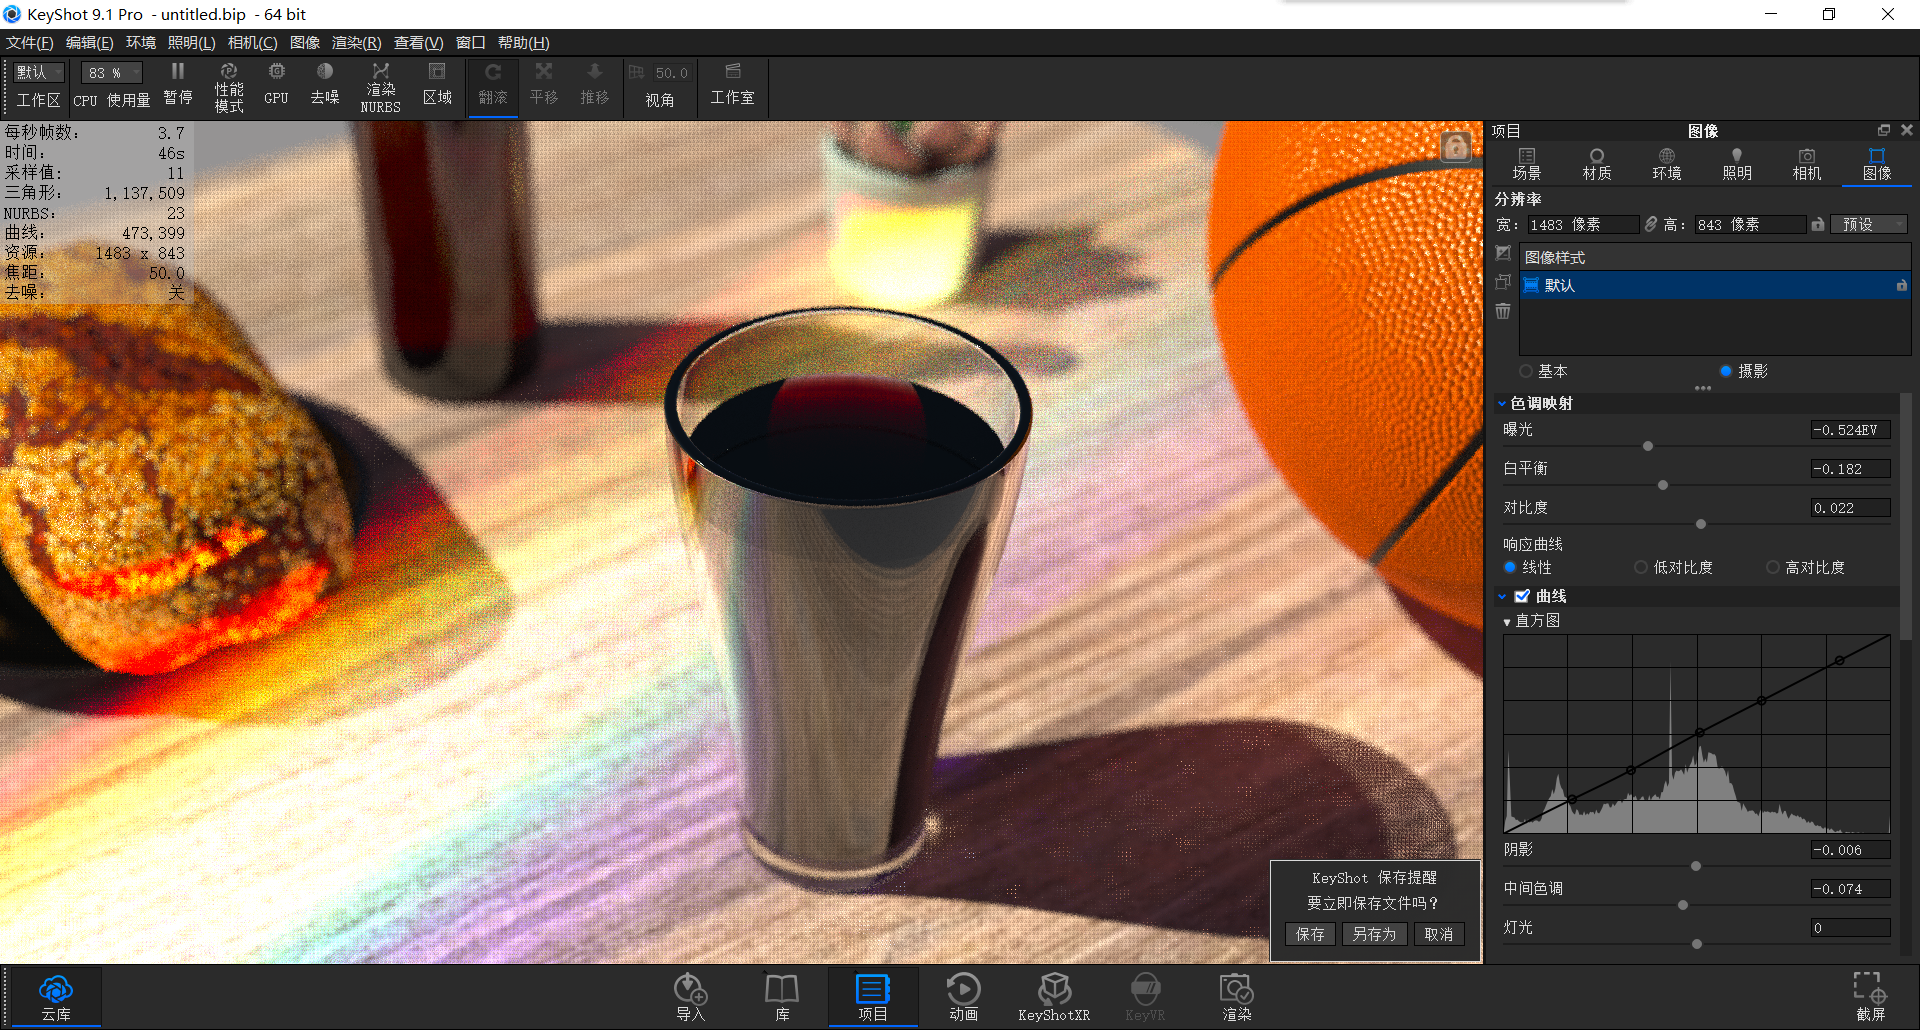
Open photography in the image, change the response curve to linear, reduce exposure, pull the white balance to negative, enhance warmth, change saturation and contrast
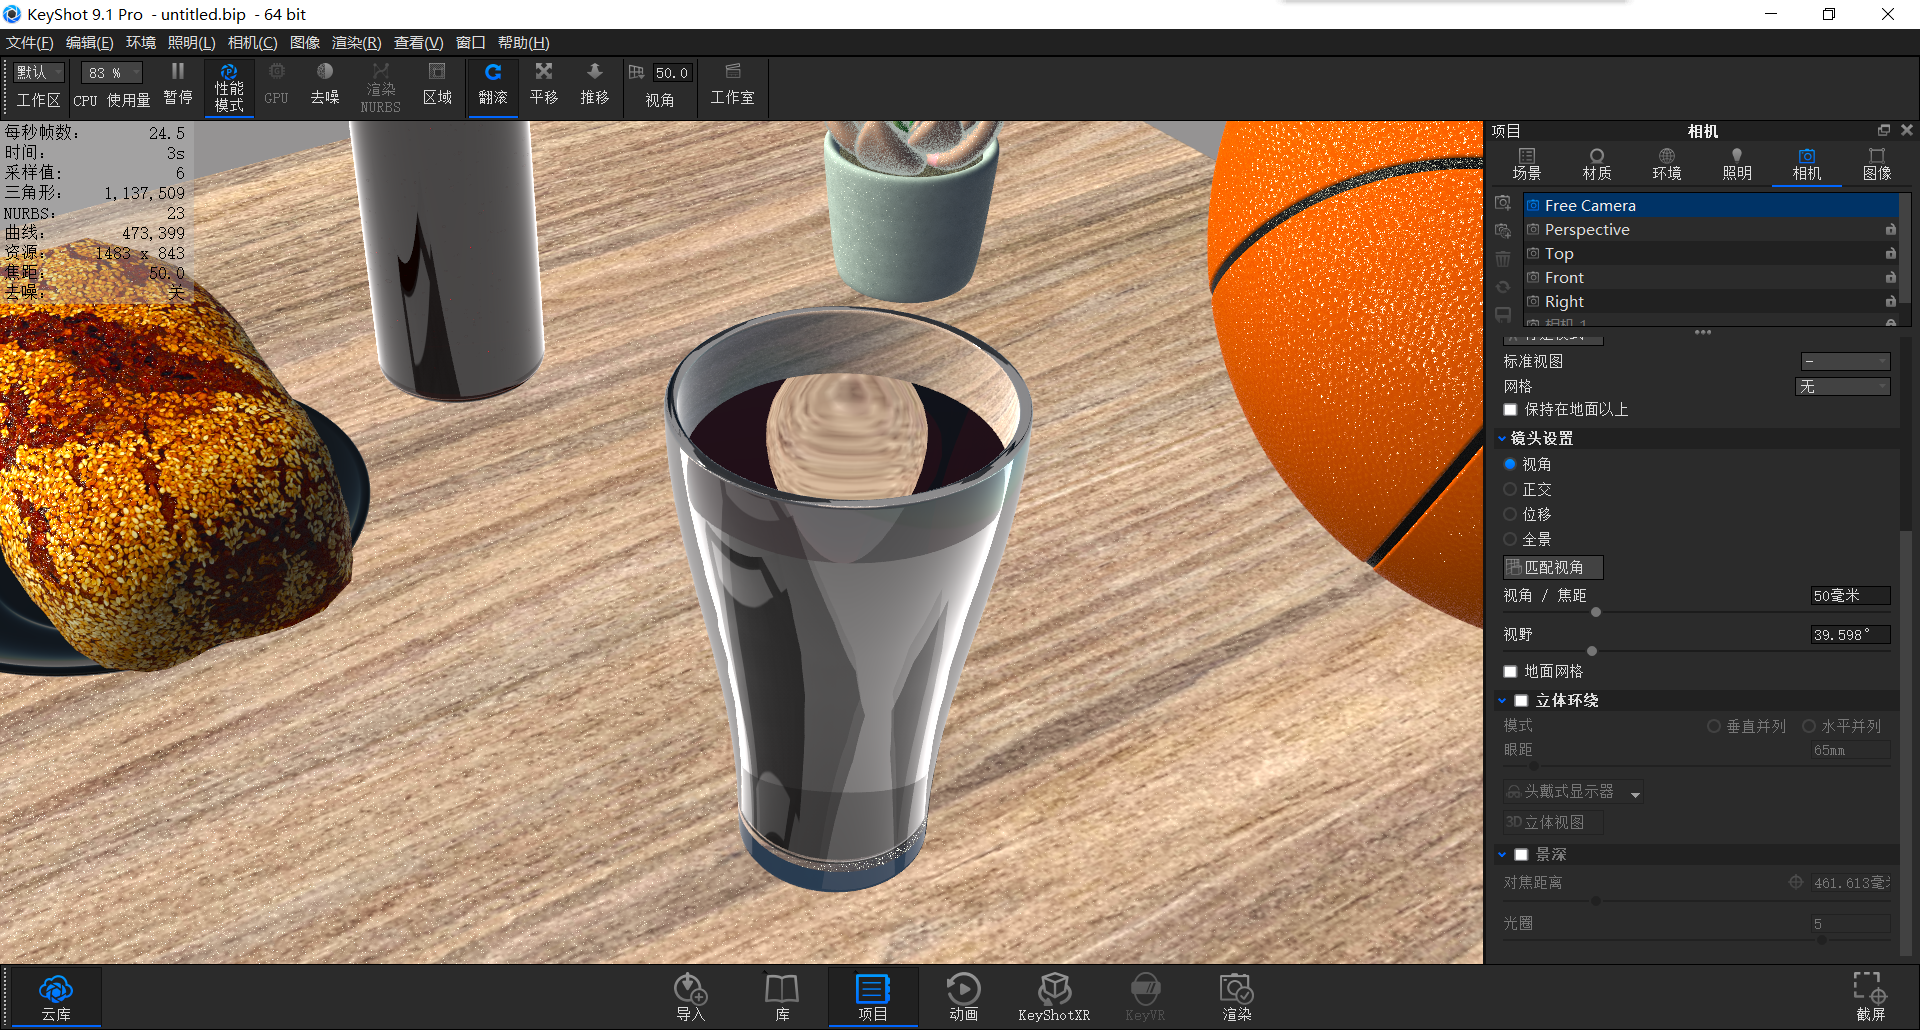
Click on the performance mode in the upper left corner.
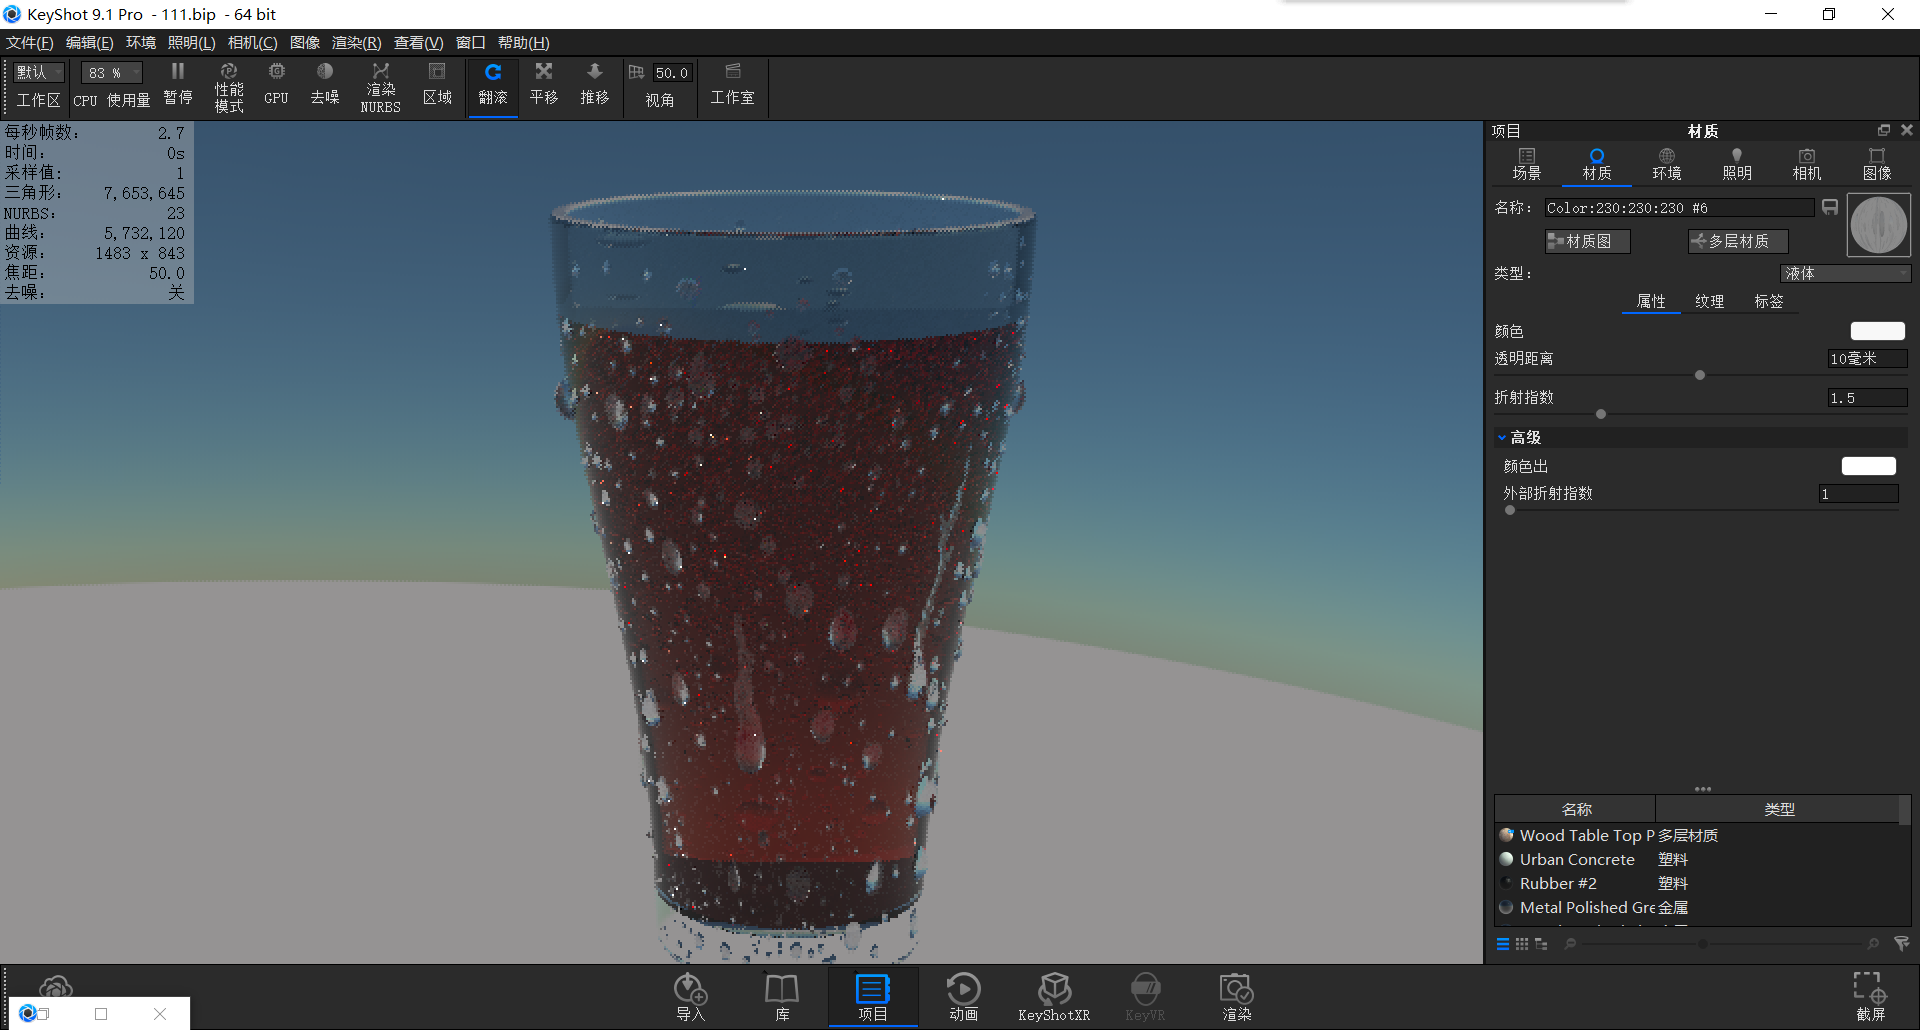
Hide the rest of the components, reduce the computational pressure, and click on the replacement and refresh in turn (note that the value size is fine-tuned again, because the change occurred when the model was just added)
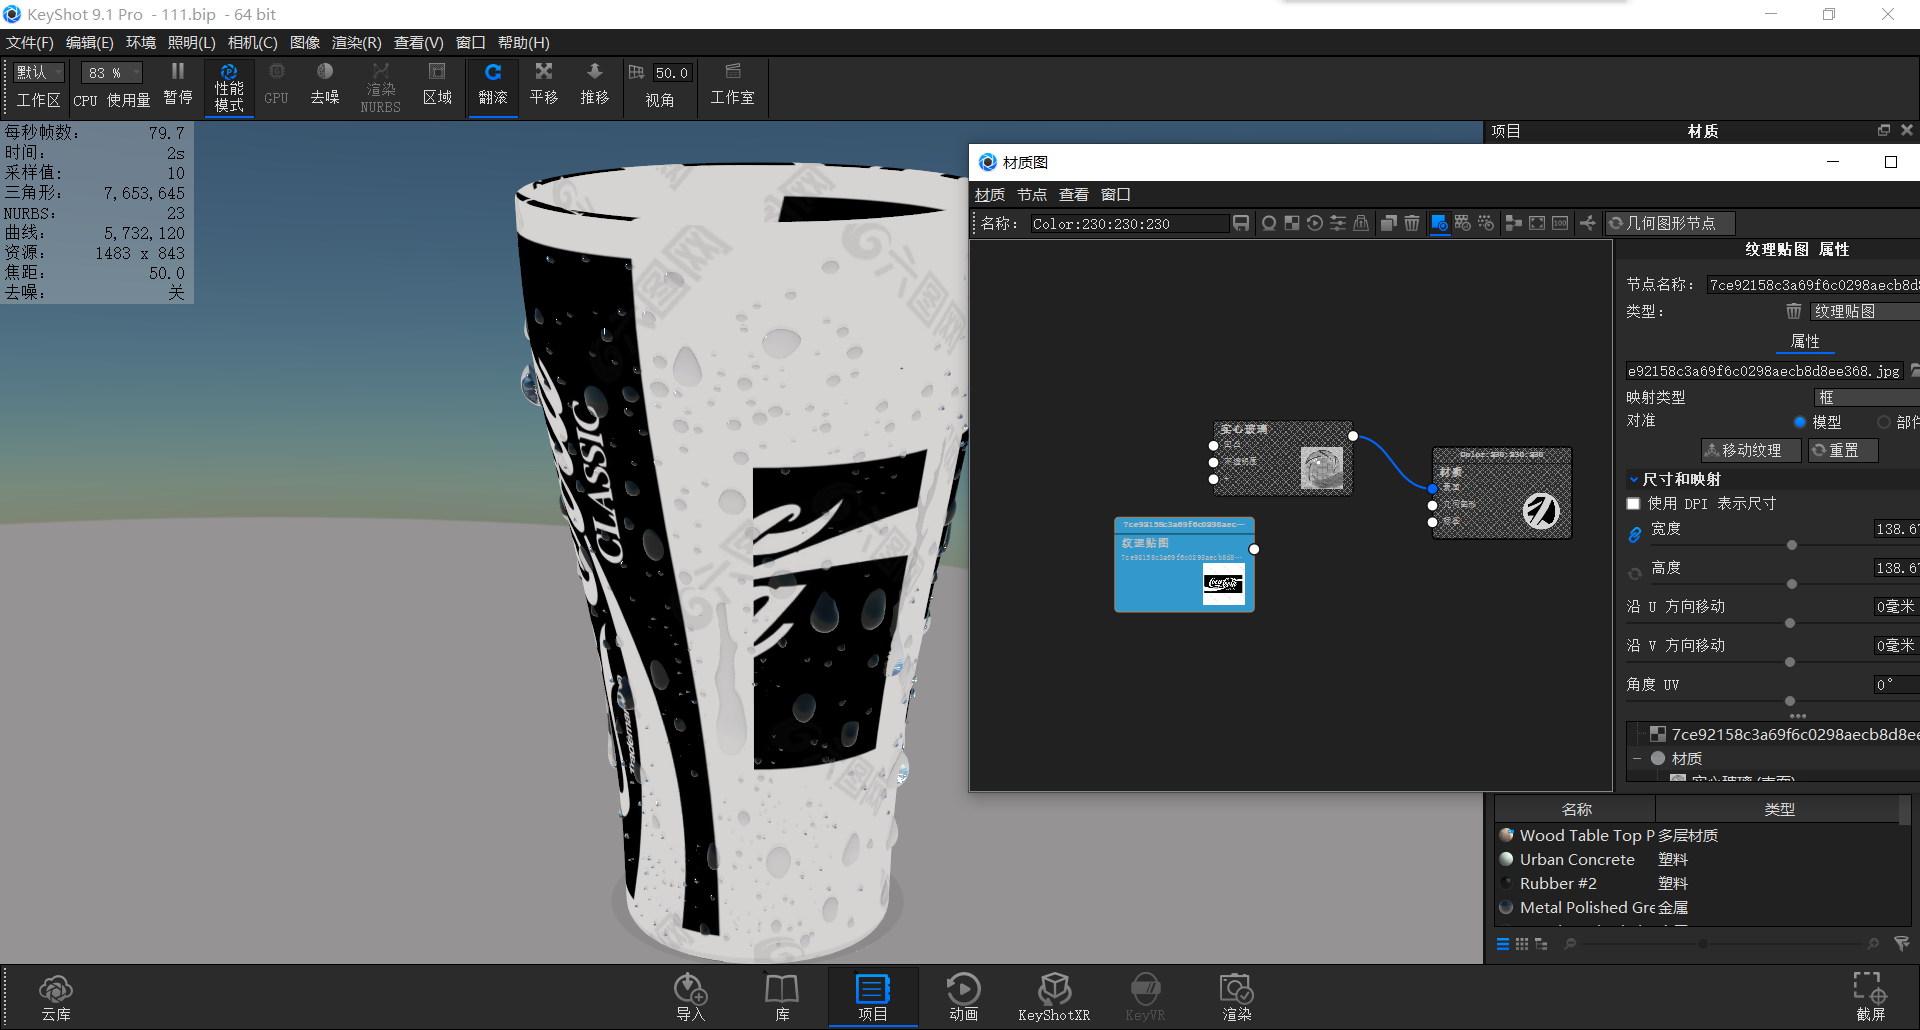
I forgot one thing, that is, to put on the label, we click on the cup, open the material map, add the label map
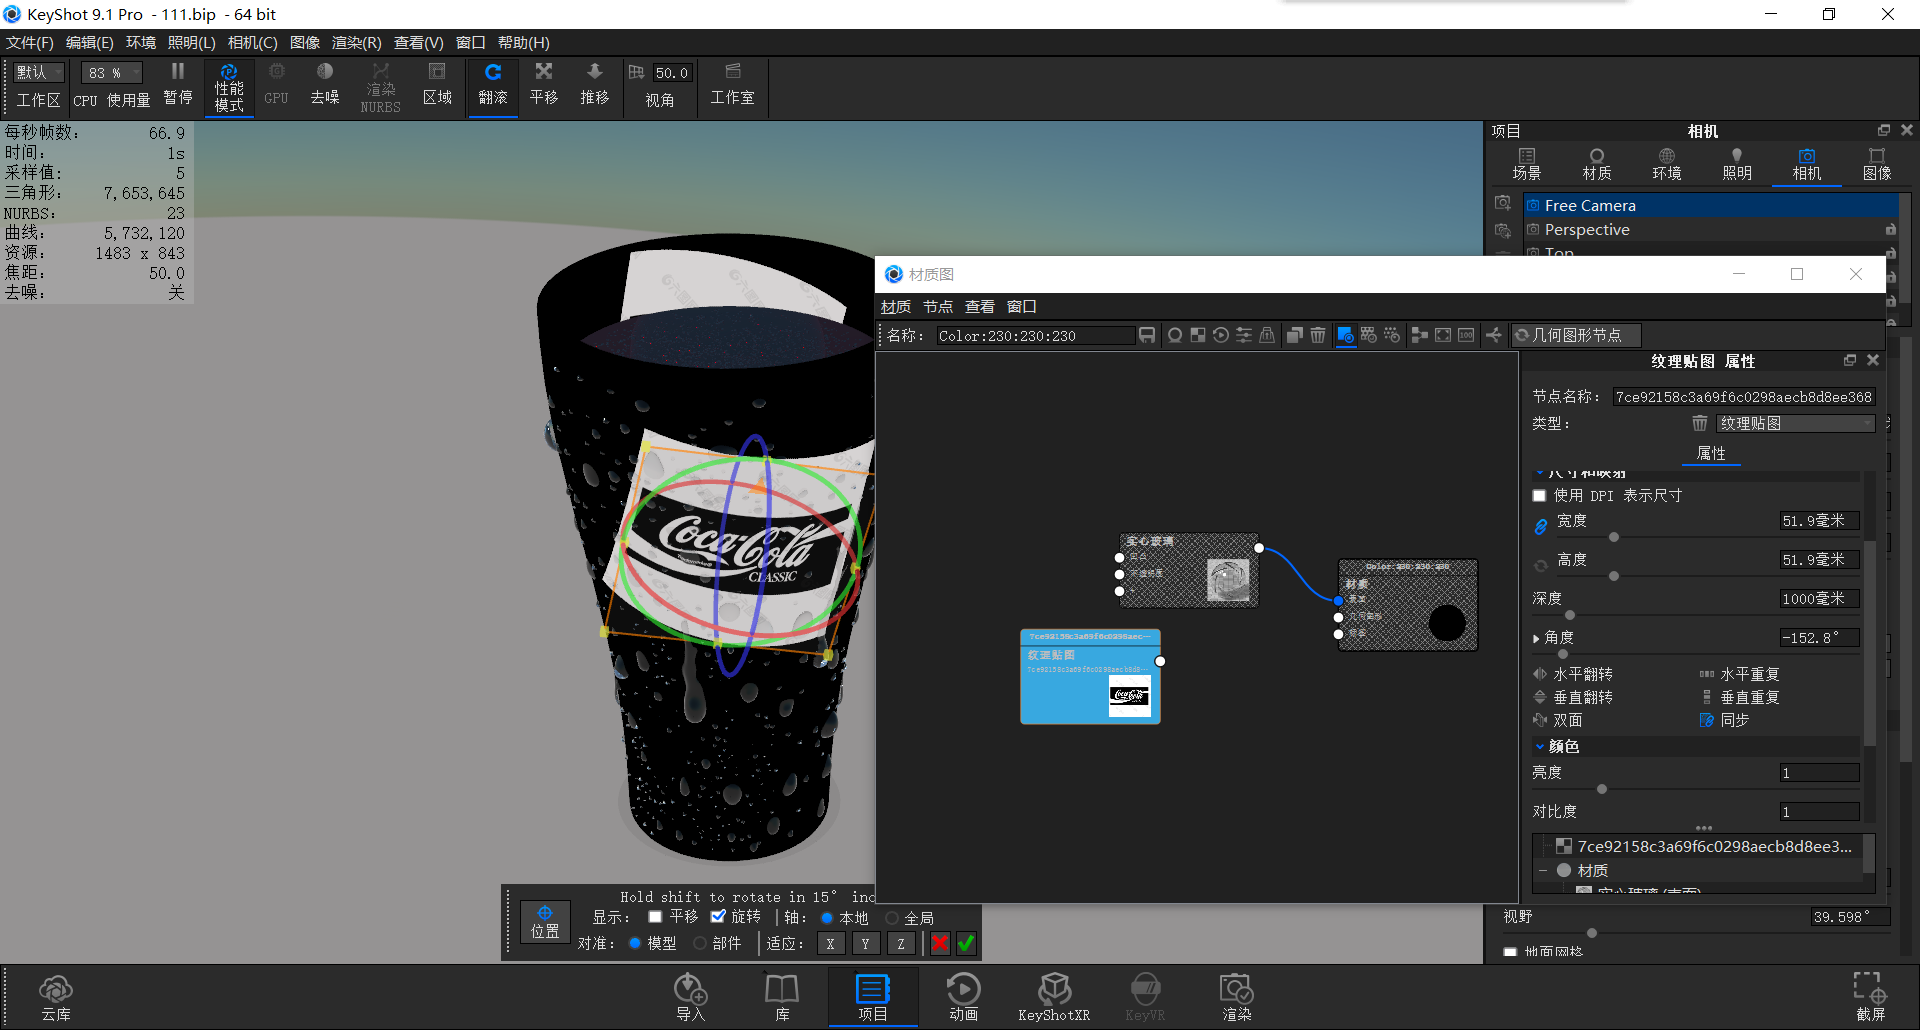
Press the C- piece preview, and change the mapping method to flat, resize, close double-sided, repeat and other buttons. At this time, we found that there is also white behind the cup.
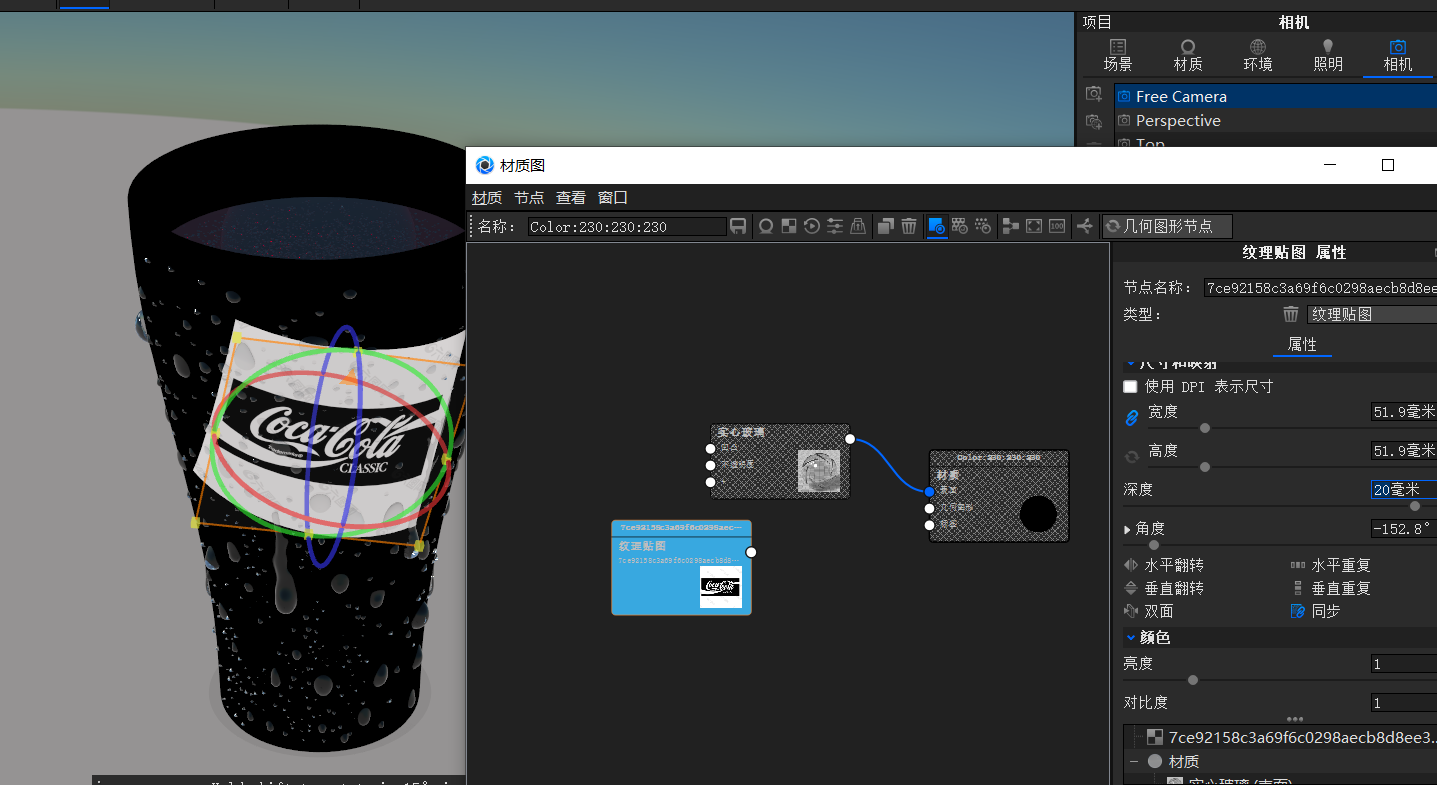
At this time, when we lower the depth, we will find that there is no white behind (the depth can control the distance that the plane map extends backward, please feel for yourself)
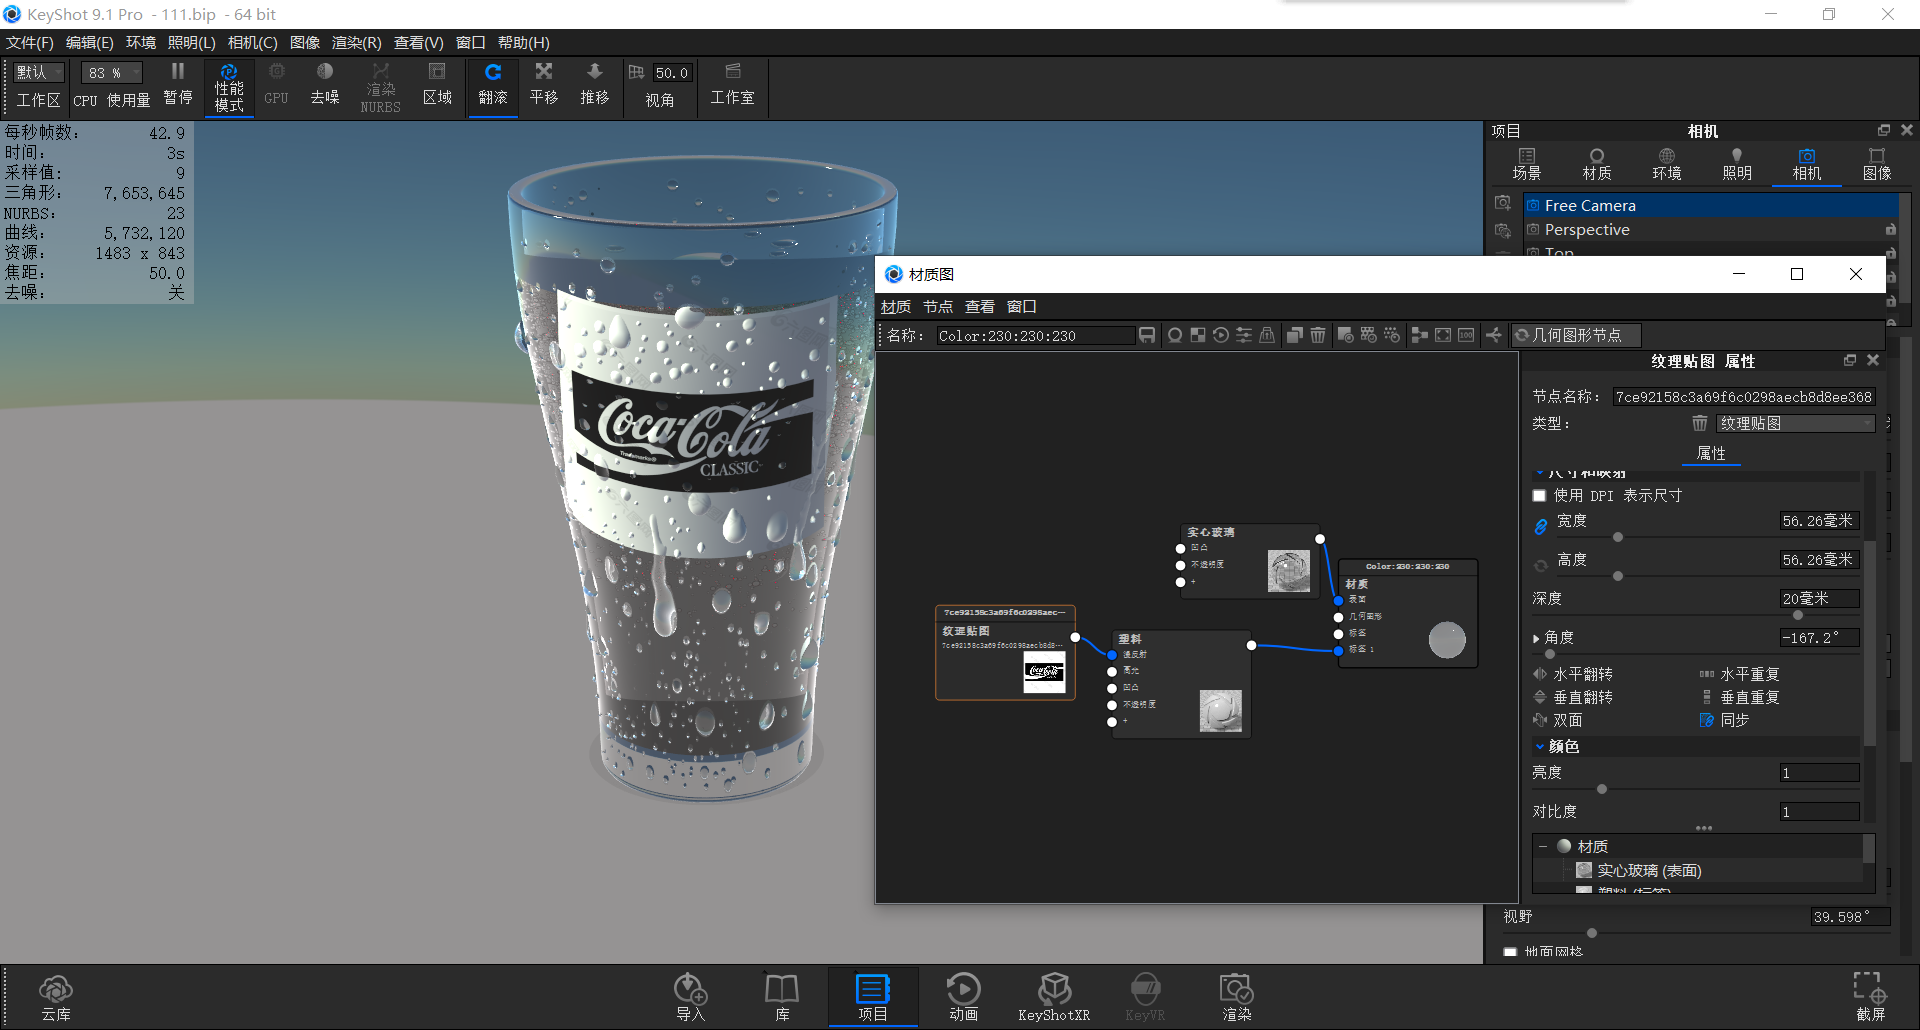
Add plastic material and link to the label, but we found that there is still a circle of white on the outside brain of the coke label.
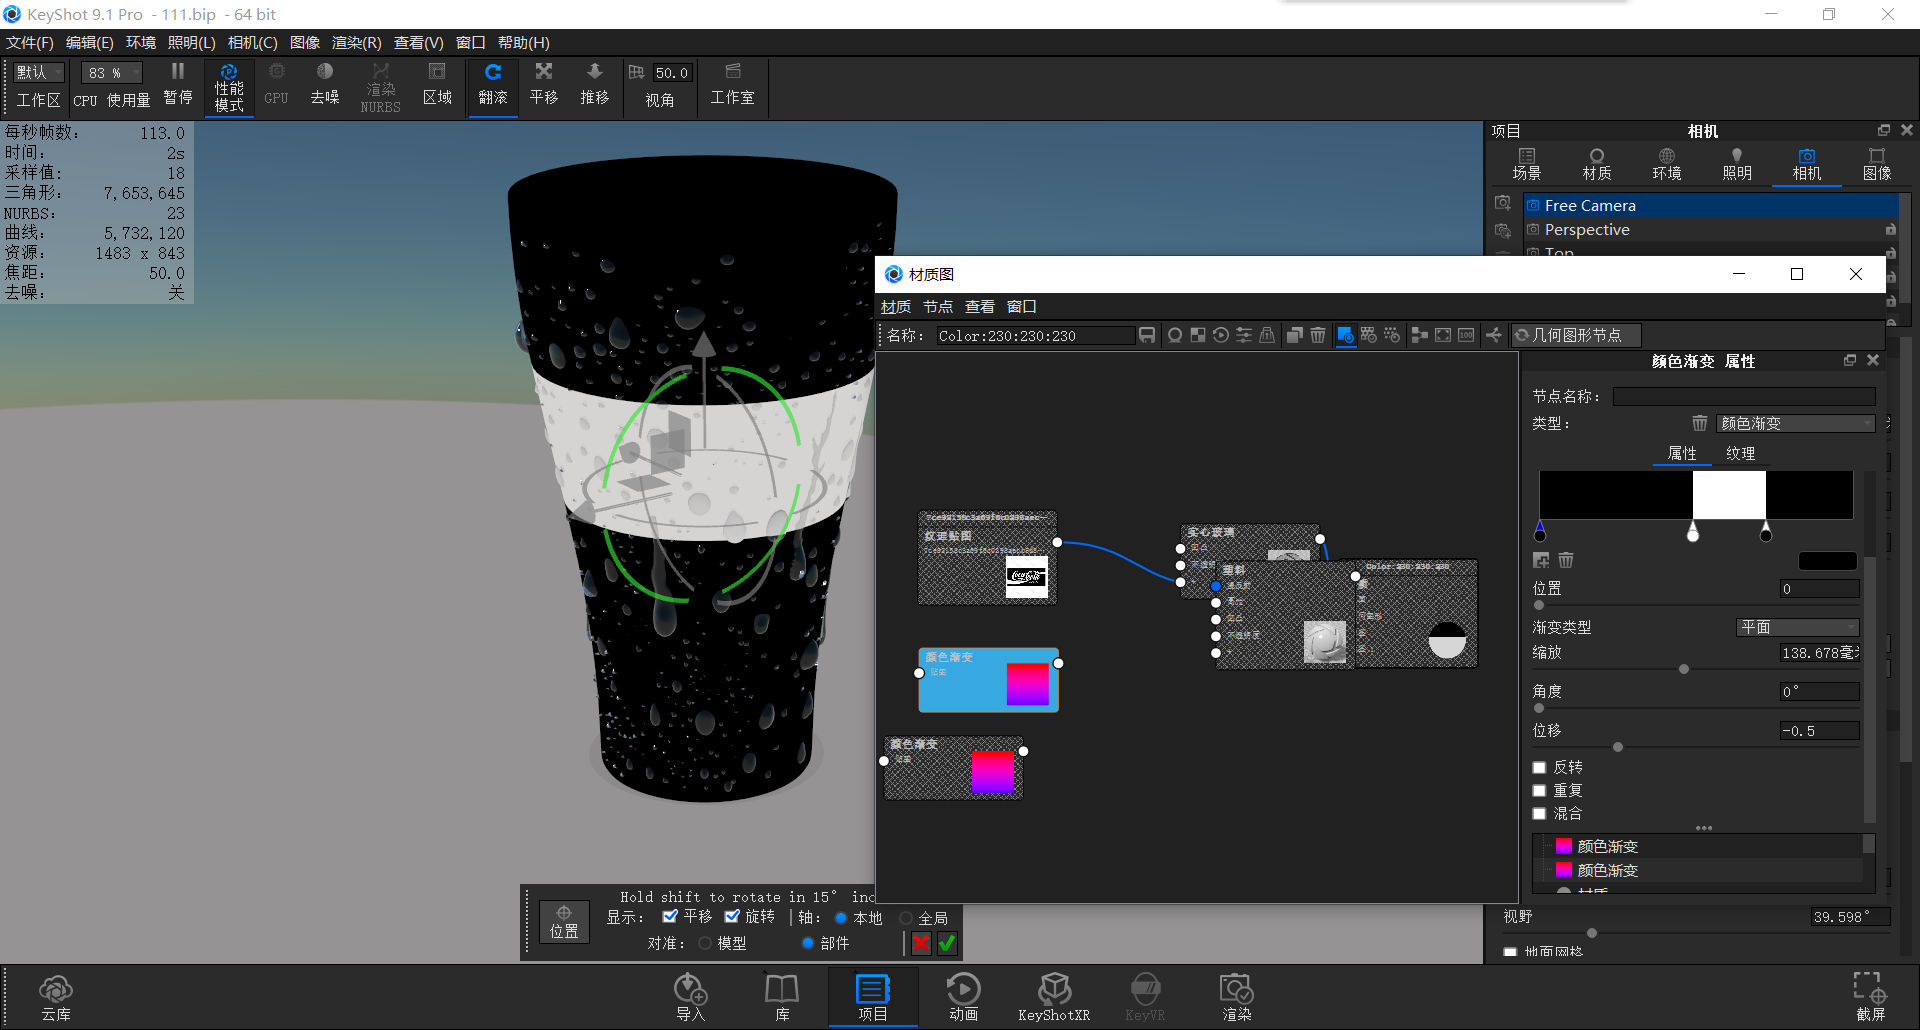
At this time, we manually make the mask and add two color gradients (the principle is to use opacity to cover the outer ring white)
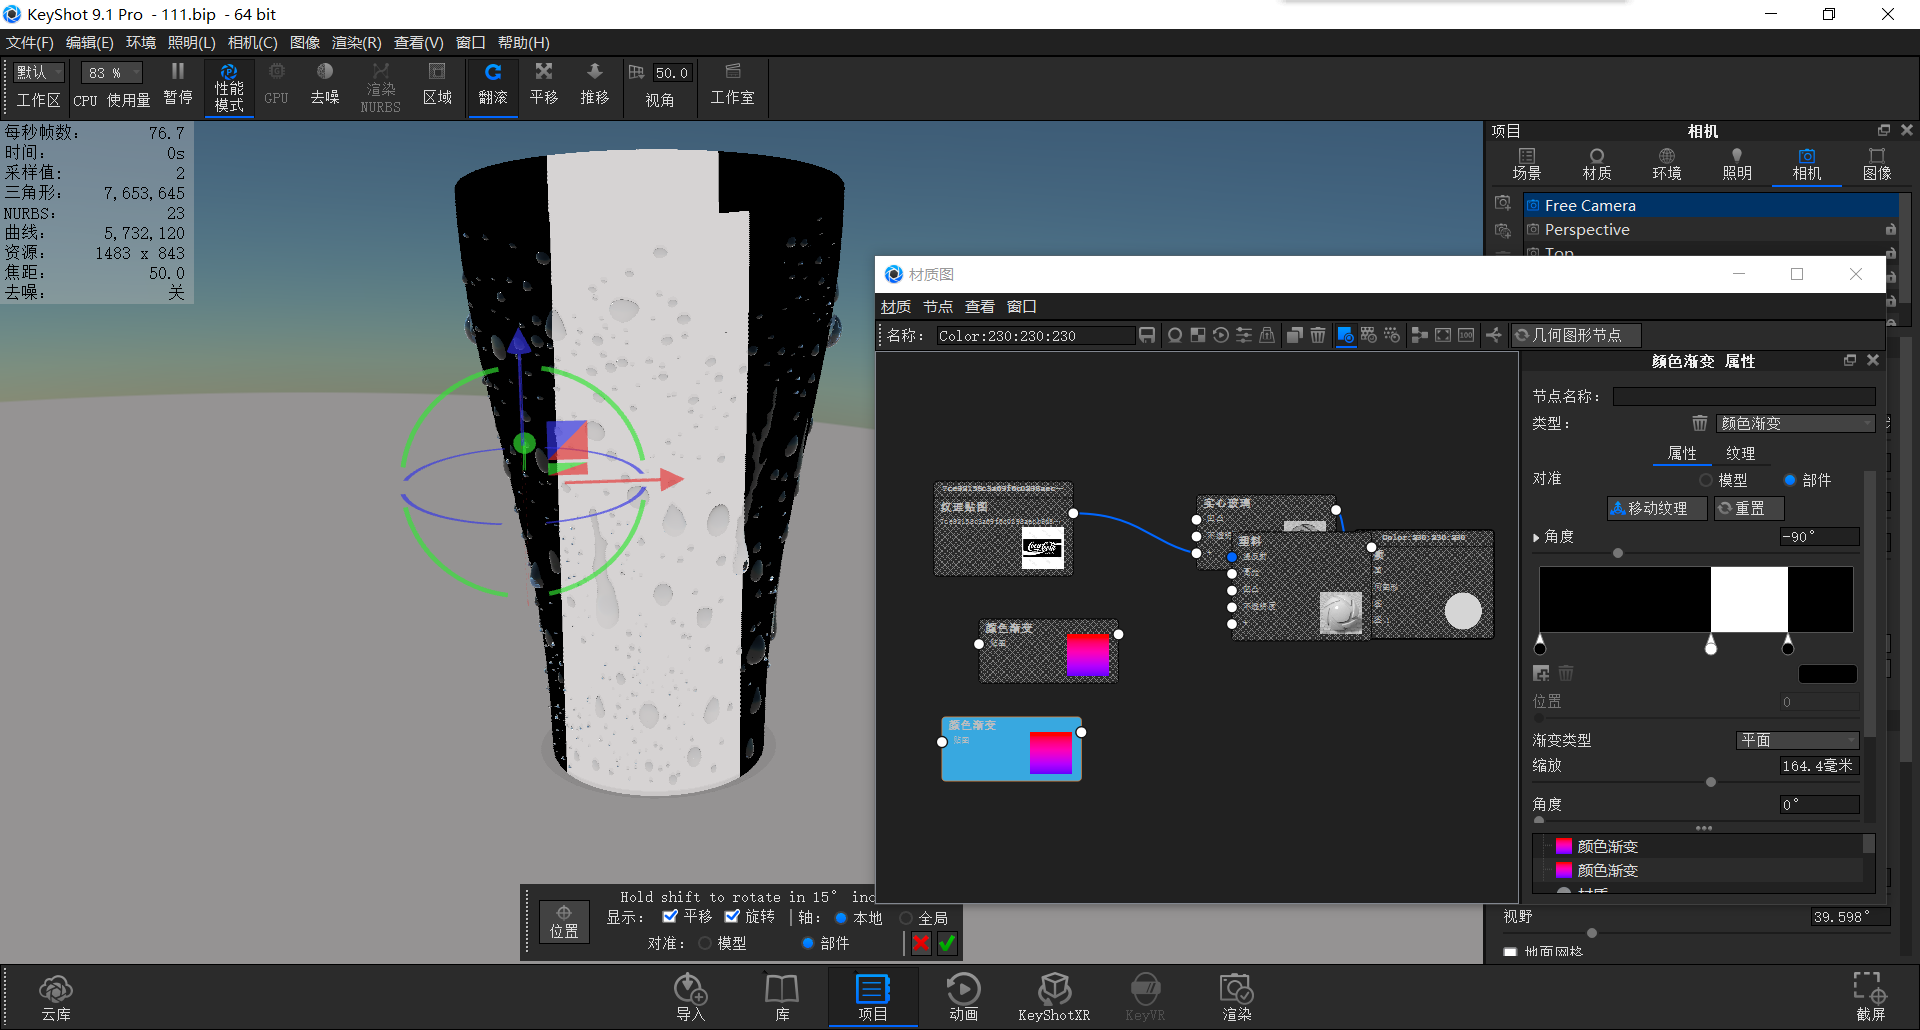
Adjust as shown in the figure (note that the alignment mode is changed to the component, and the red axis points to the gradient direction)
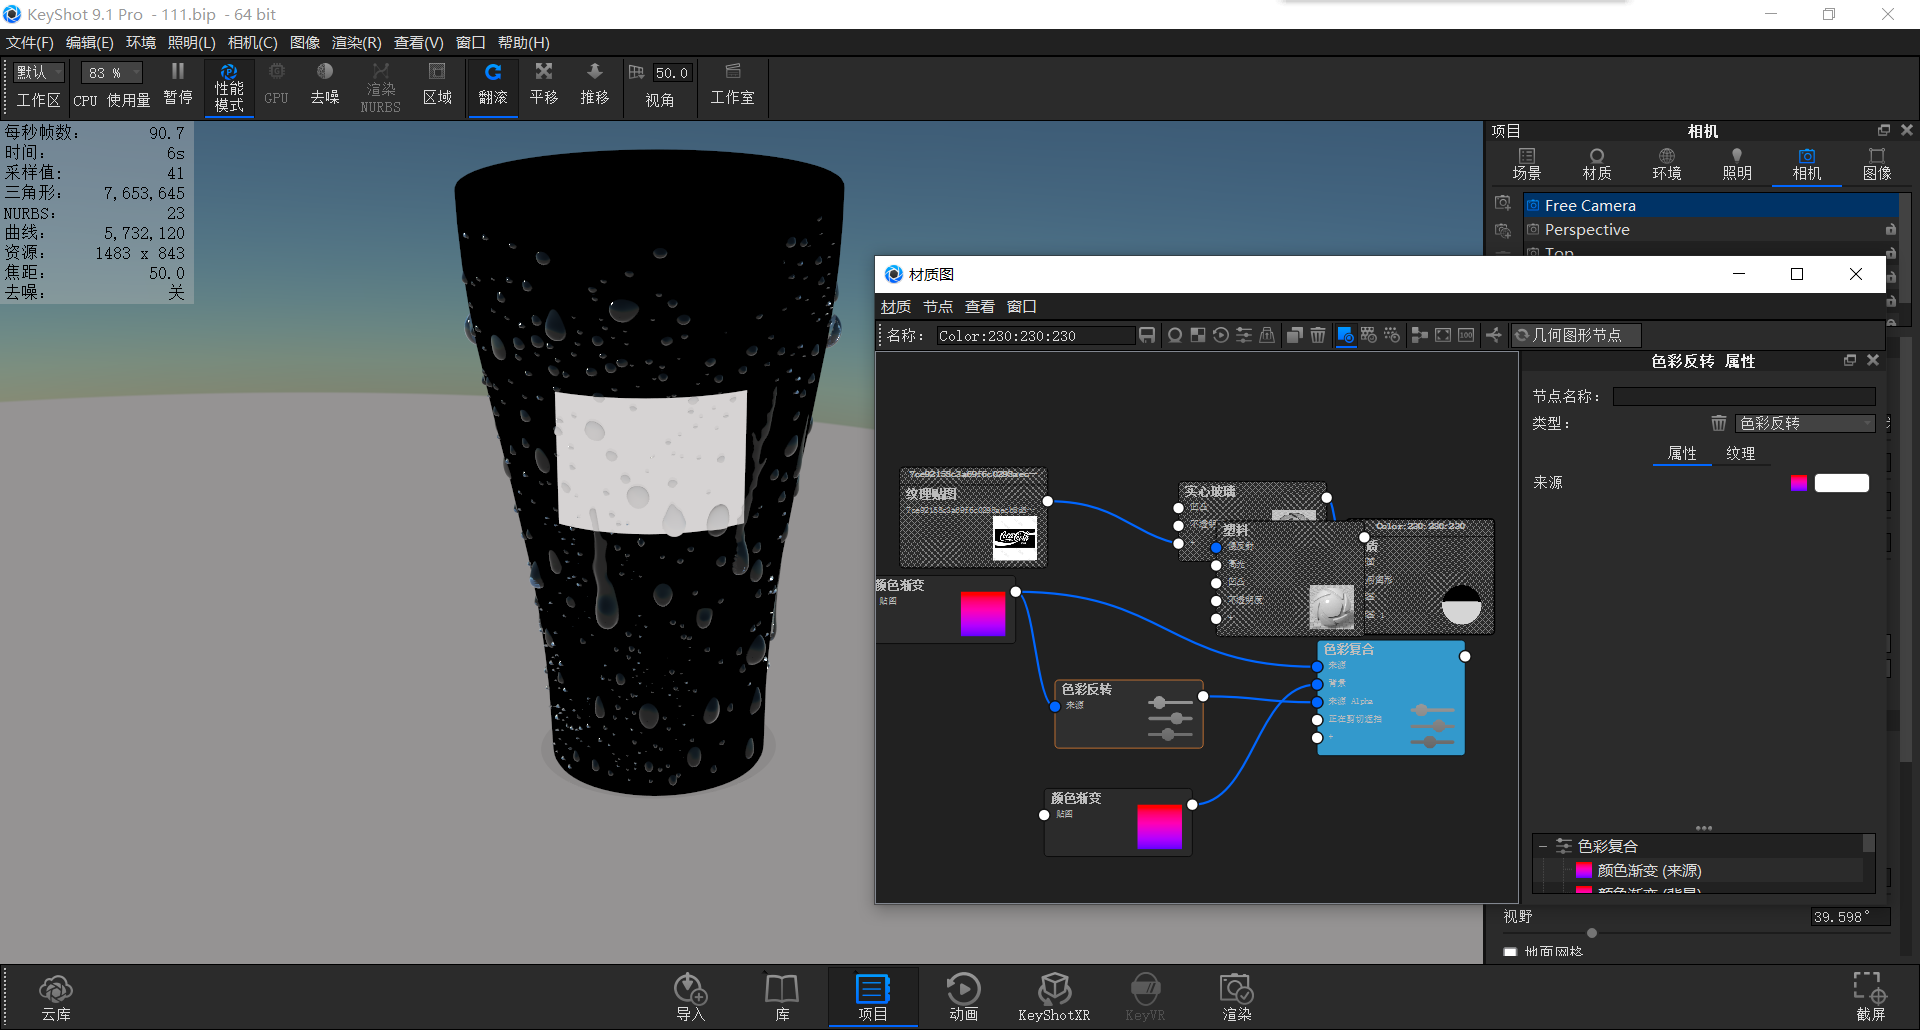
Then we add color composites and link them in turn to achieve the effect in the picture (the source is the foreground, the source alph is to control the transparency of the source, and the specific content can be seen in the first tutorial on the homepage: the witness of the centrist)
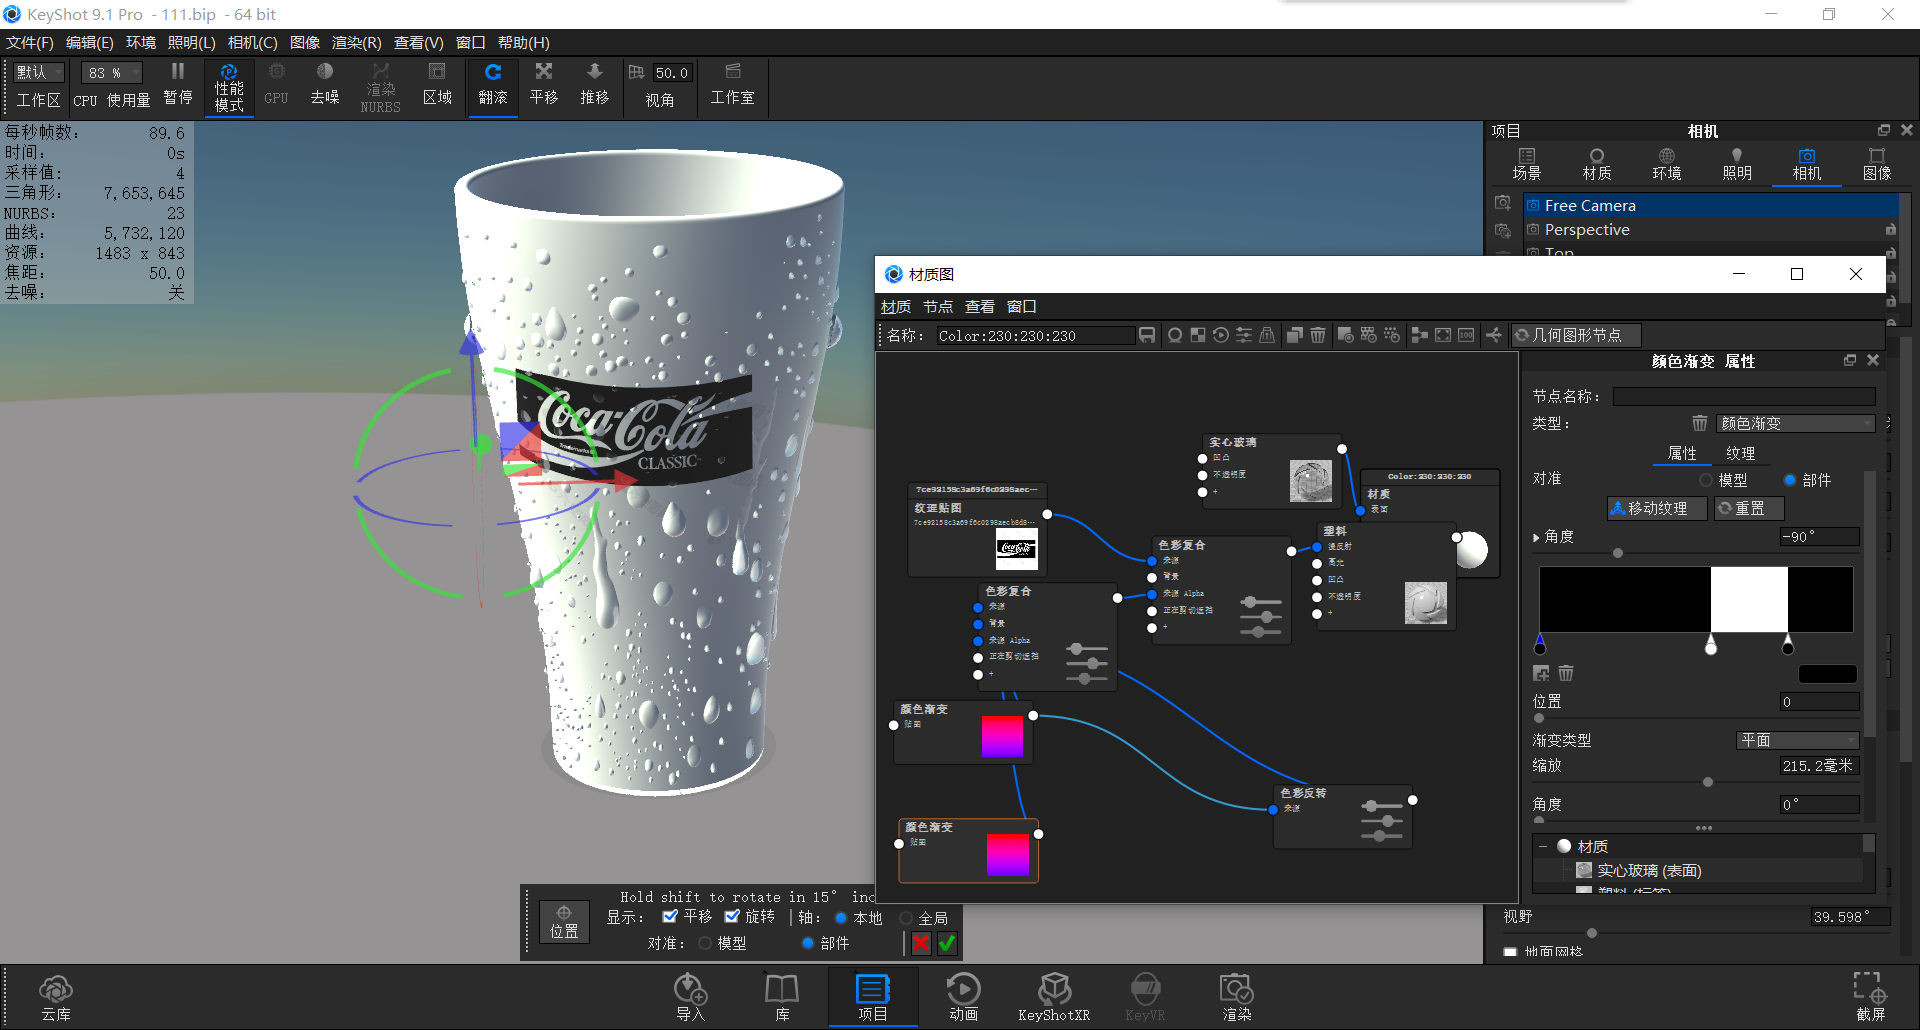
Then we add another color compound, linking the just adjusted color compound to the source alpha and the map to the source
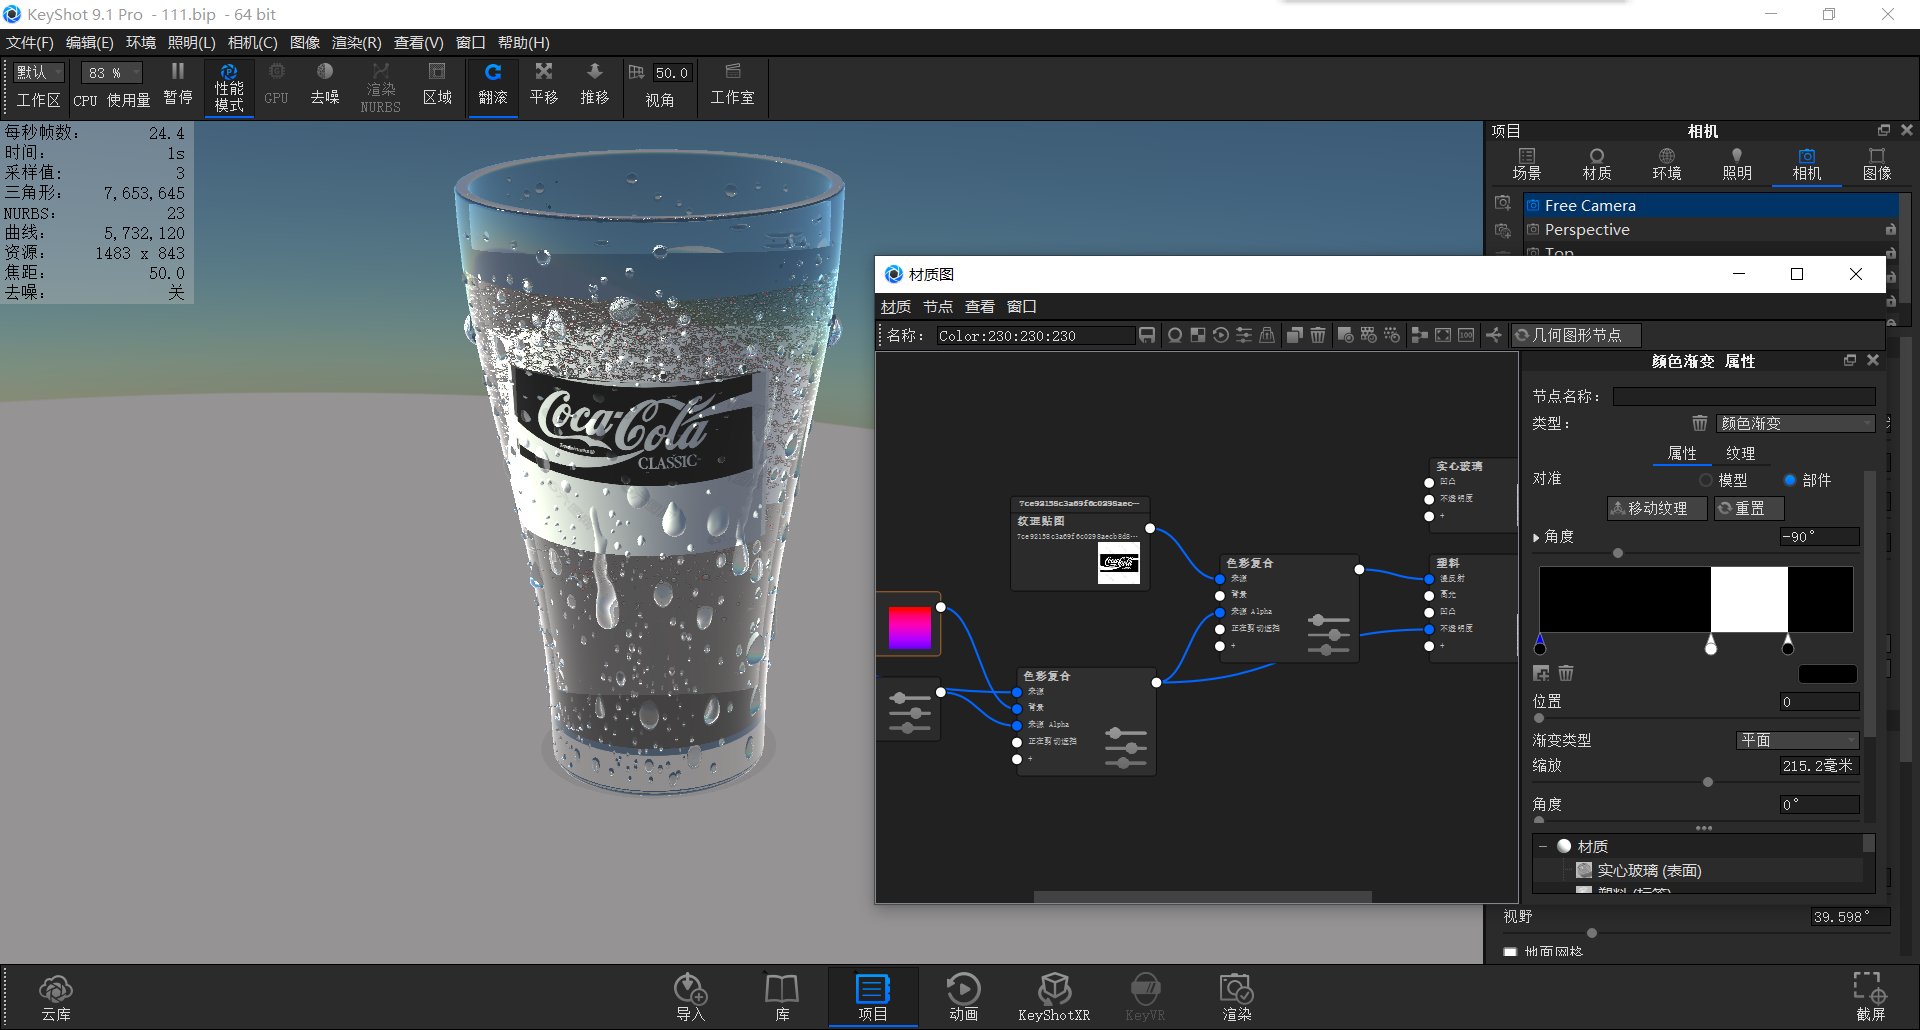
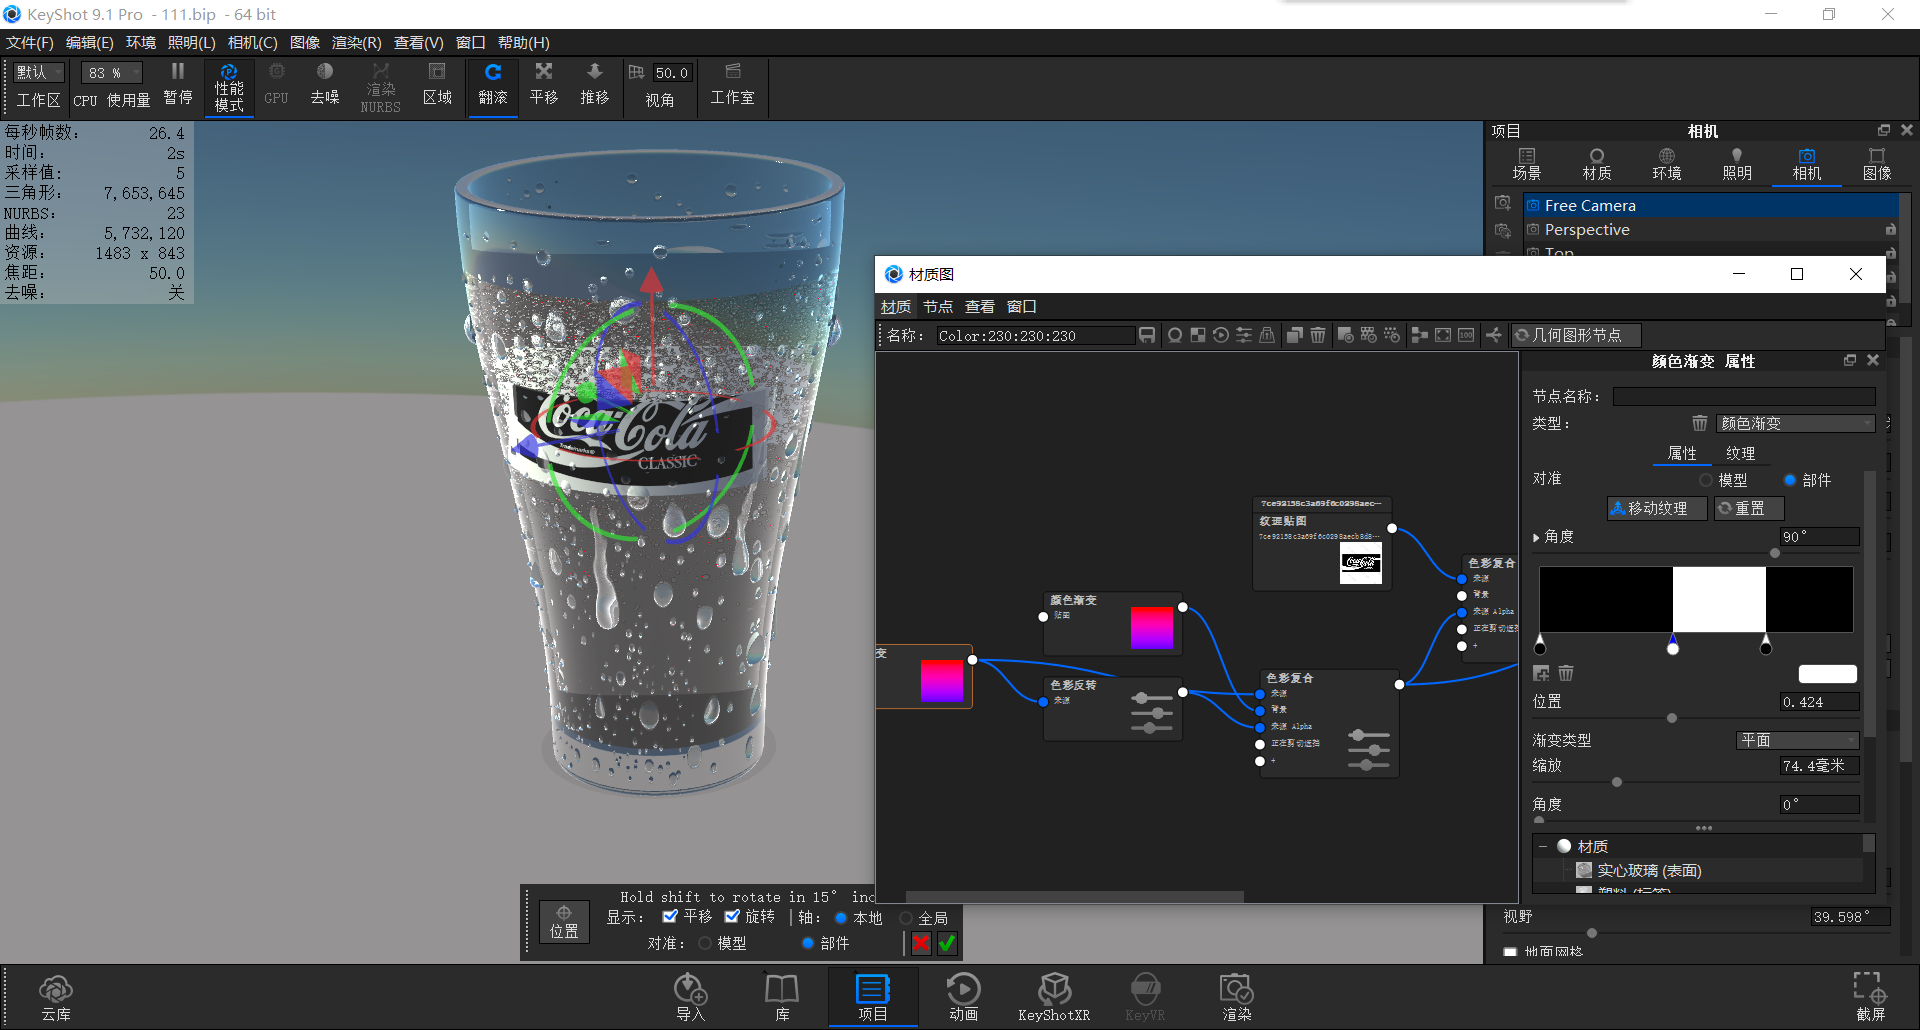
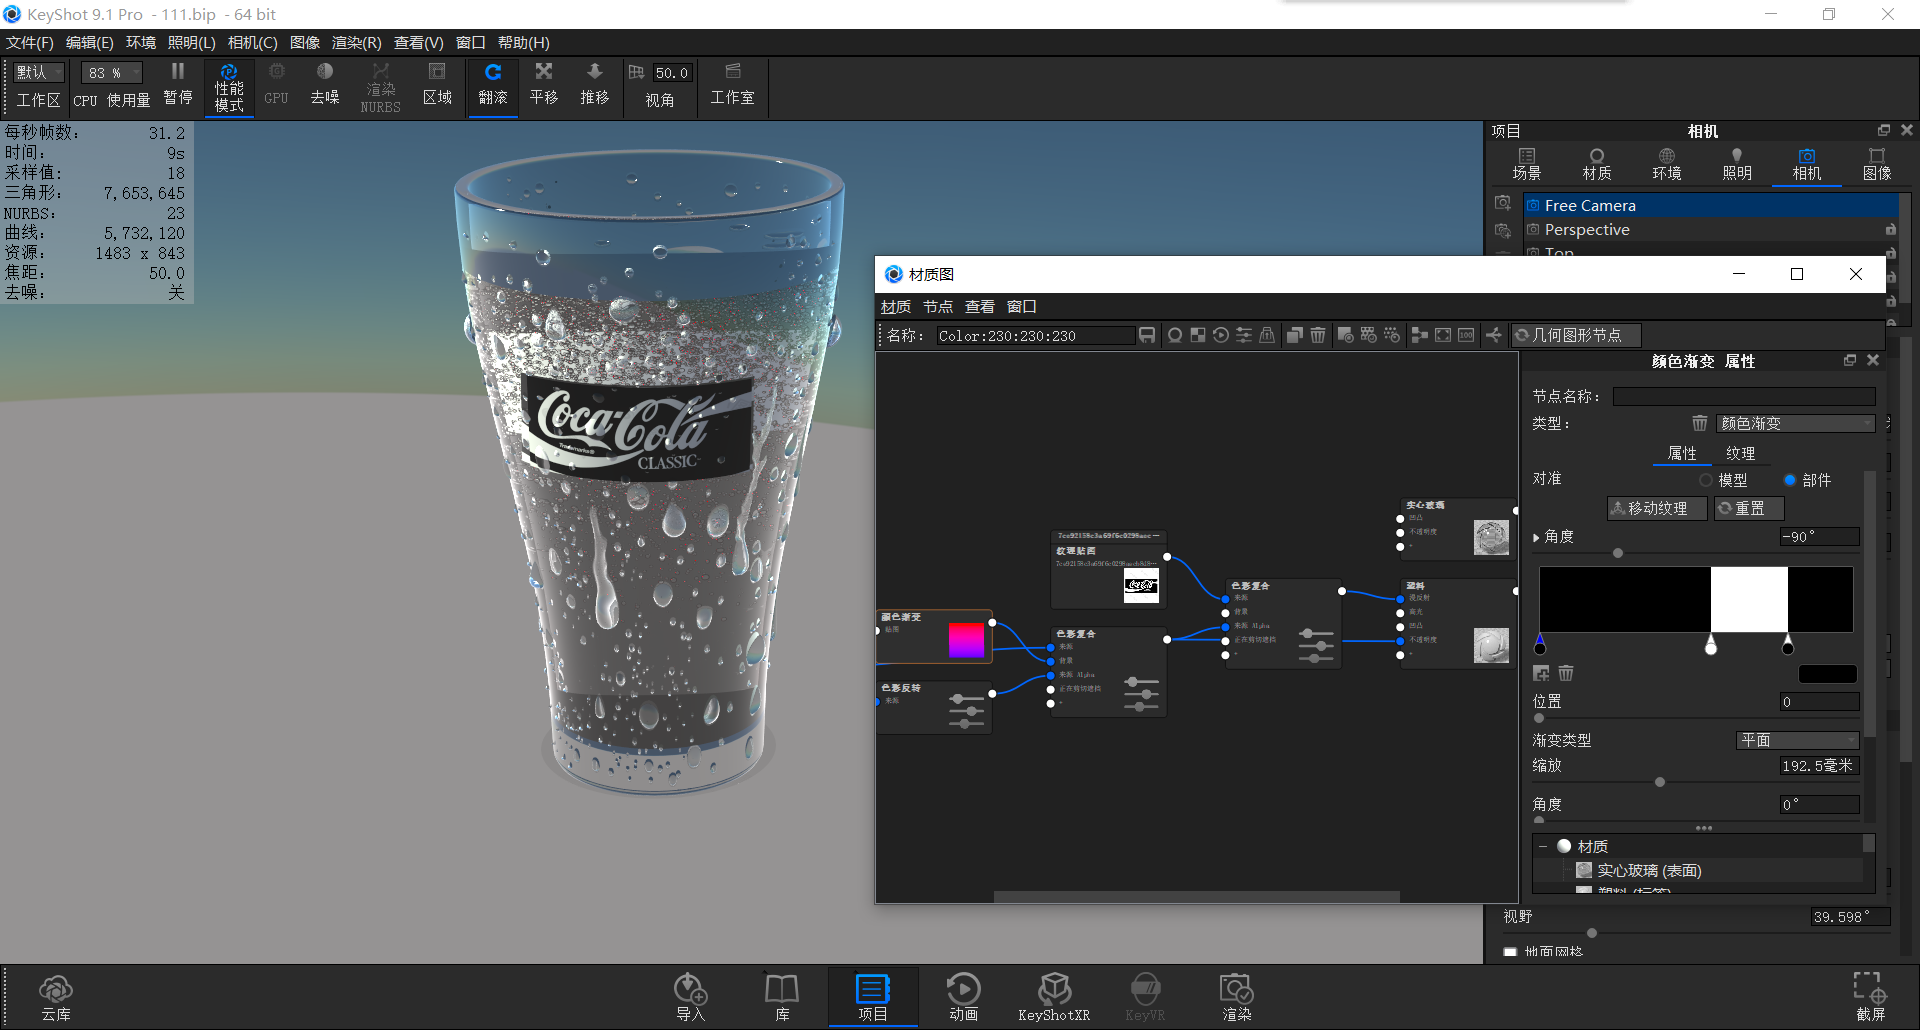
Constantly change the gradient size position until the full label is revealed.
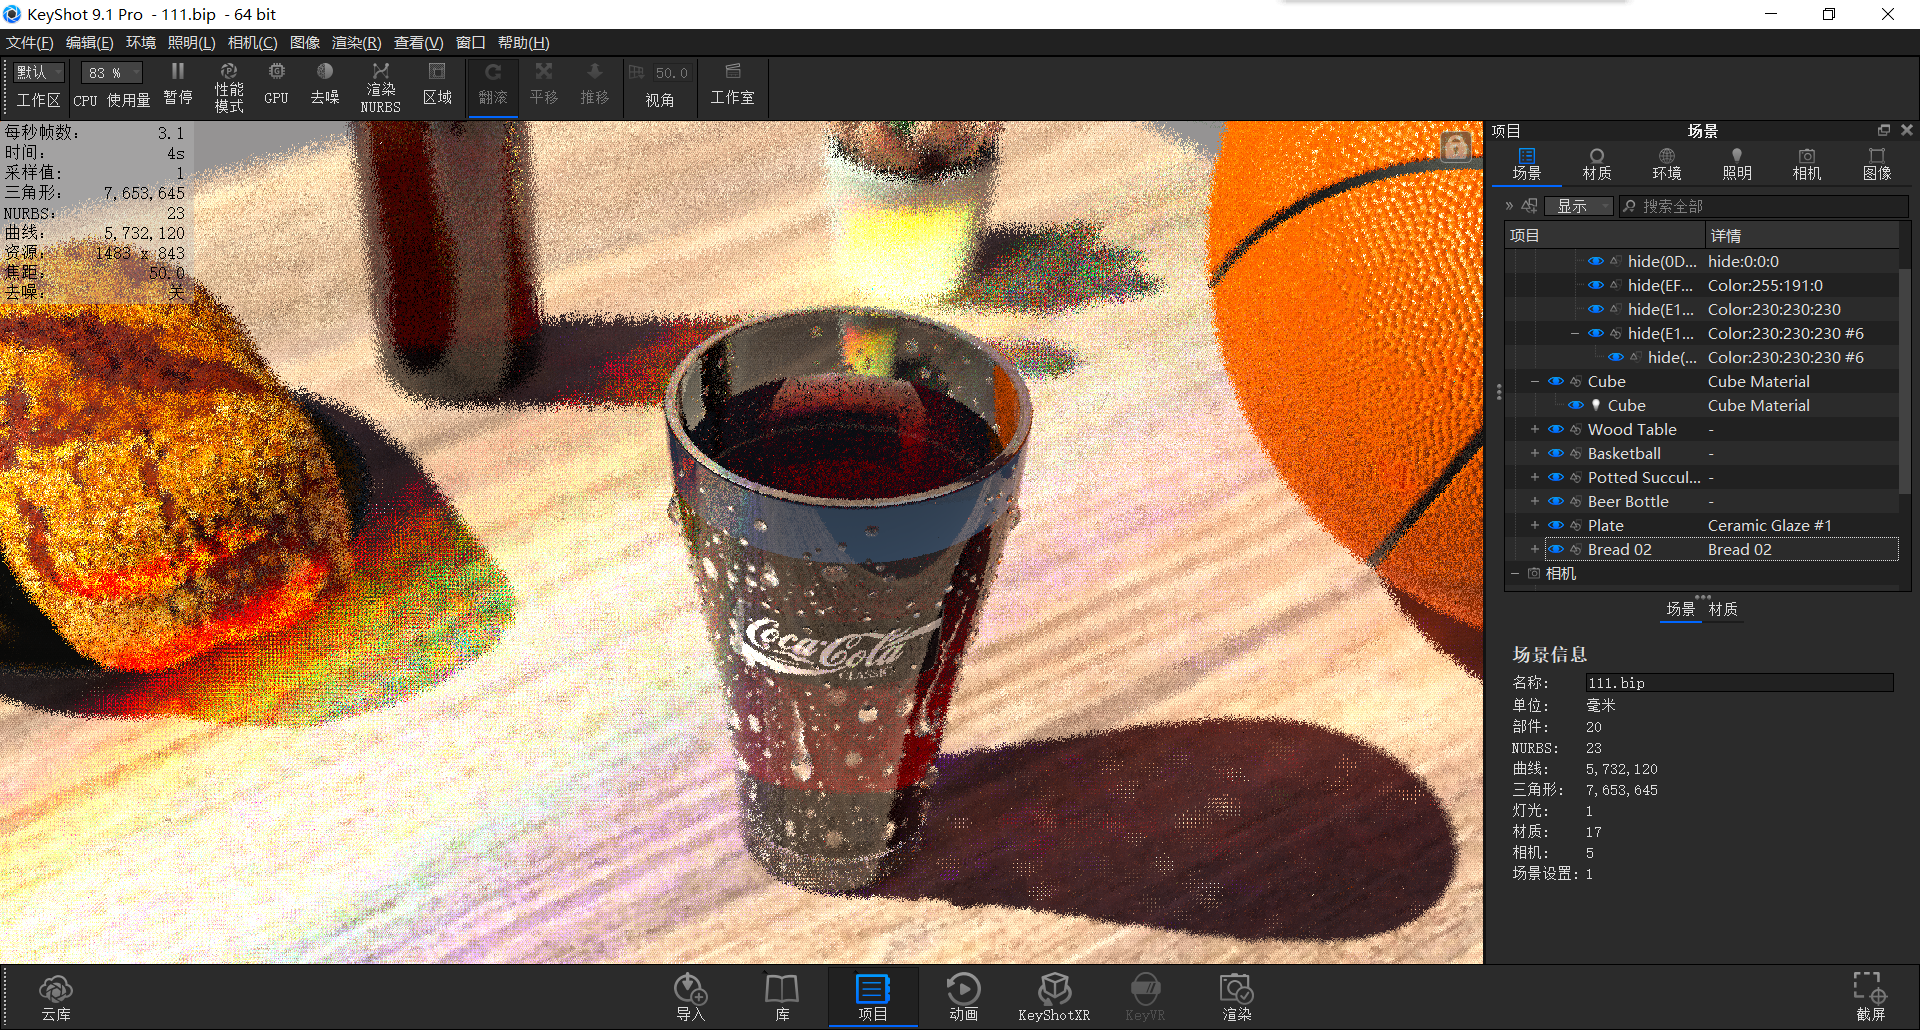
Light up the rest of the parts, turn off the performance mode, and click Render
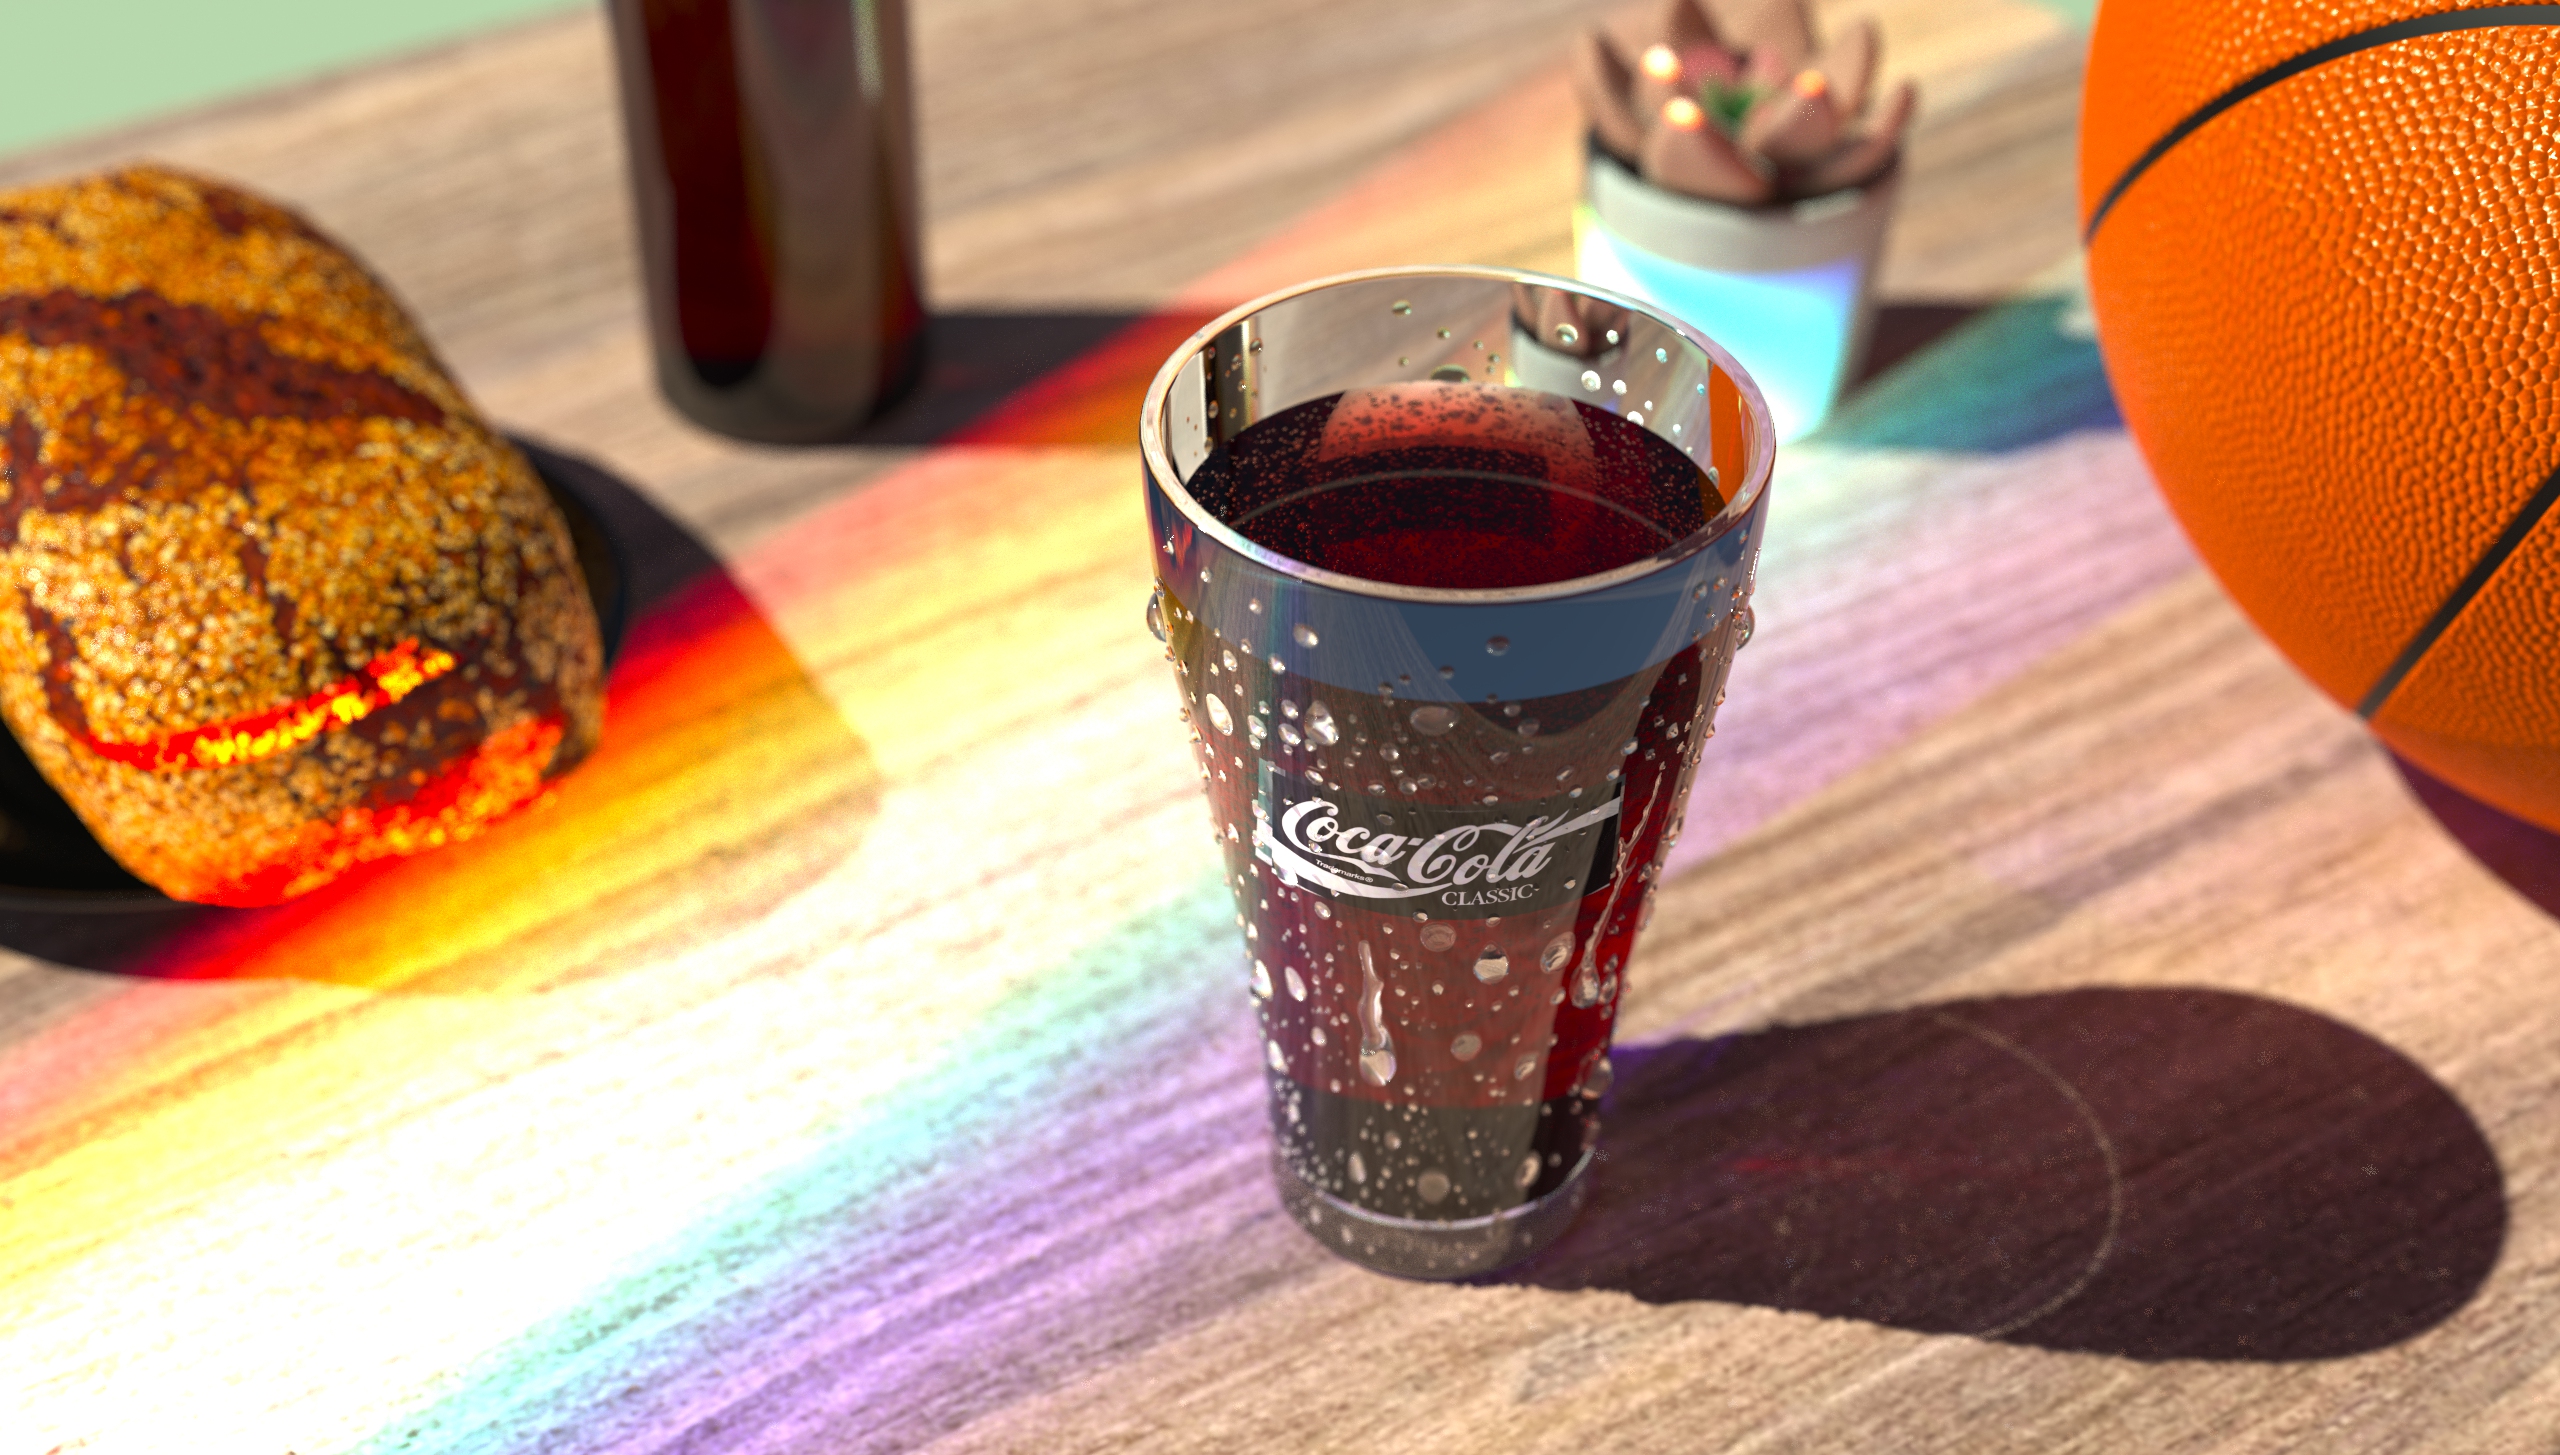
How, do you feel youthful and energetic, and the summer feeling is slow, then don't go and open the keyshot, please drink ice on your computer, I believe you can do better
Those who need source files can leave comments and email, and I will send them as soon as I see them.

New user?Create an account
Log In Reset your password.
Account existed?Log In
Read and agree to the User Agreement Terms of Use.

Please enter your email to reset your password
Boss, do I deserve 1689824762@qq.com
This tutorial is very good, big brother, please ask for the source file
Big Brother Asks for Source File 204126944@qq.com
Please give me a source file, I want to learn. 197098017@qq.com
Great god, ask for a source file to learn, 769068916@qq.com, thank you!
Big Brother asks for the source file to learn, 2278833861@qq.com
Give me a claw, can KS9.0 be opened? Source file oh send proud!
Want to learn, do I still have a chance? 997548092@qq.com
Want to learn, great god can send a source file? 340391821@qq.com
After searching the Internet, I finally found the water drop effect here. Can the great god send a source file to learn?
Thank you 594810419@qq.com
If you want to learn, can you send a source file, 1349032504@qq.com
The tutorial was amazing. Although I felt that I couldn't make the tone, I still wanted to try 576970318@qq.com.
Big Brother Asks for 1107804894@qq.com
At that time, it was really amazing when watching the tutorial to do this dispersion. natt's keyshot tutorial
Praise, ask for documents, 893126469@qq.com