Let's do an interesting rendering!
This chapter mainly explains the rendering skills of silhouette, the rendering method of hair, and how to observe life and apply beauty to your own rendering.
(In fact, the red and green contrast color combination does not seem ugly.)
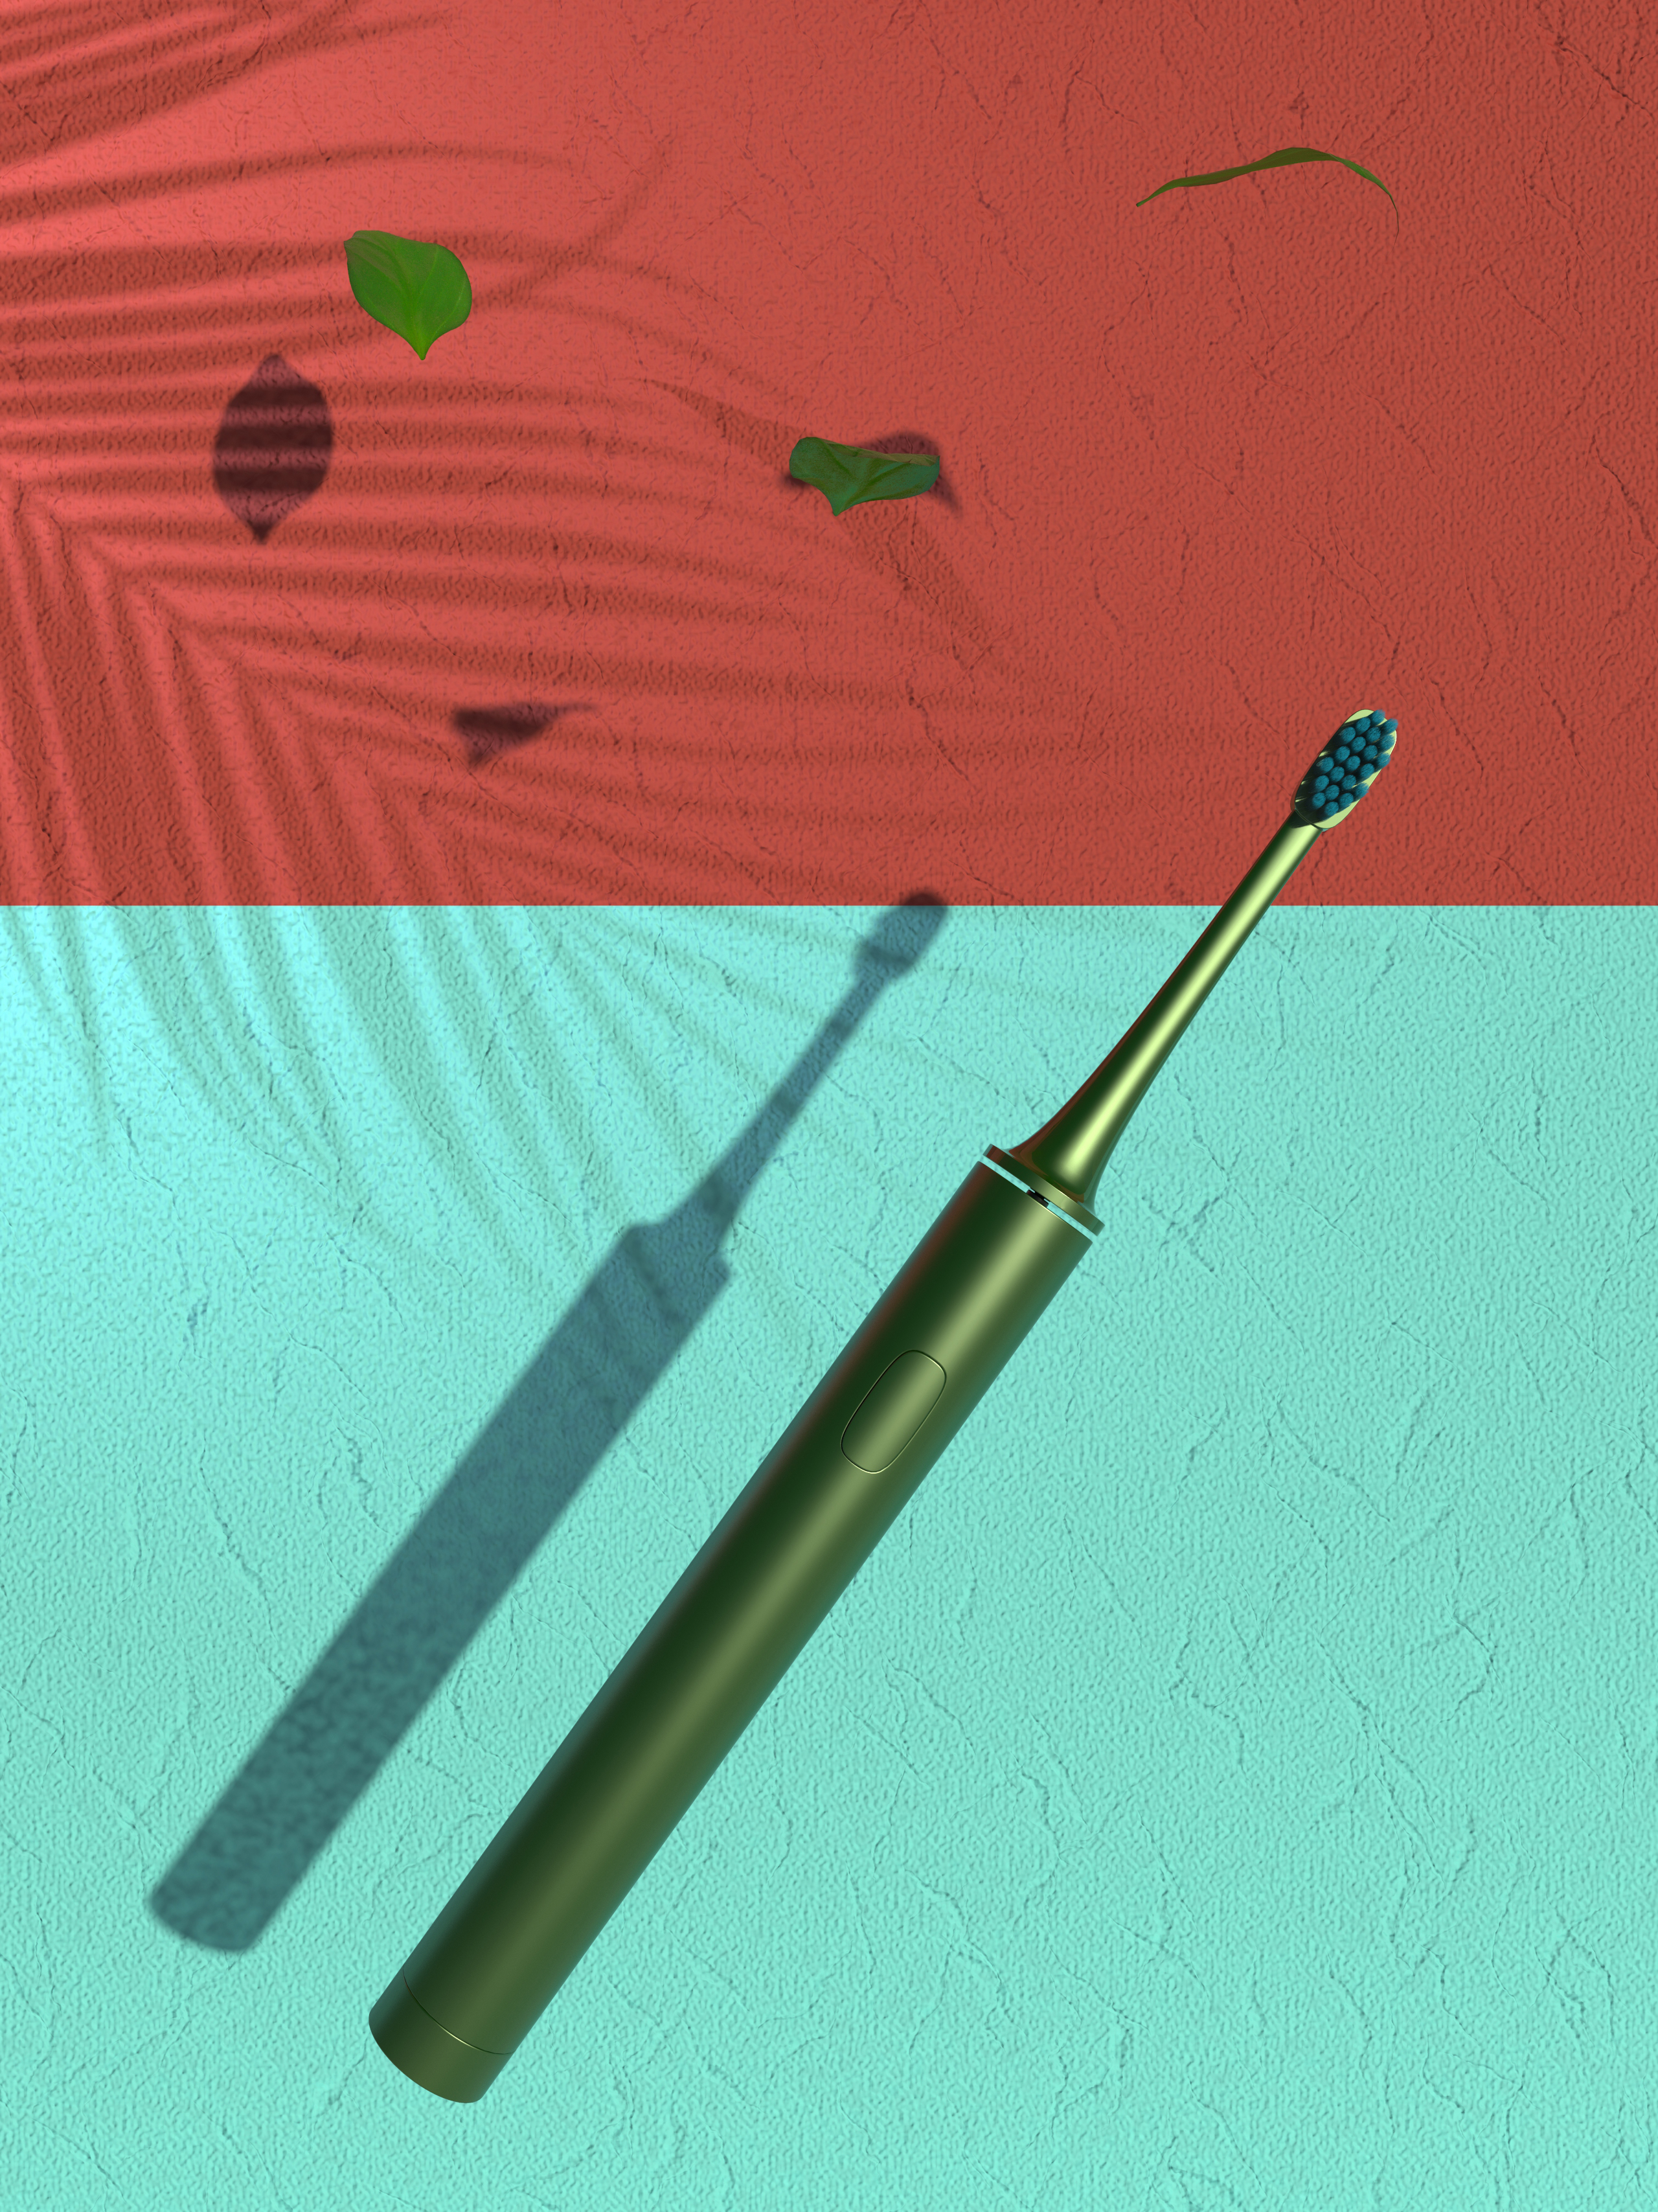
It is not easy to set up a dog for work. If there are any deficiencies, please let me know. If you feel good, I hope you can leave a compliment or comment, or pay attention to me. I will continue to cheer up and make some good and attentive tutorials. Thank you!
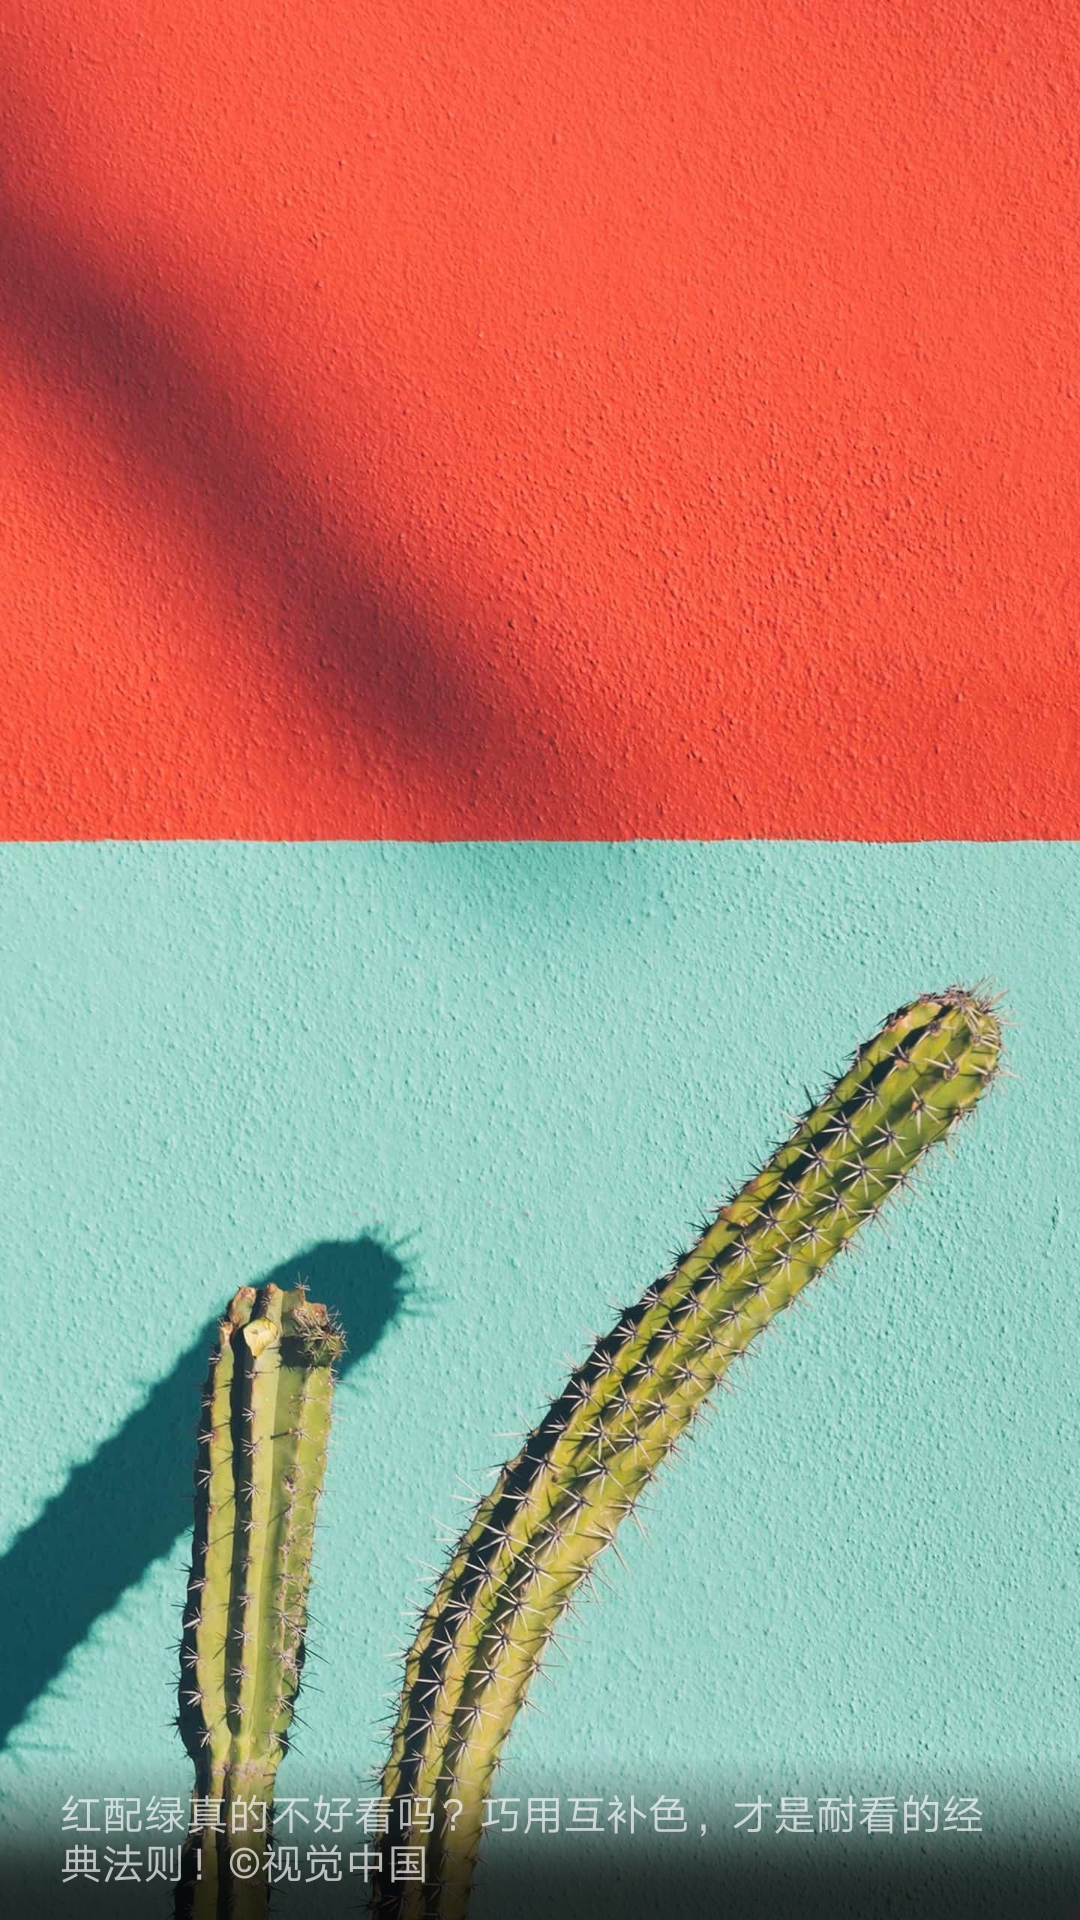
Some students in the previous tutorial comments asked me, how do you build a scene map and how do you find good inspiration? I answered that he should learn to observe more things around him. This picture is a landscape I saw on the cover lock screen of Huawei's mobile phone. At that time, I was amazed. The contrast between red and green is not only not earthy, but also a bit more classical palace style. So I borrowed the layout and color of this picture and applied it to the product.
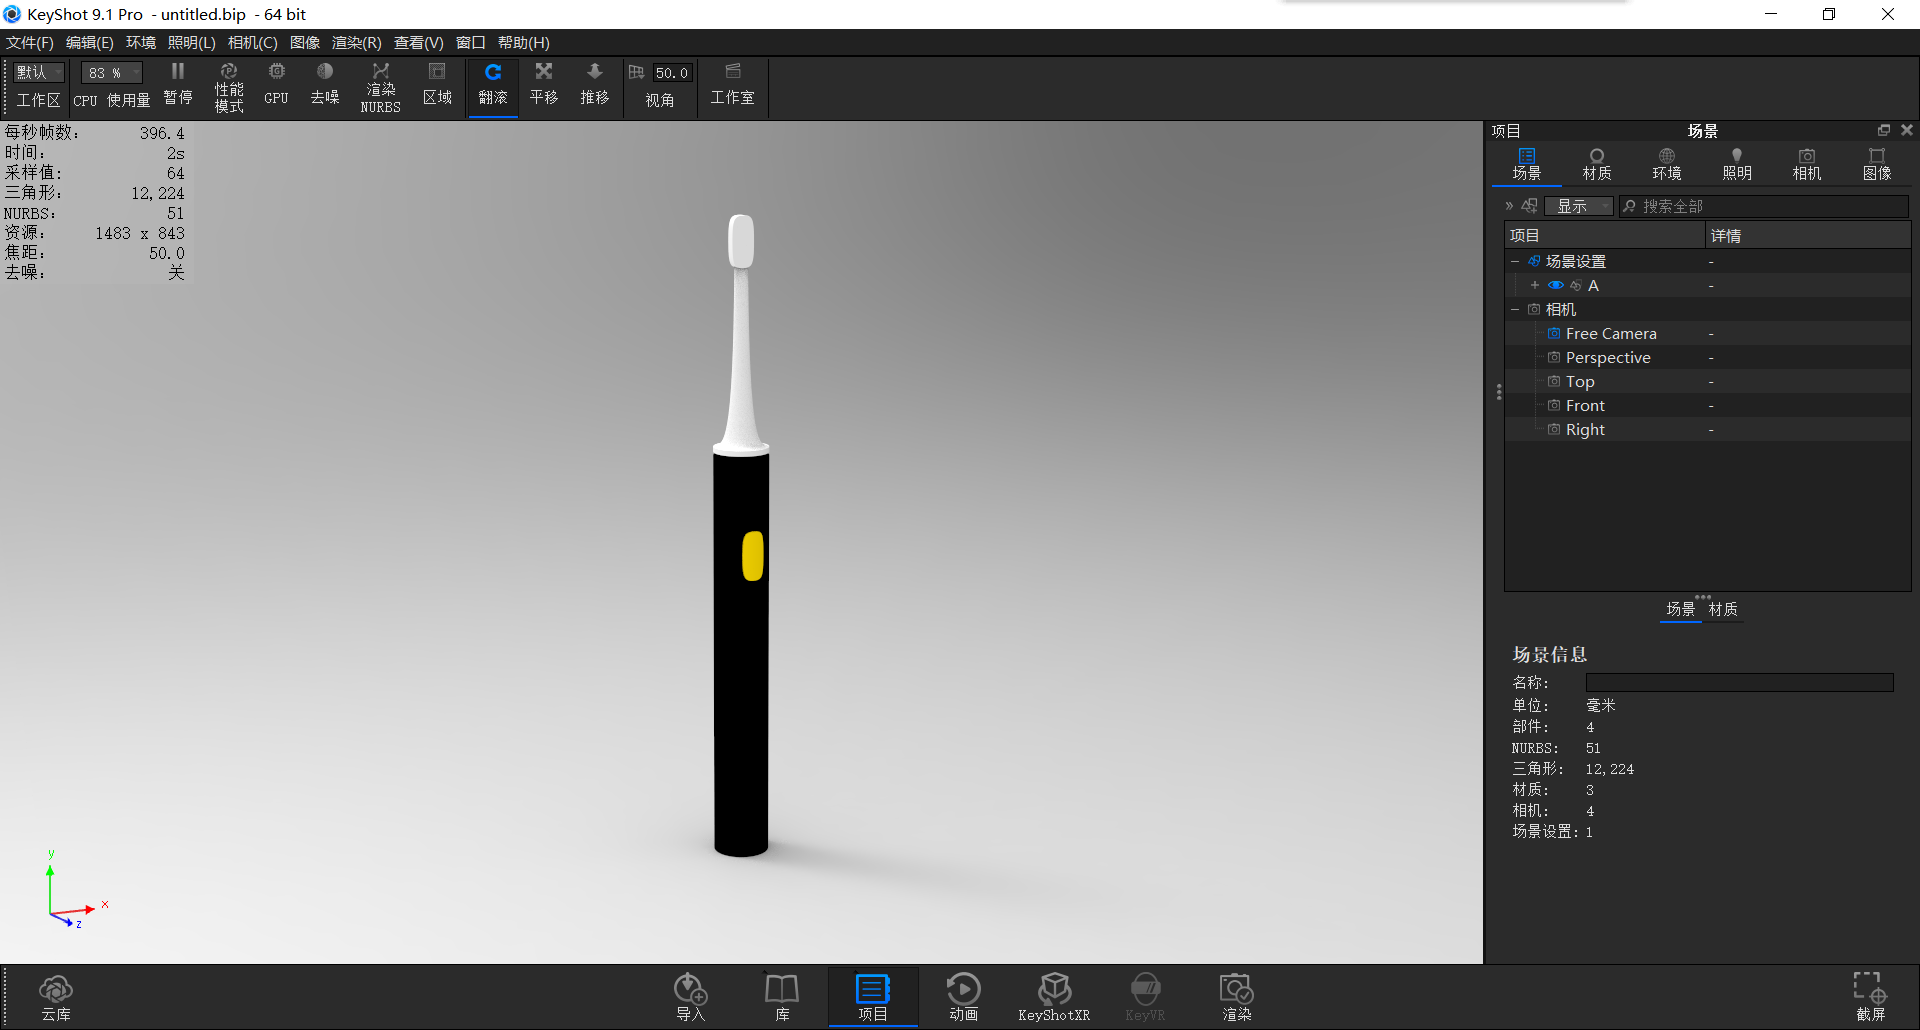
First import the model into the Keyshot9
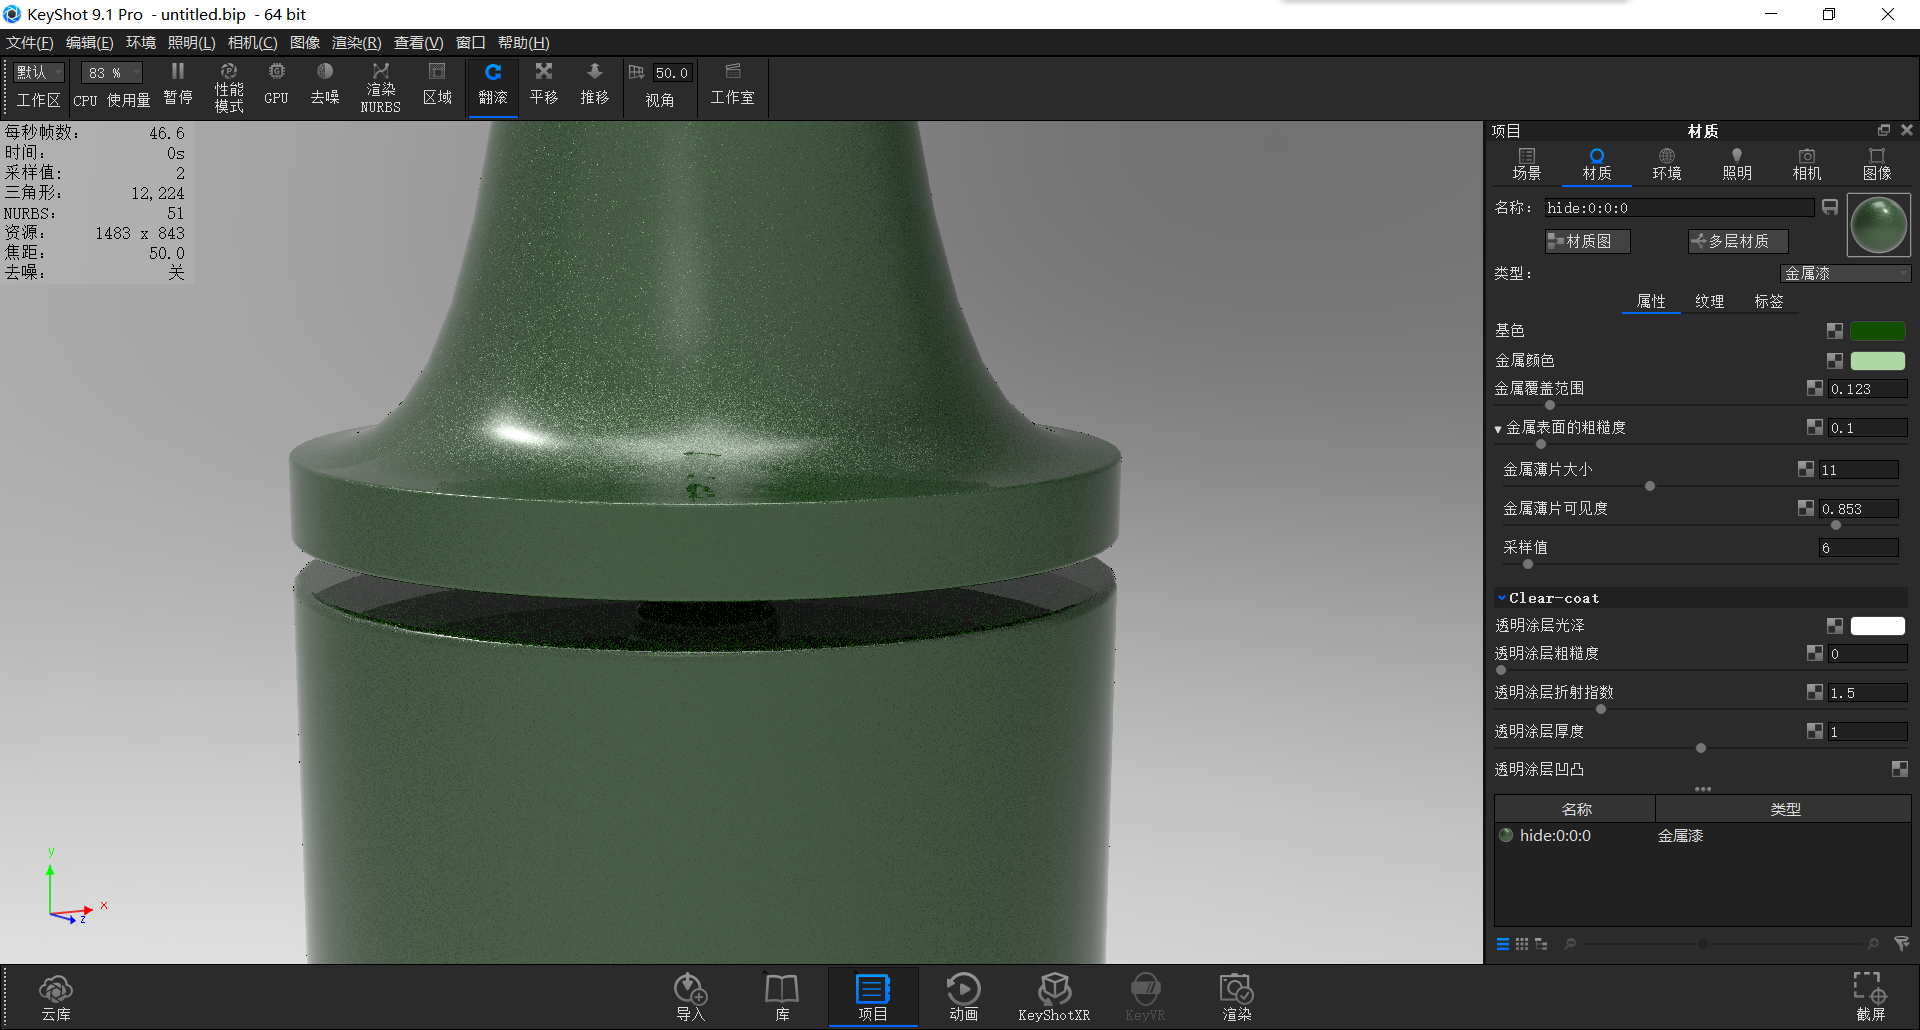
Give the material of metallic paint in turn to enhance the texture of the product.
When adjusting parameters, be patient and keep trying.
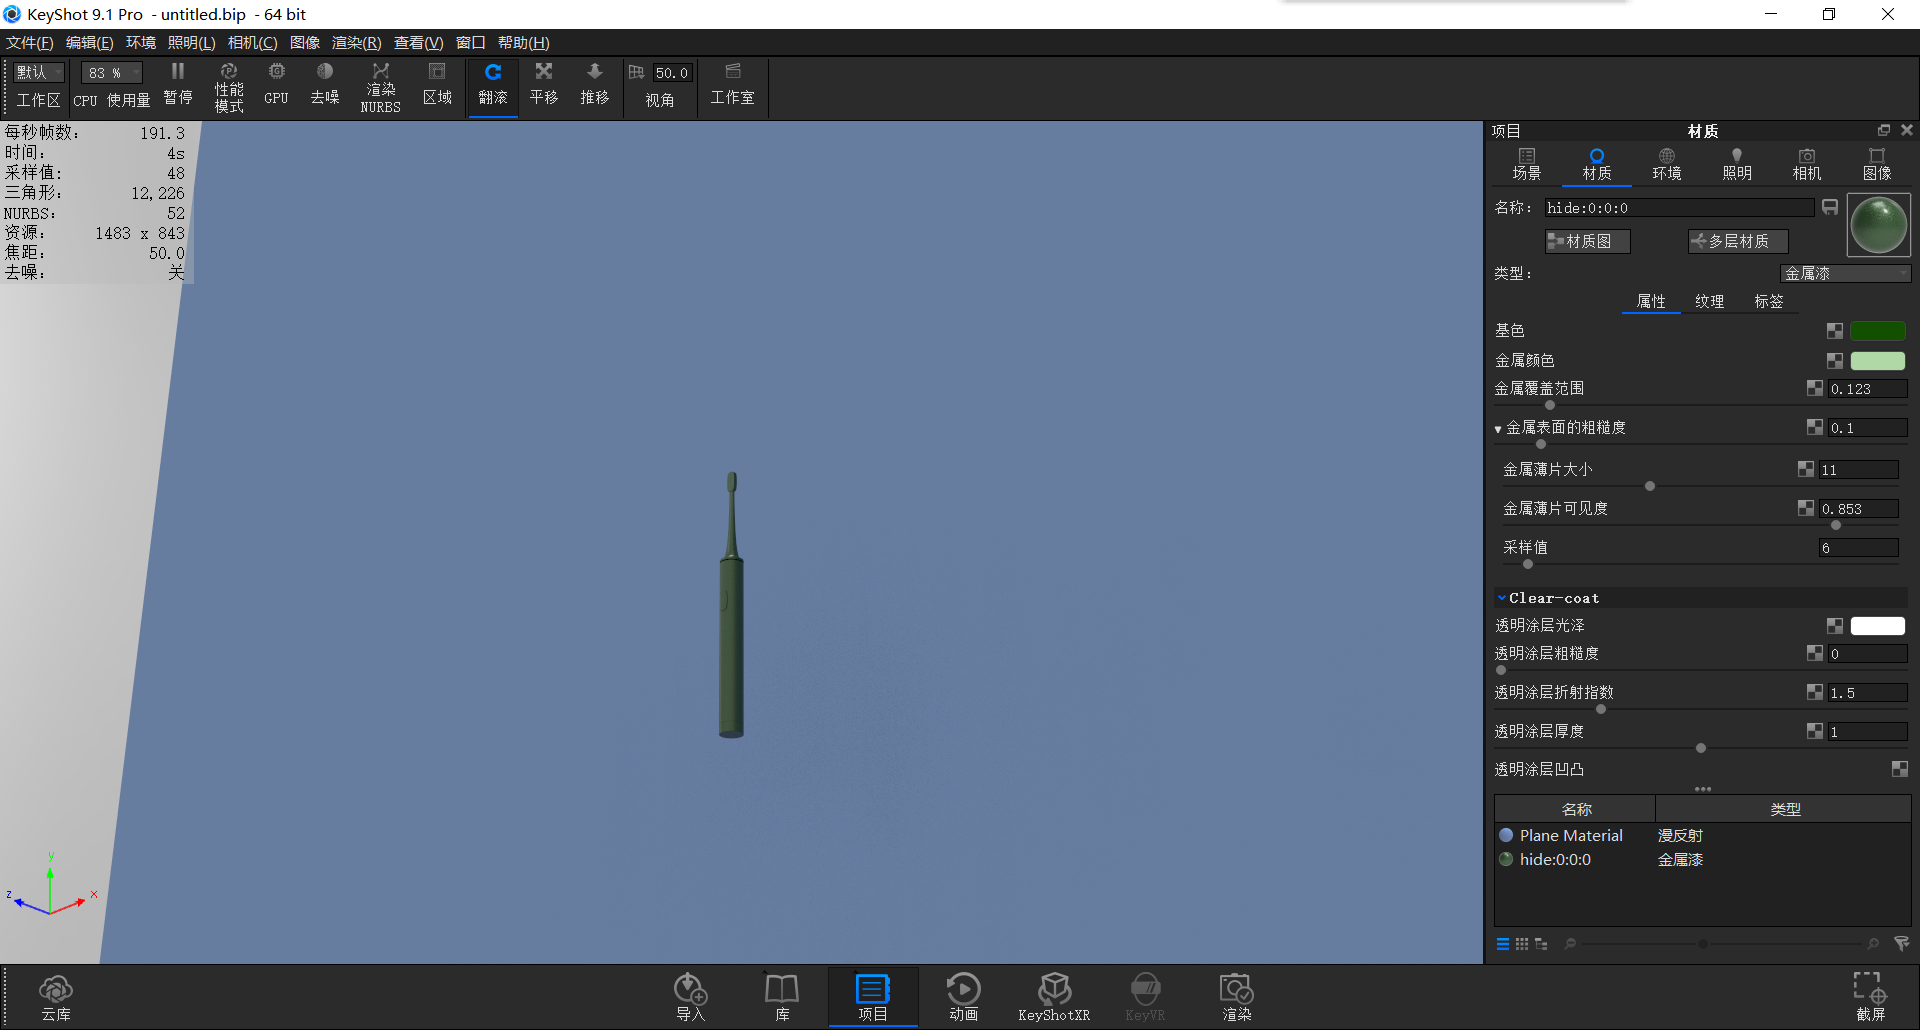
Then we hold down ctrl 7 to add a plane and move the rotation to zoom in to the back of the product as a background board.
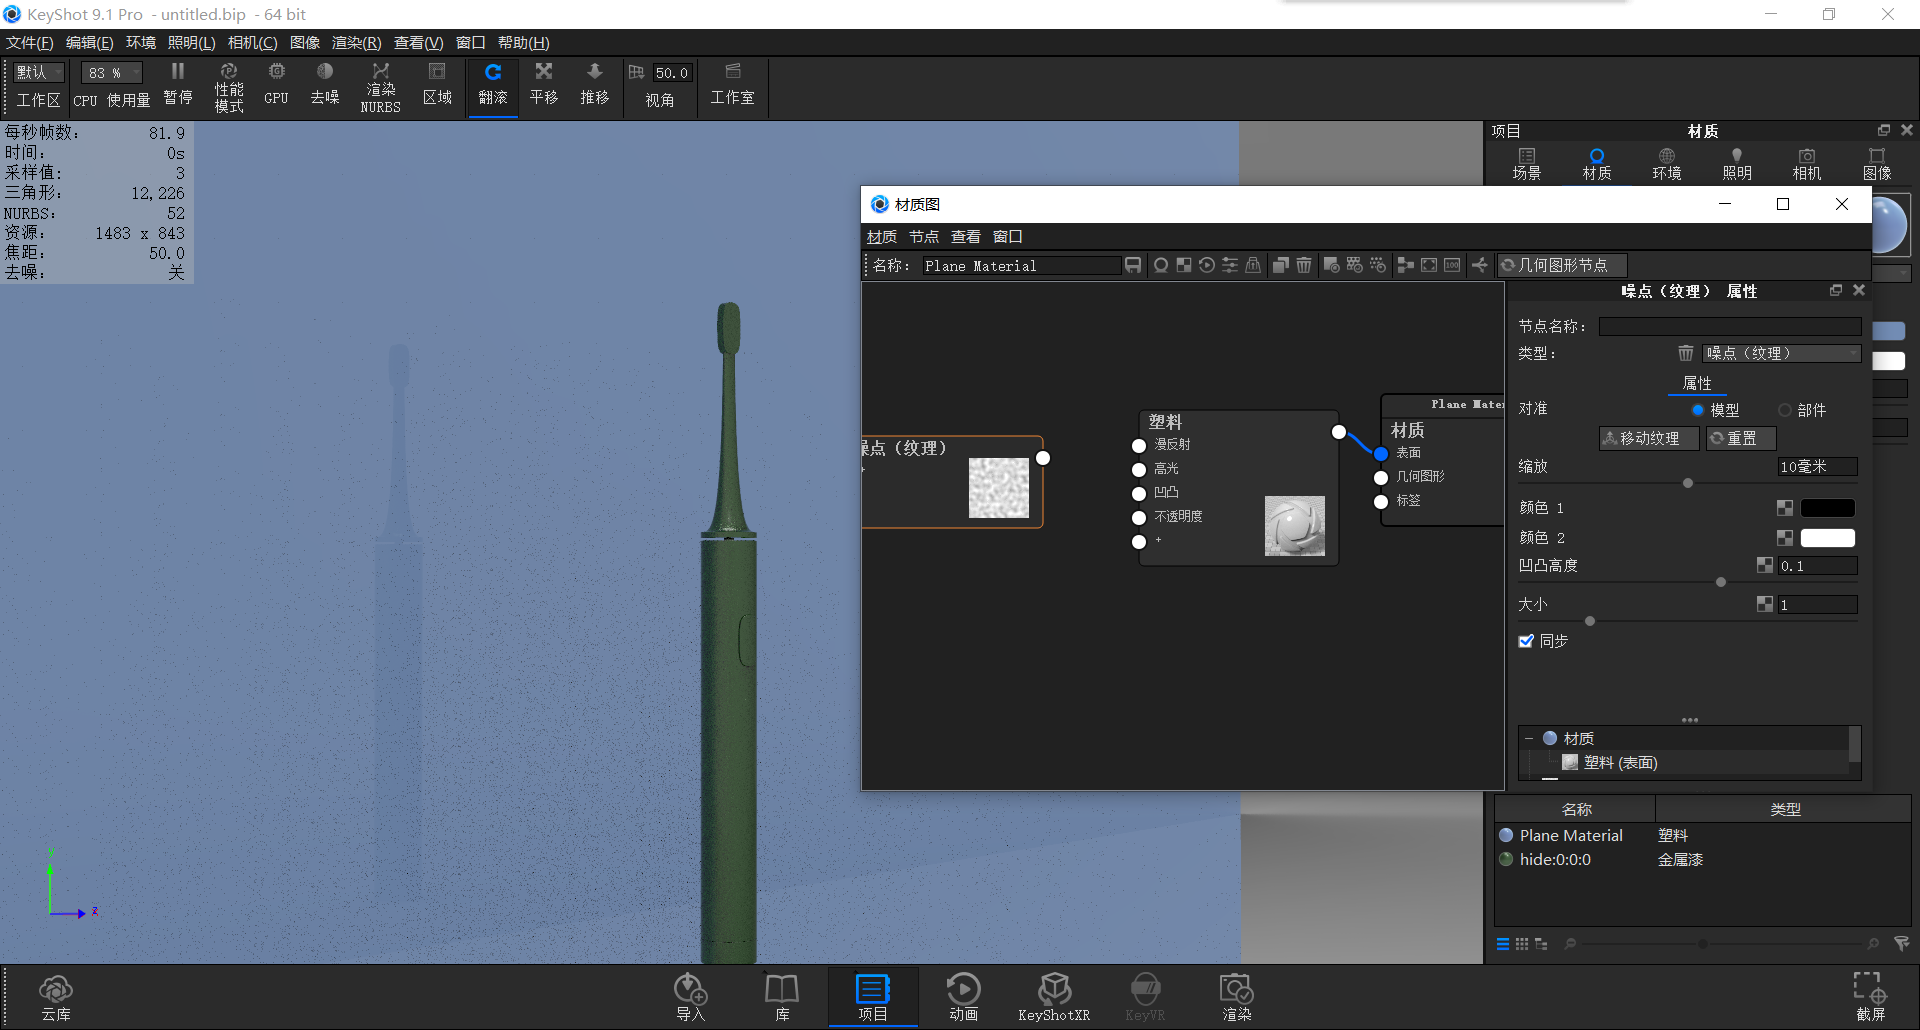
We open the material map of the plane and add a noise texture that comes with the system.
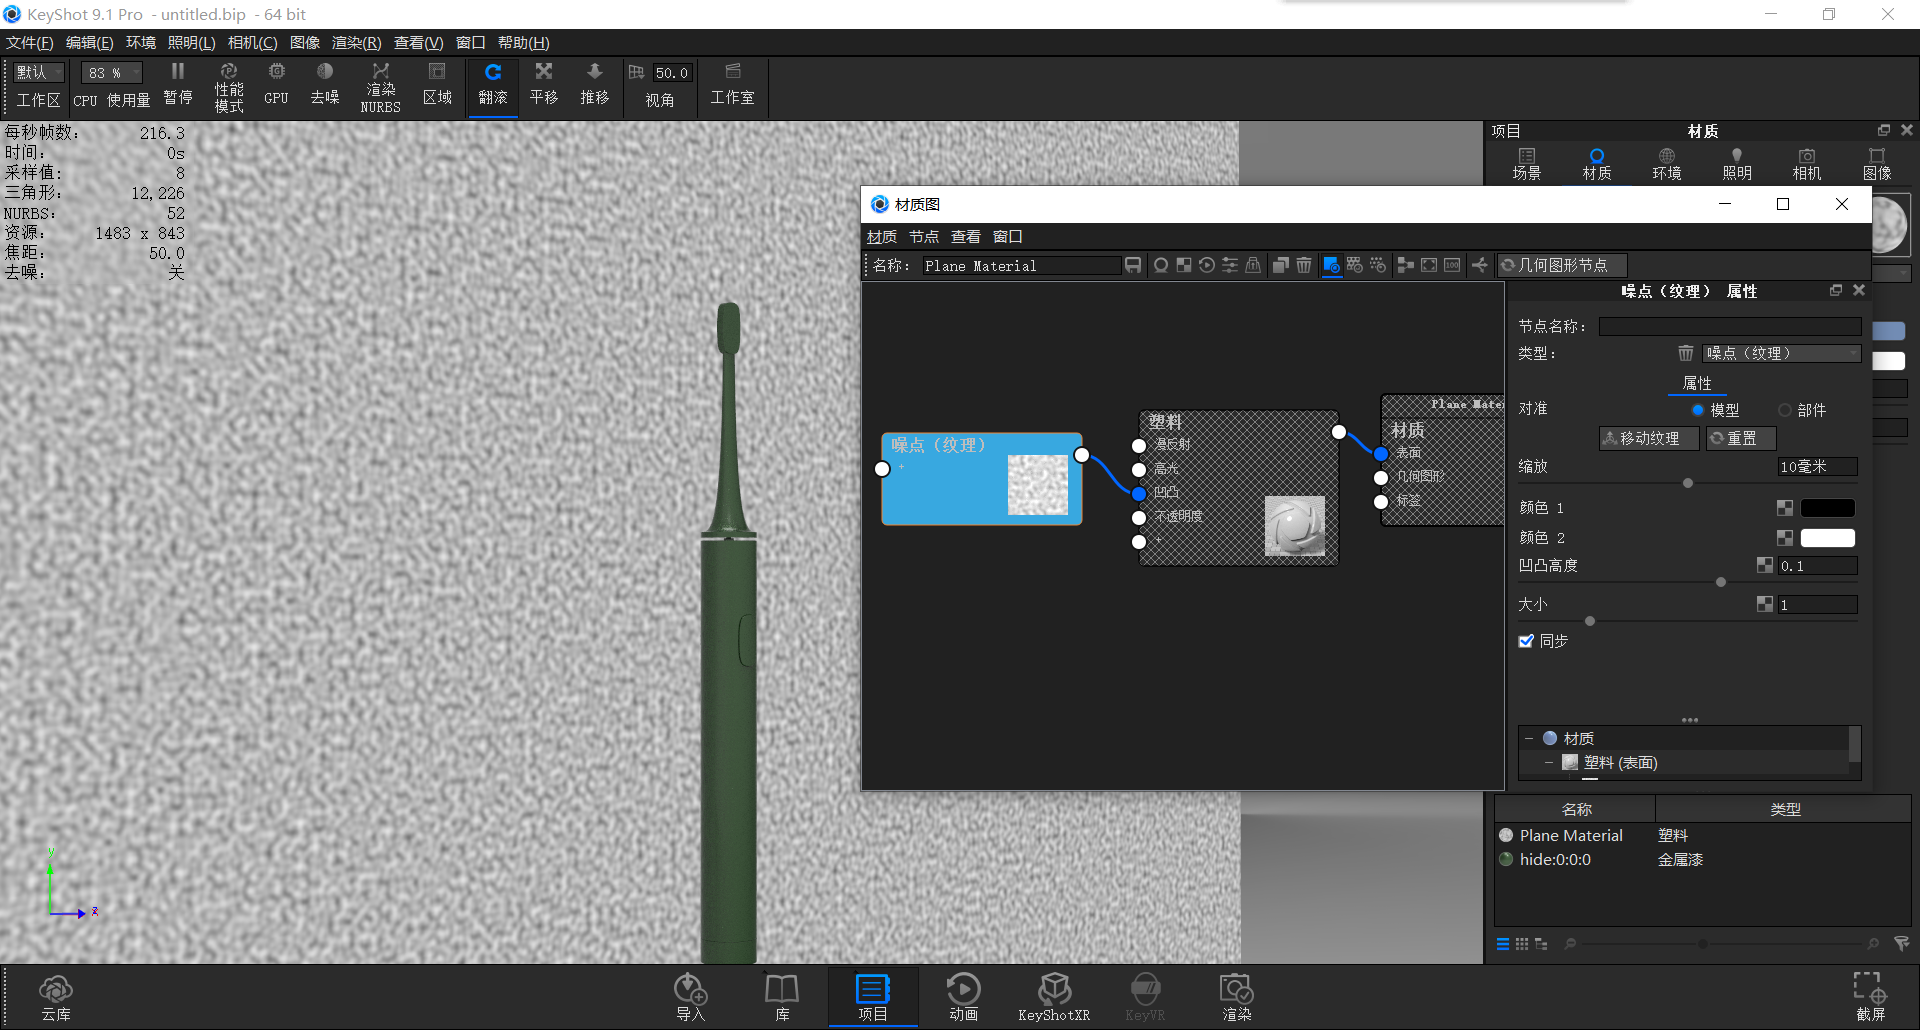
We connect the noise to the bump node and press the C key to preview the noise color
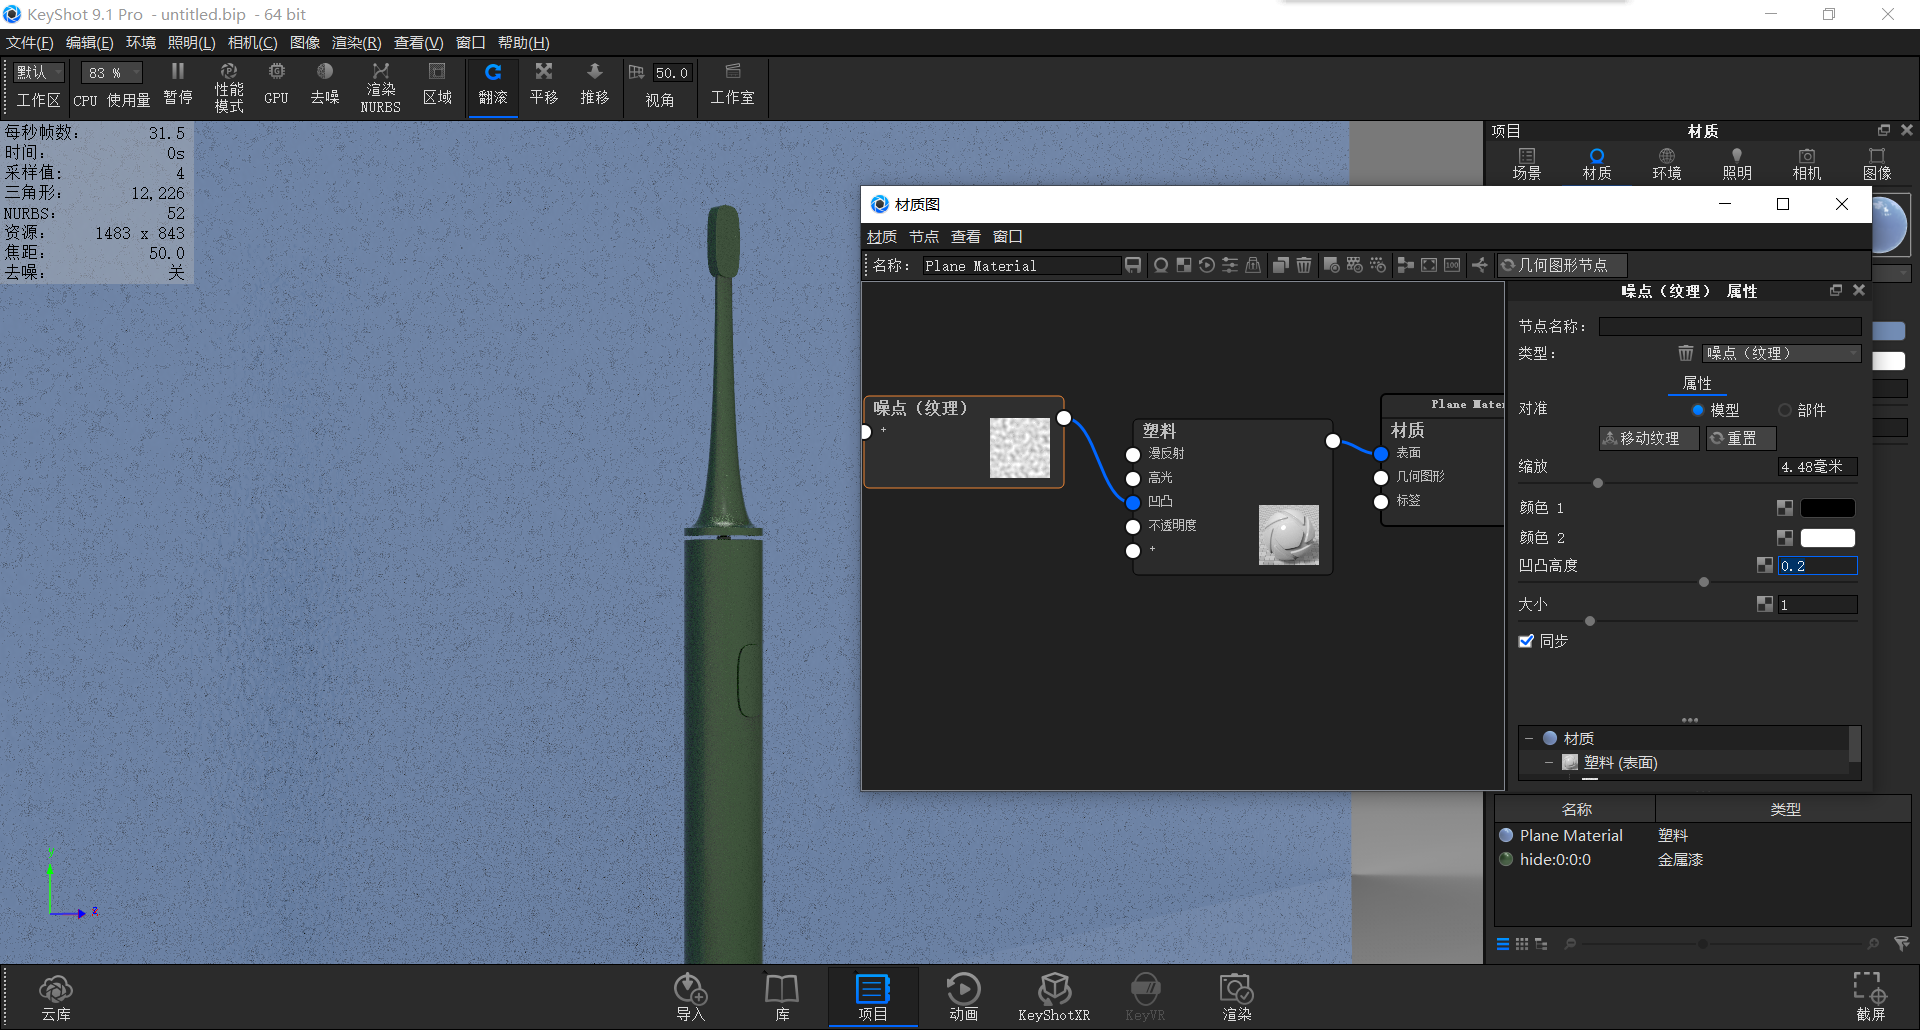
Then we can adjust the height of the bump properly until we feel it is appropriate.

Then we add a color gradient (see the previous tutorial Summer Coke for specific usage)
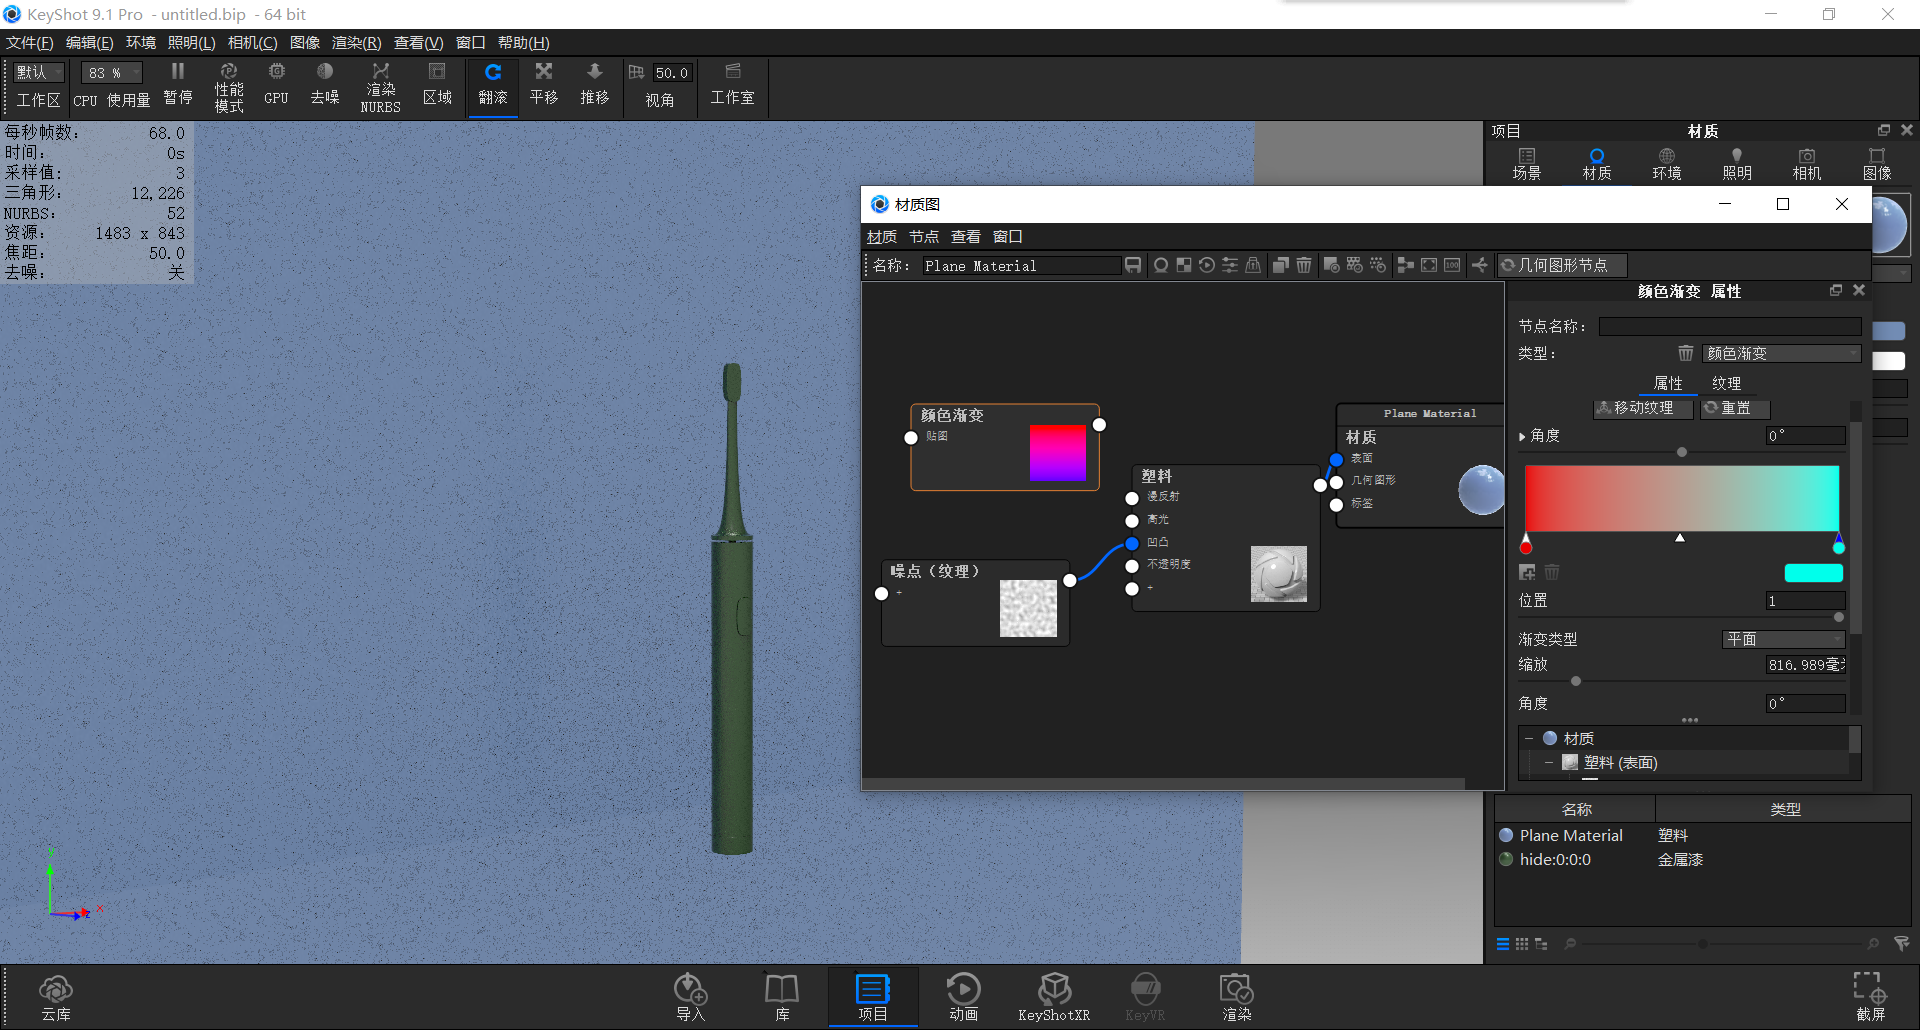
Then we change the color of the gradient
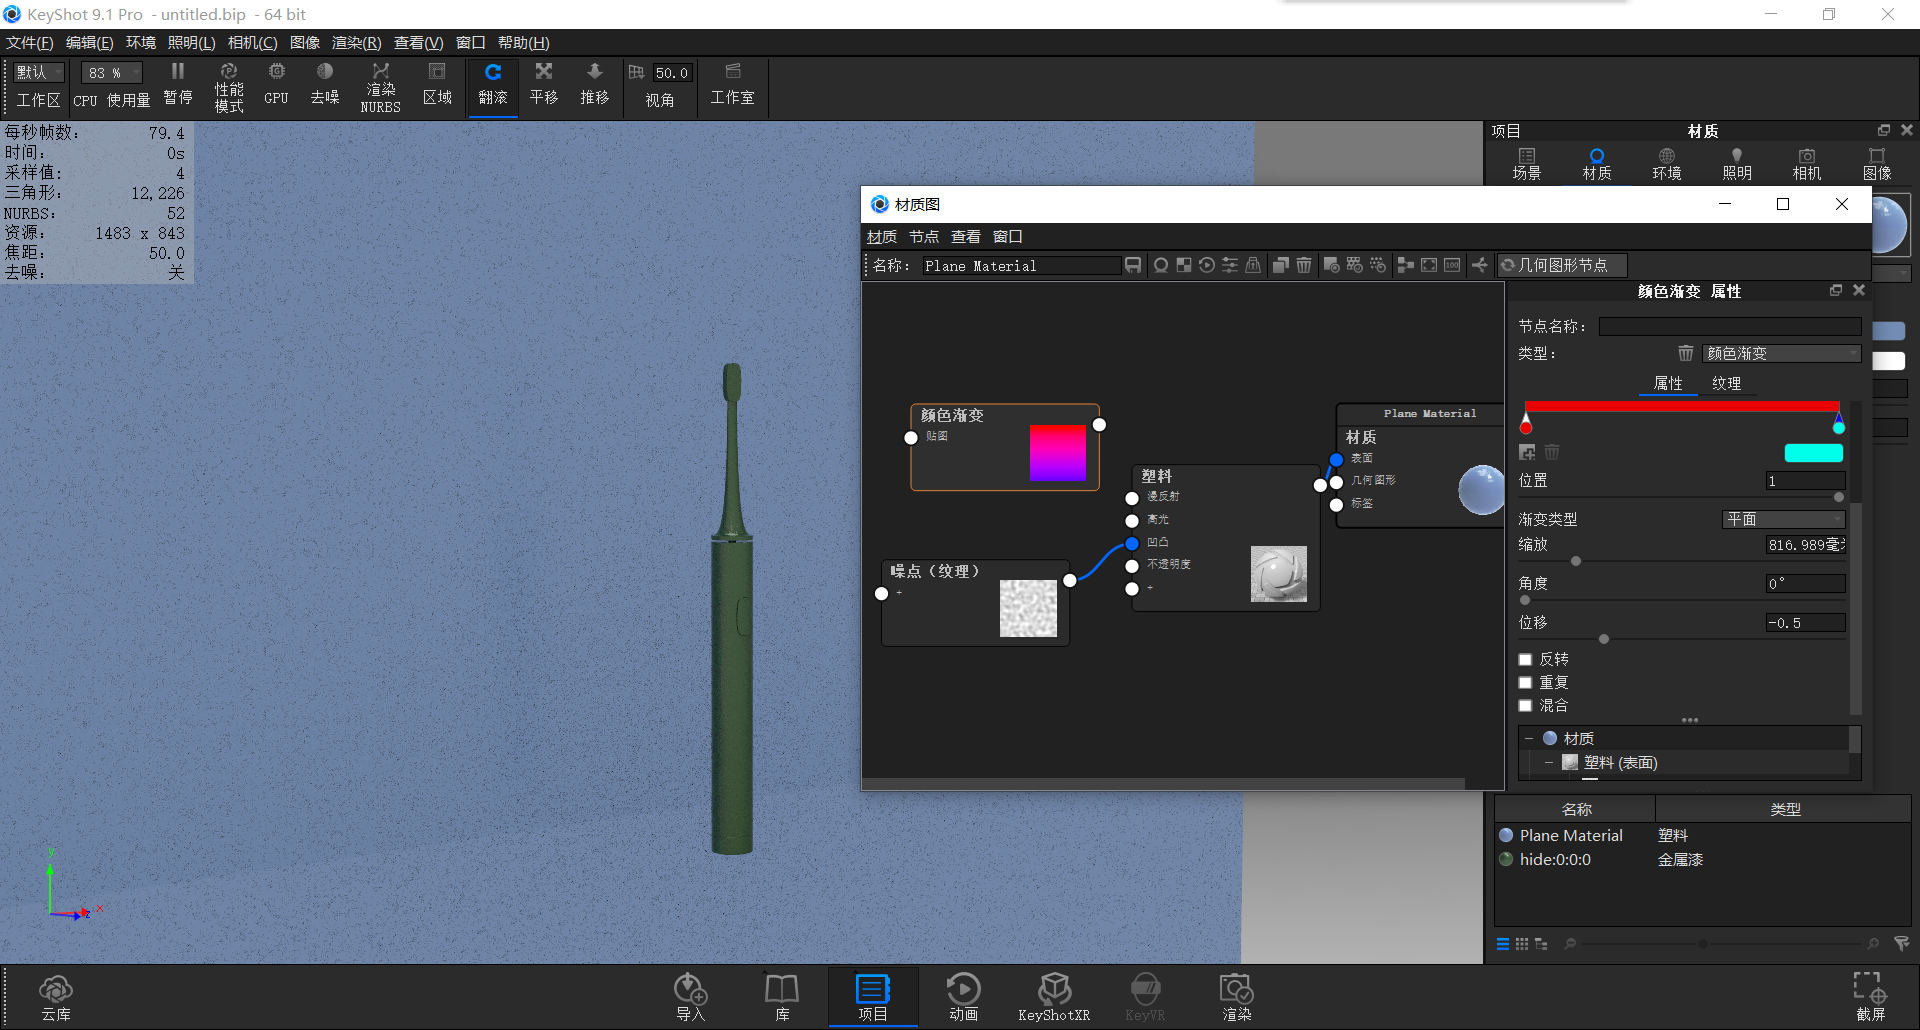
We scroll the middle mouse button to close the color below.
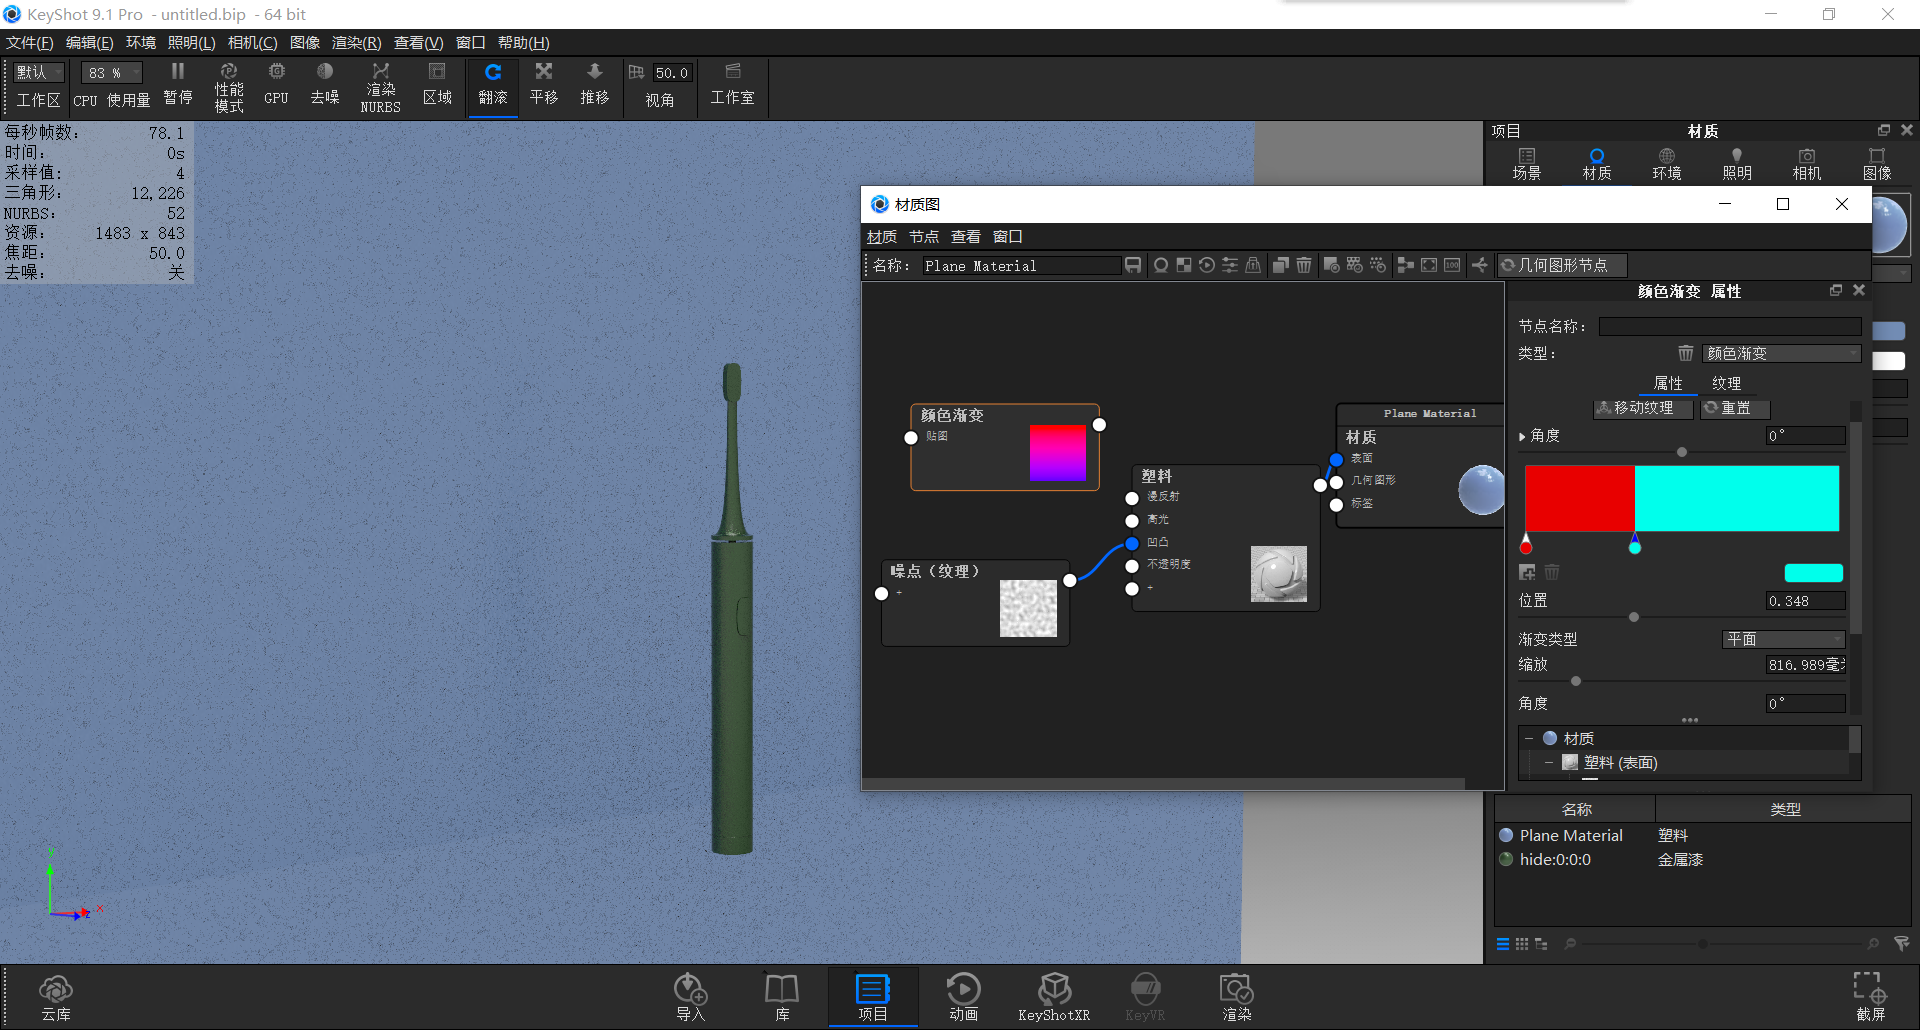
We can adjust the position button to control the ratio of red to blue
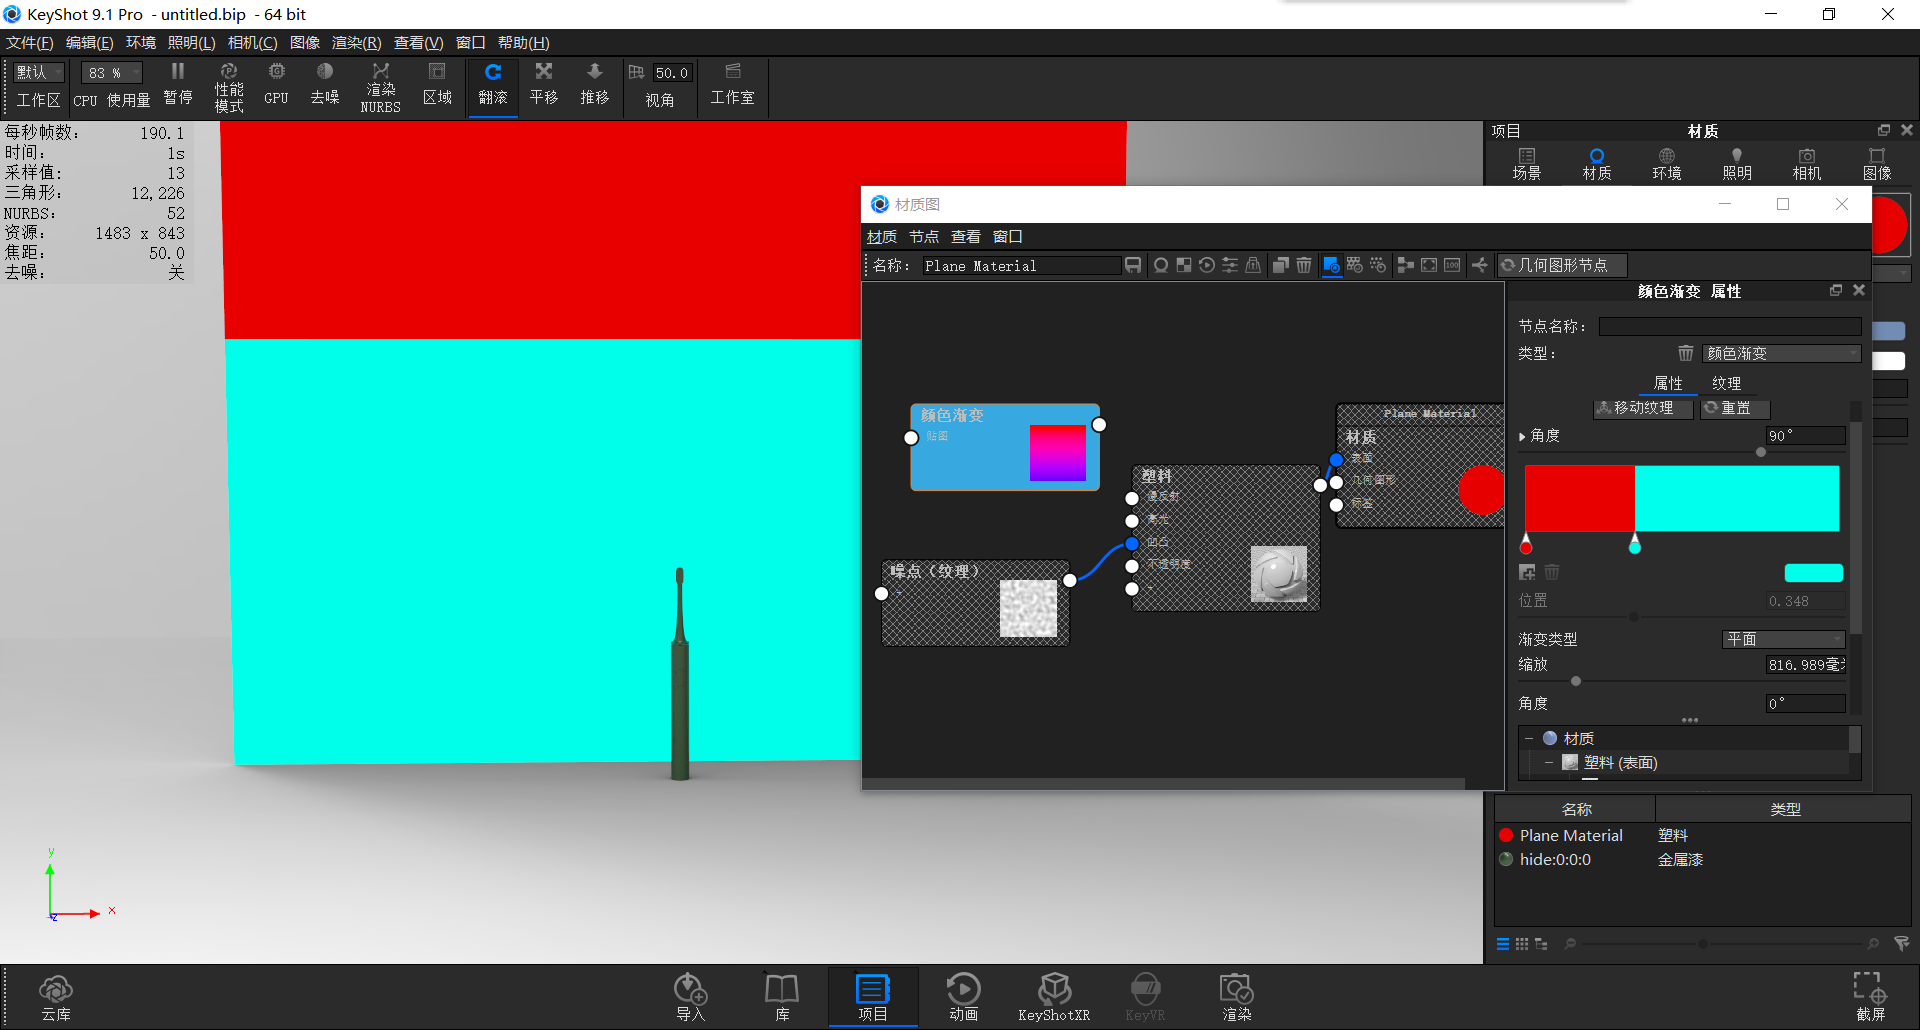
Then we press the C key to preview and adjust the gradient to the appropriate position
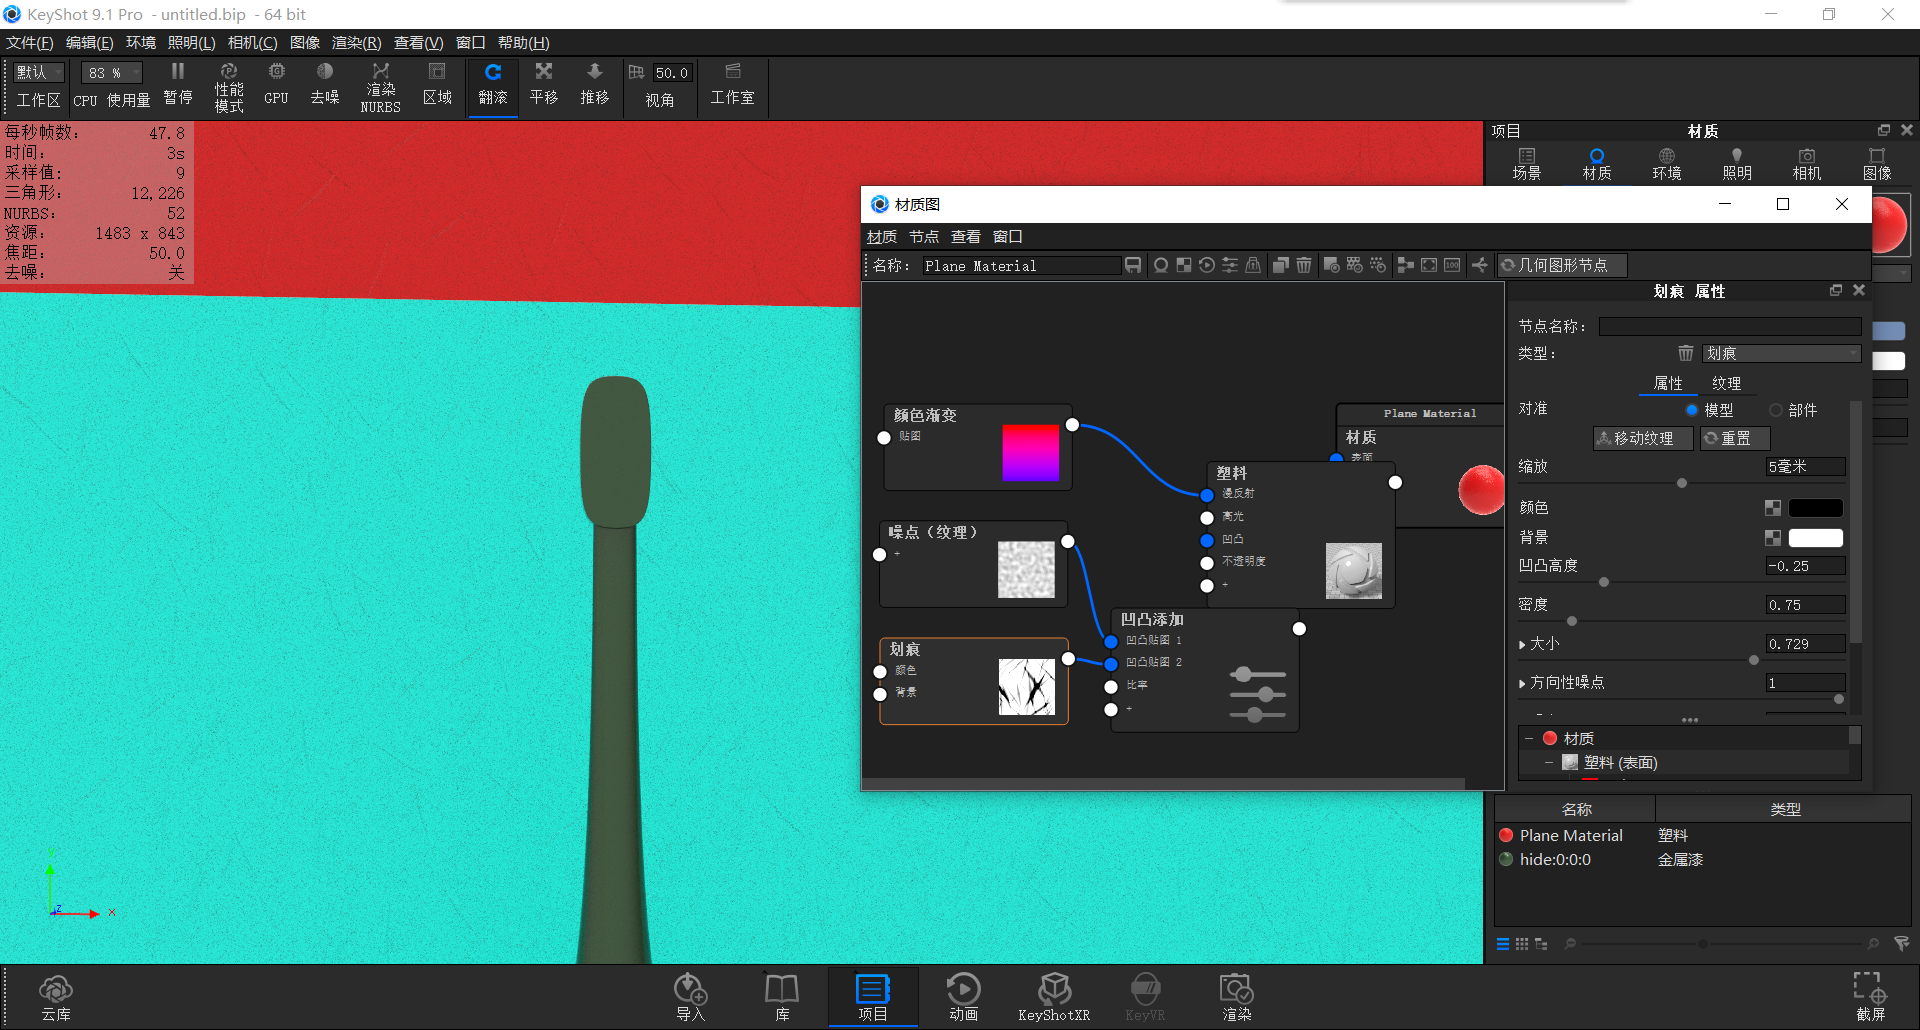
We add a system's own scratch texture and bump add utility, and link the scratches and noise to the bump added nodes, and adjust the density of the scratches and the height of the bump (by feeling)
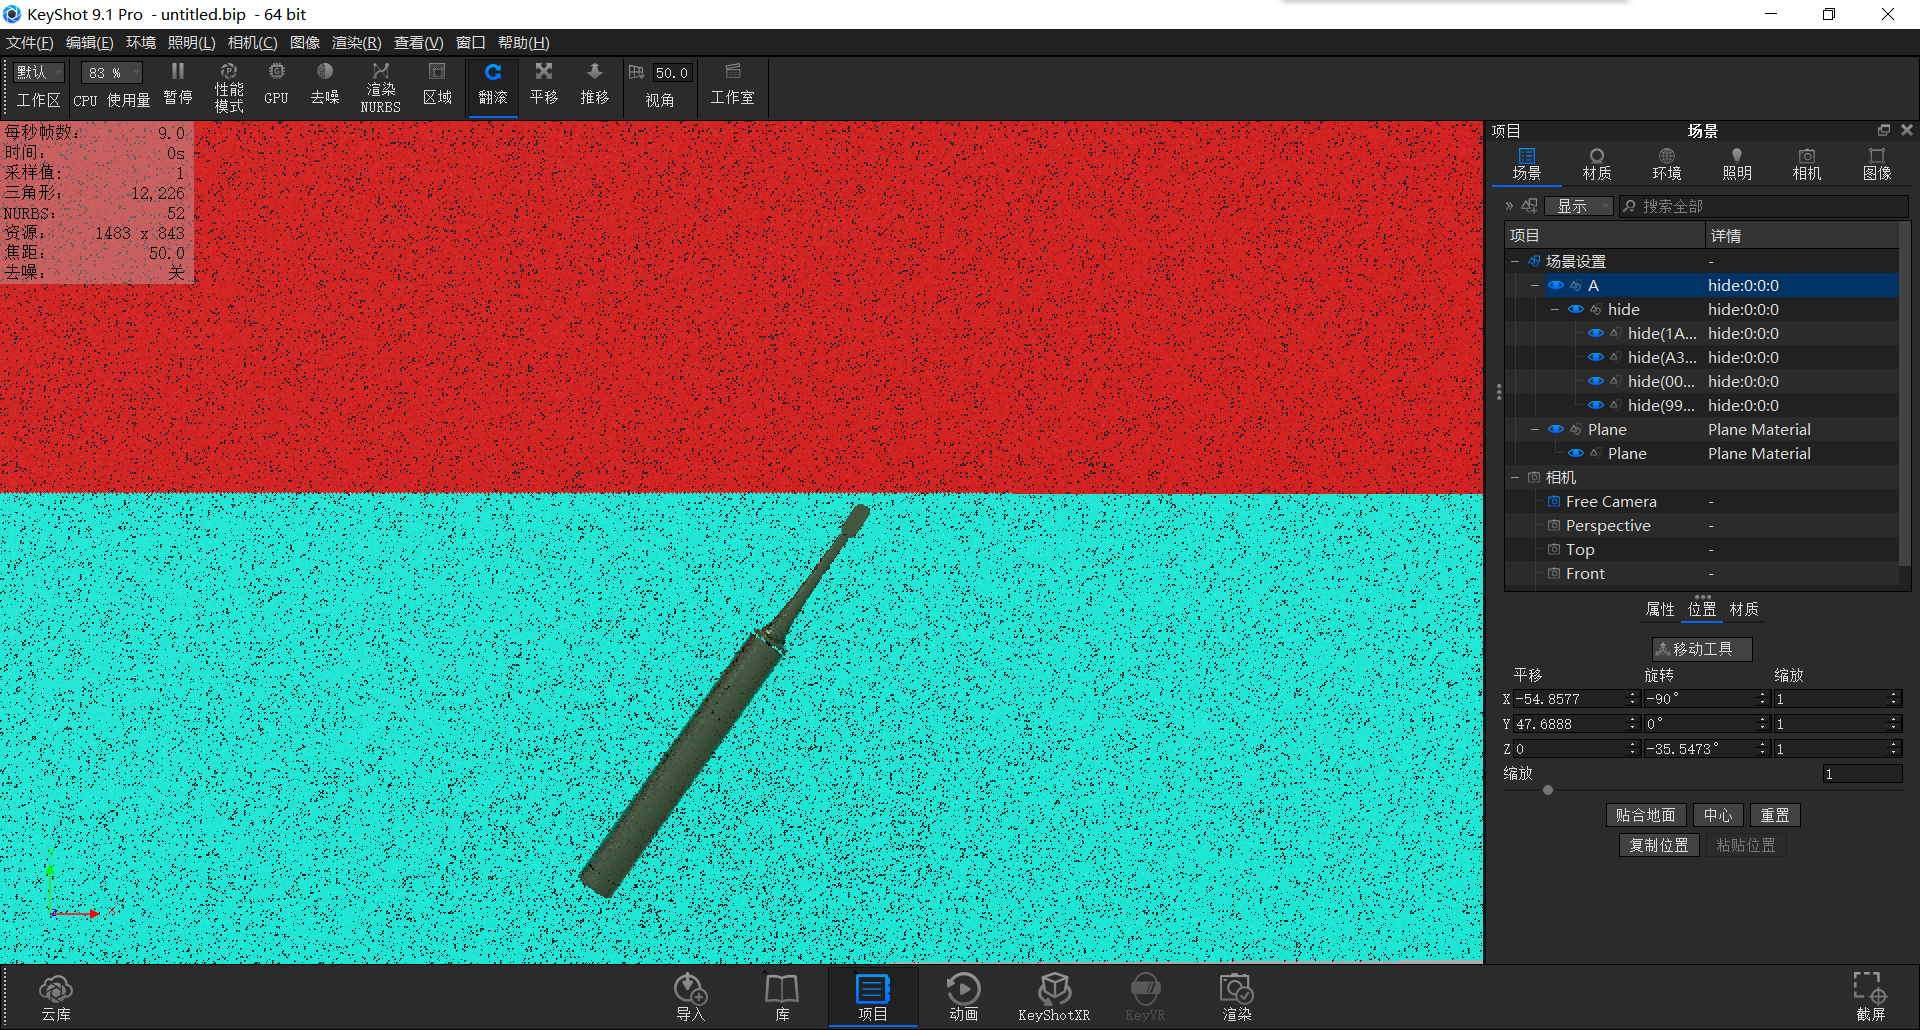
After roughly adjusting, we open the scene menu, select the electric toothbrush and adjust its angle.
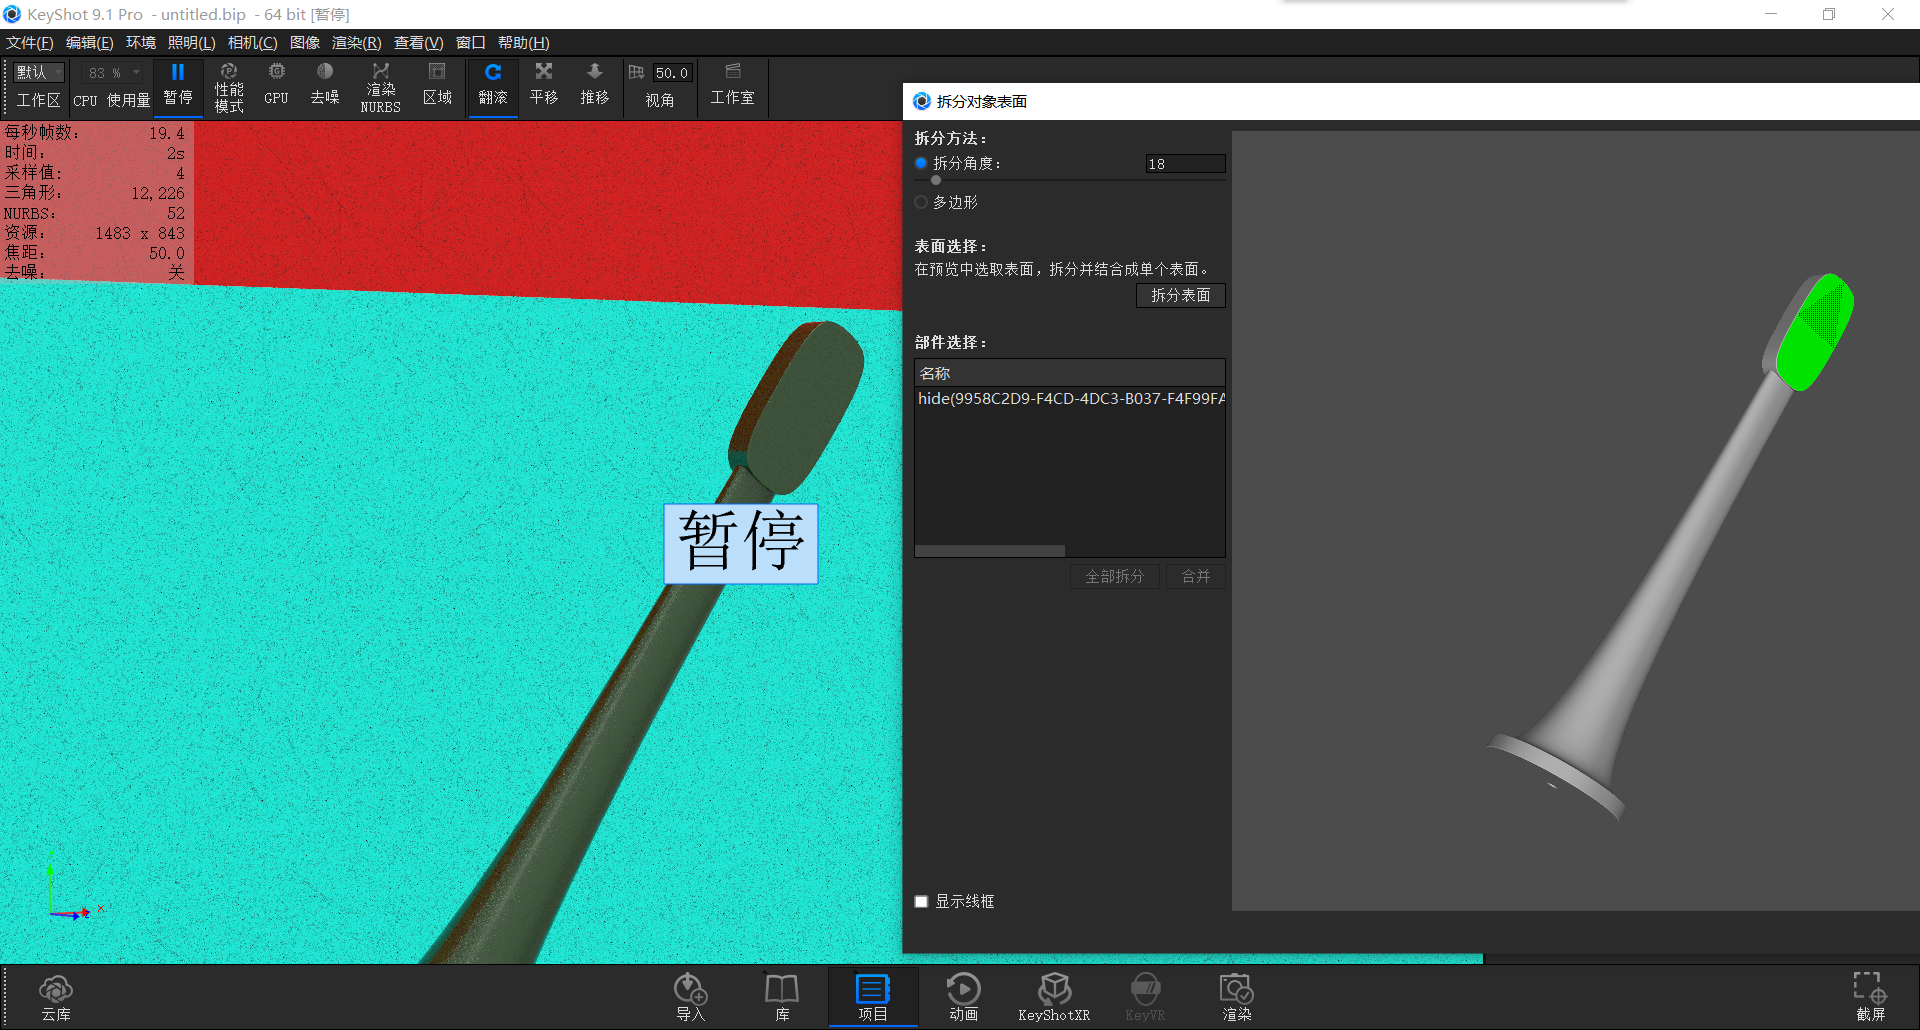
Right-click on the surface of the toothbrush head, click the split object surface button, open the menu, adjust the split angle to select only this surface
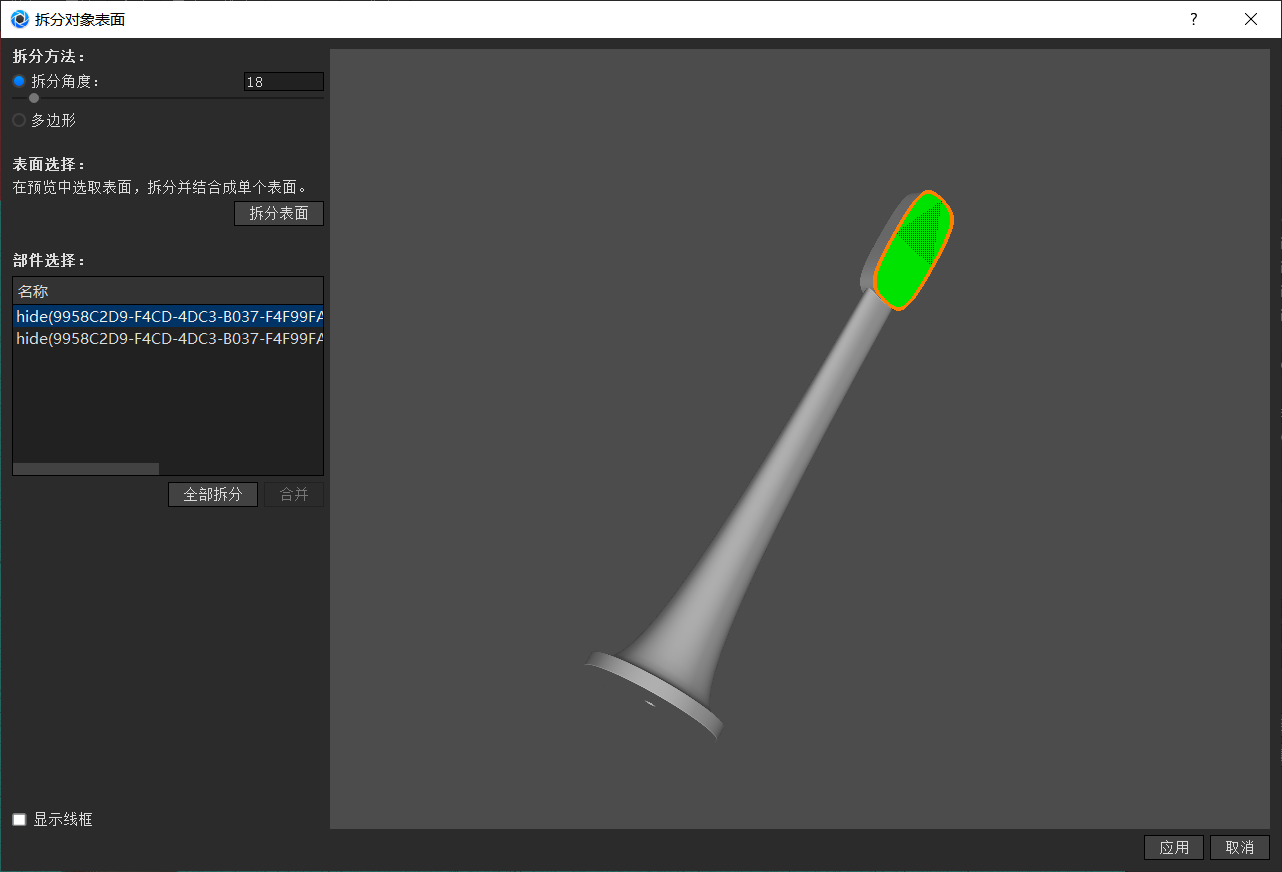
After selecting, first click on the split surface and then click on the application to complete the operation.
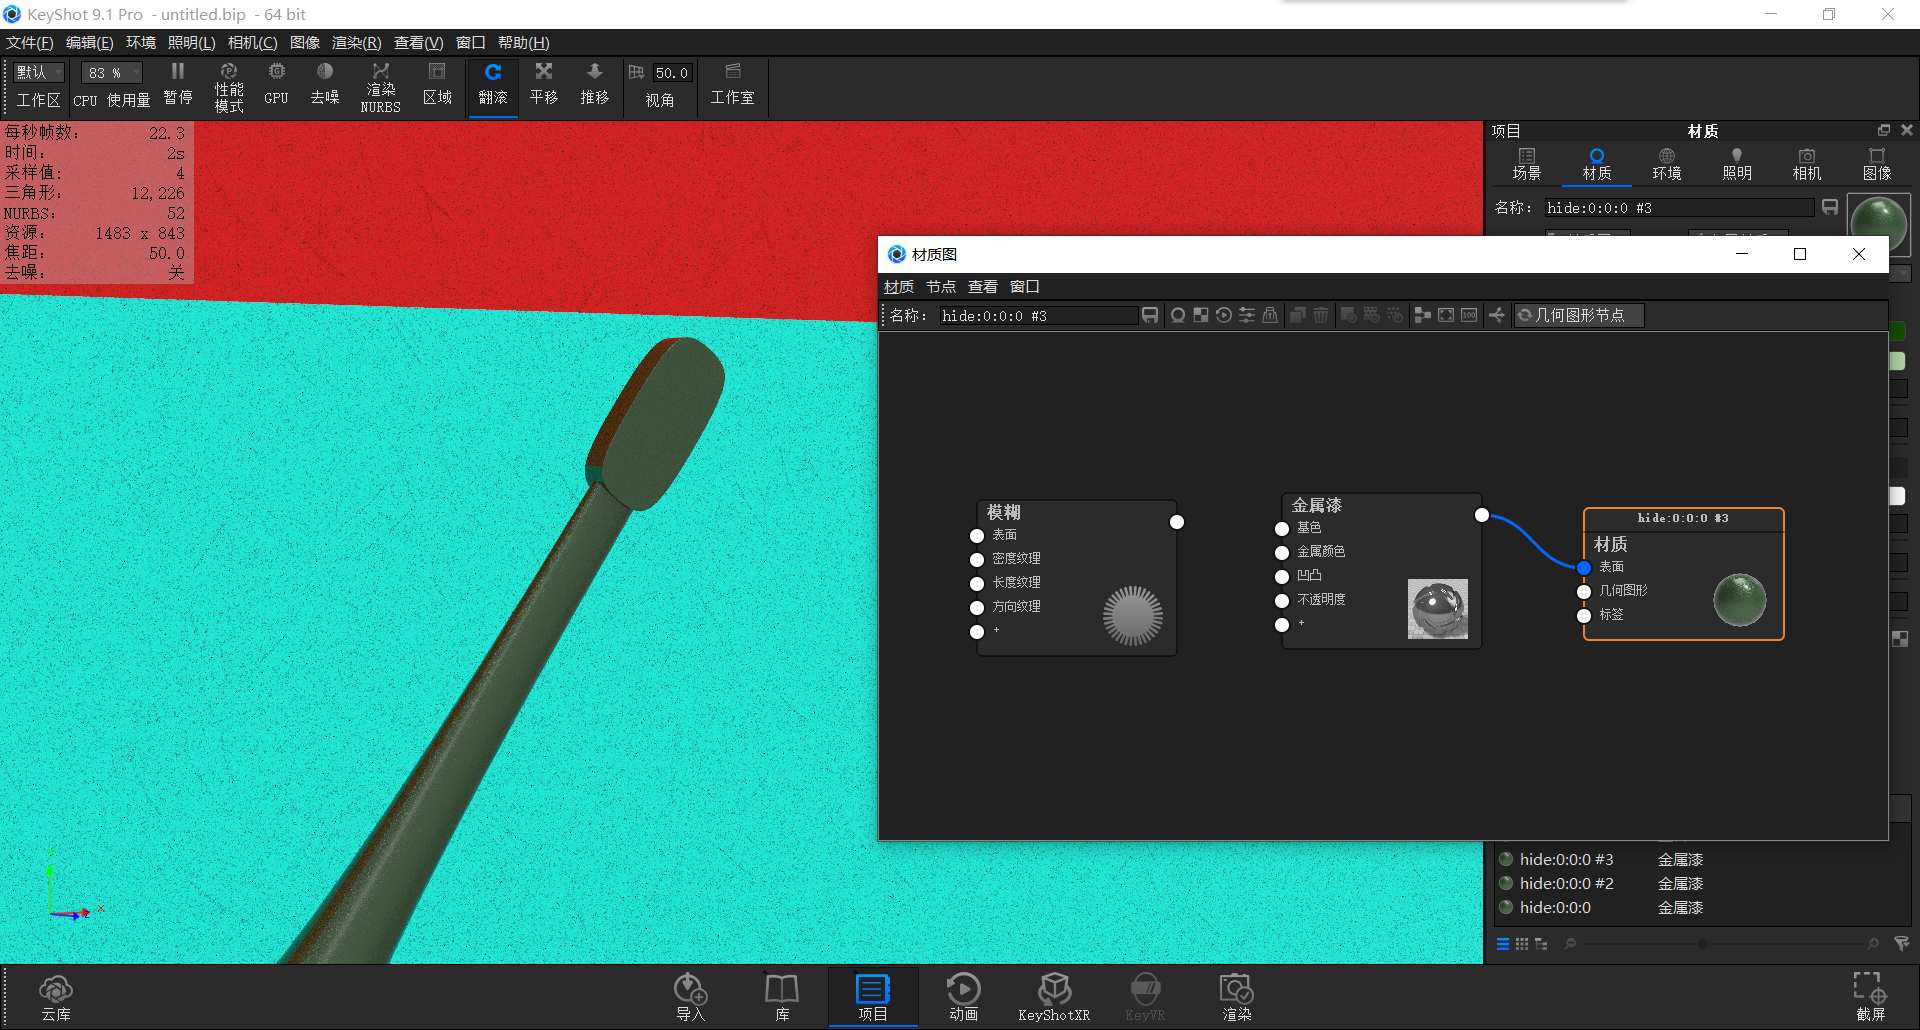
We double-click the split surface to open the material diagram and add a fuzz node from the geometry.

After linking it to the geometry and refreshing, we can see the hair replaced by the original parameter.
(Length is the length of the control hair)
(Length change is the value that controls the length change of hair fibers)
(Randomness controls the random curvature of the hair to produce the effect of miscellaneous hairs)
(Radius is the thickness of the control hair)
(Density is to control the number of hairs per unit)
(Fragments can be understood as controlling the rendering quality of fur)
(The maximum curve controls how many hairs can be in this picture, in millions, and when the value is zero, it is infinite)
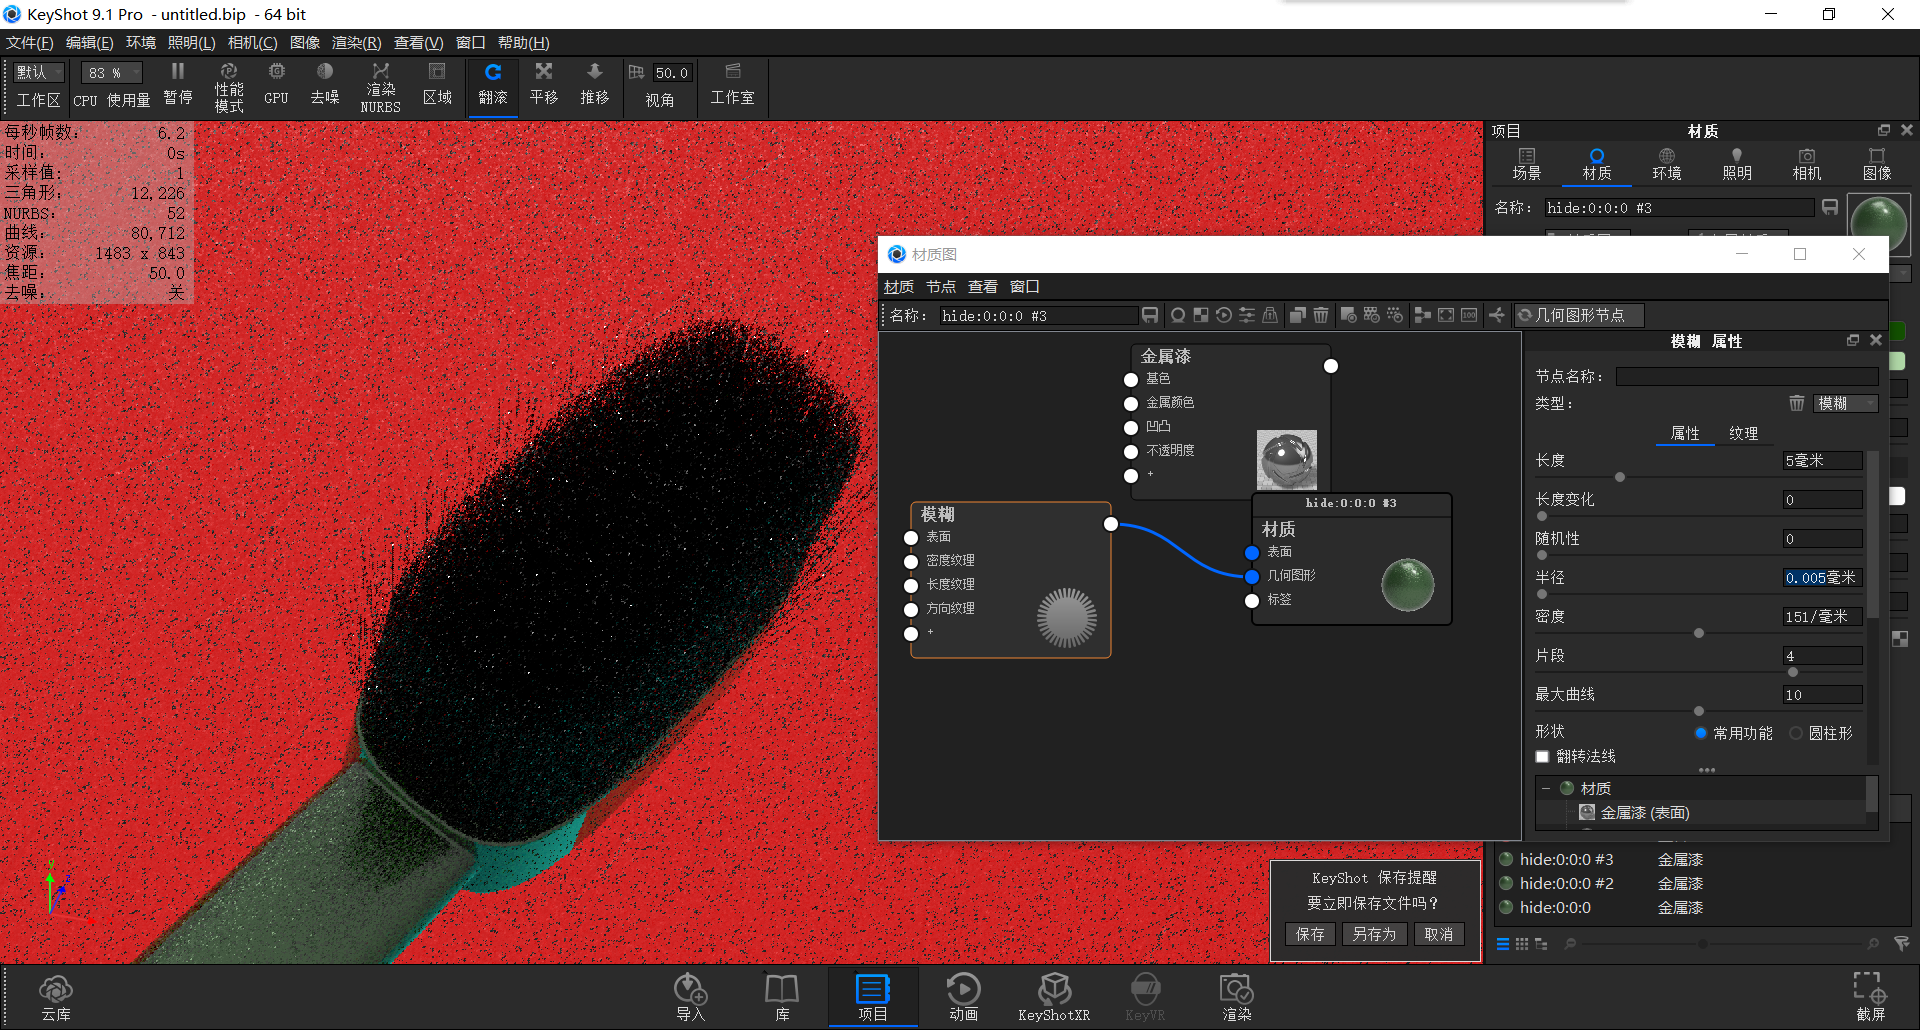
We appropriately adjust the hair parameters and refresh again.
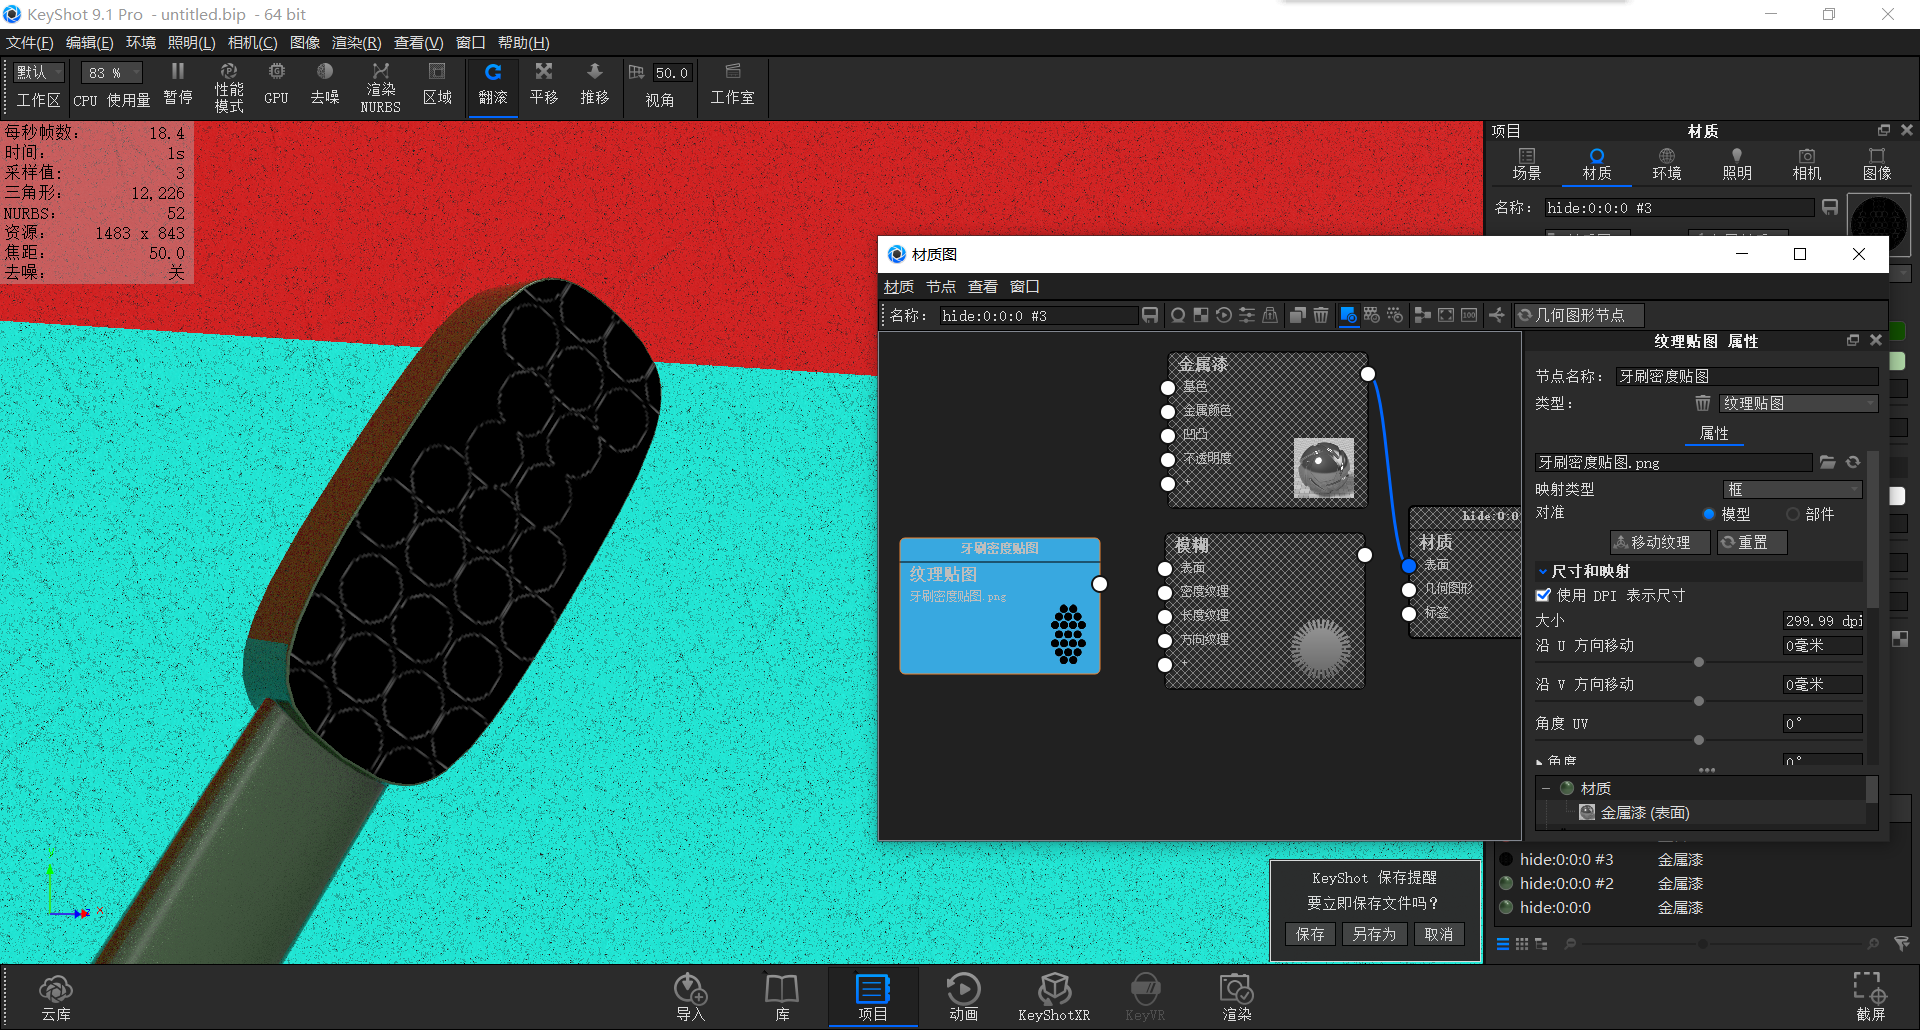
We add the toothbrush density map I made to the material map and press the C key to preview it.
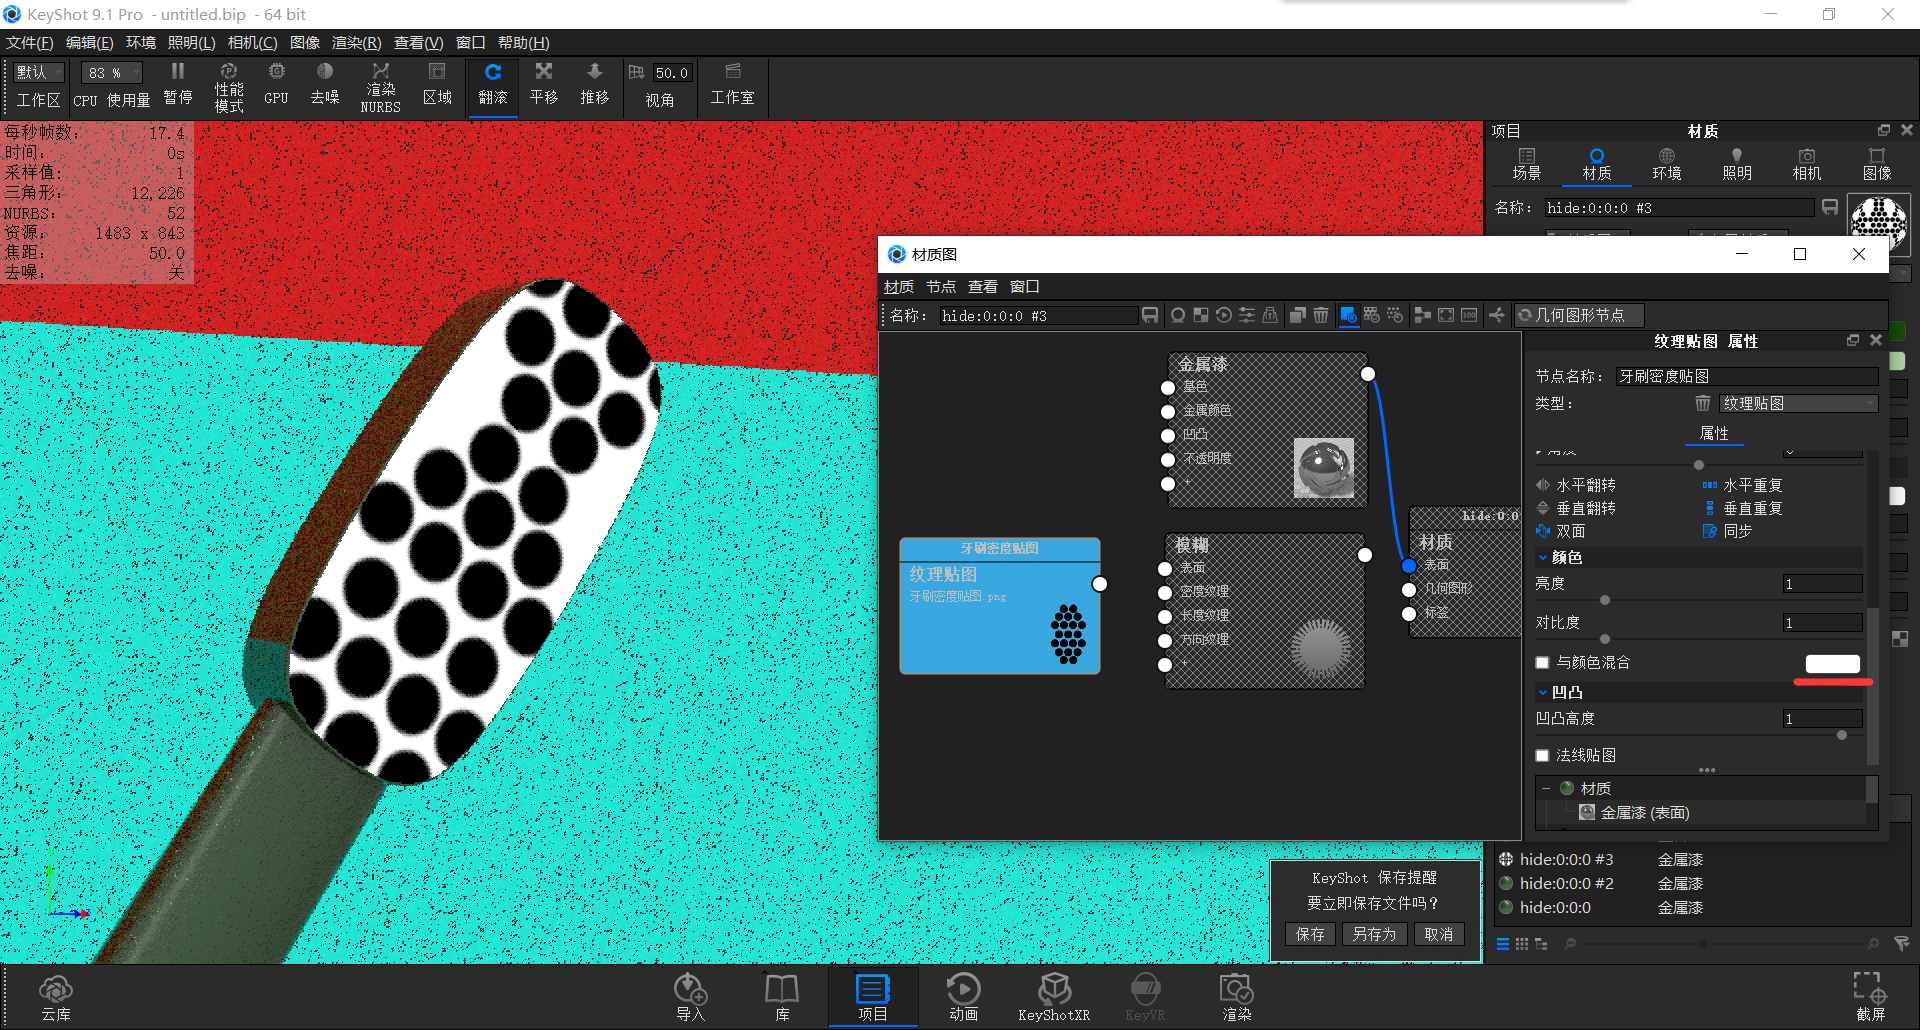
I found that the png picture I made was black, so I changed the background color at the bottom to white.
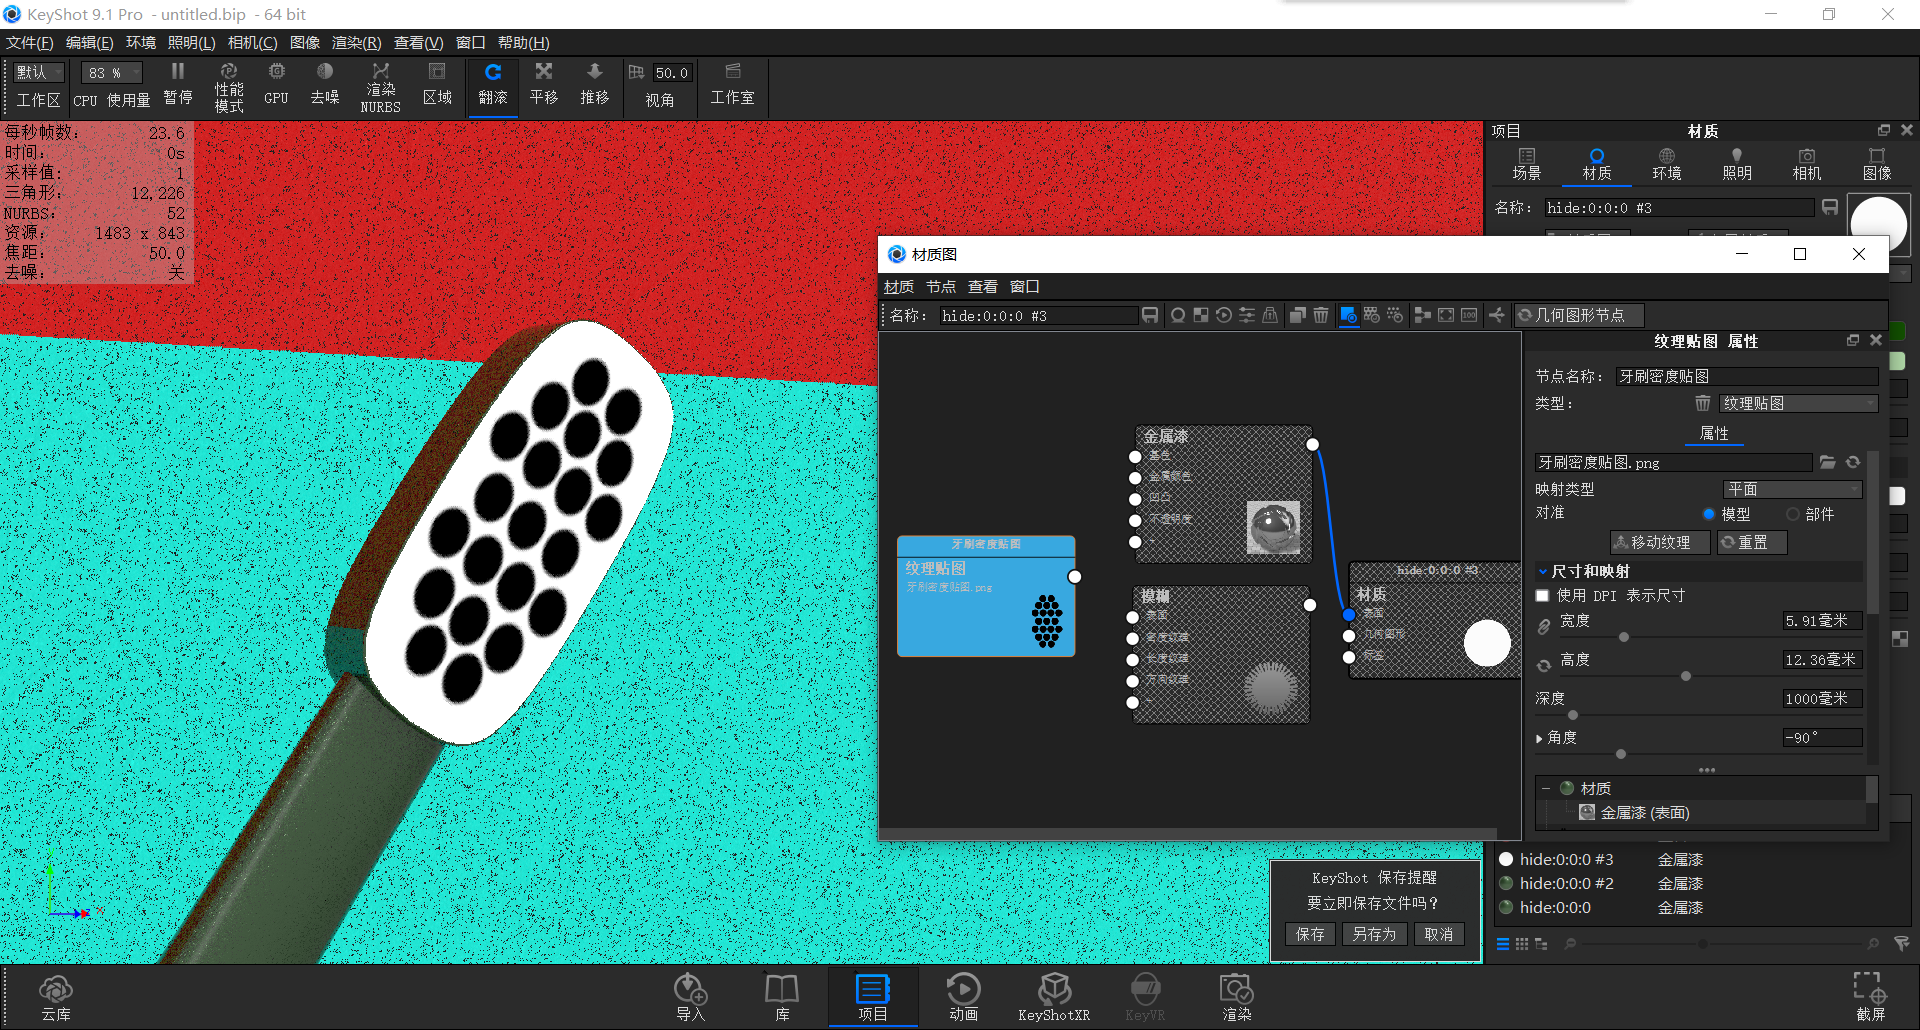
Change the map mapping mode to flat, turn off horizontal and vertical repetition, and resize appropriately
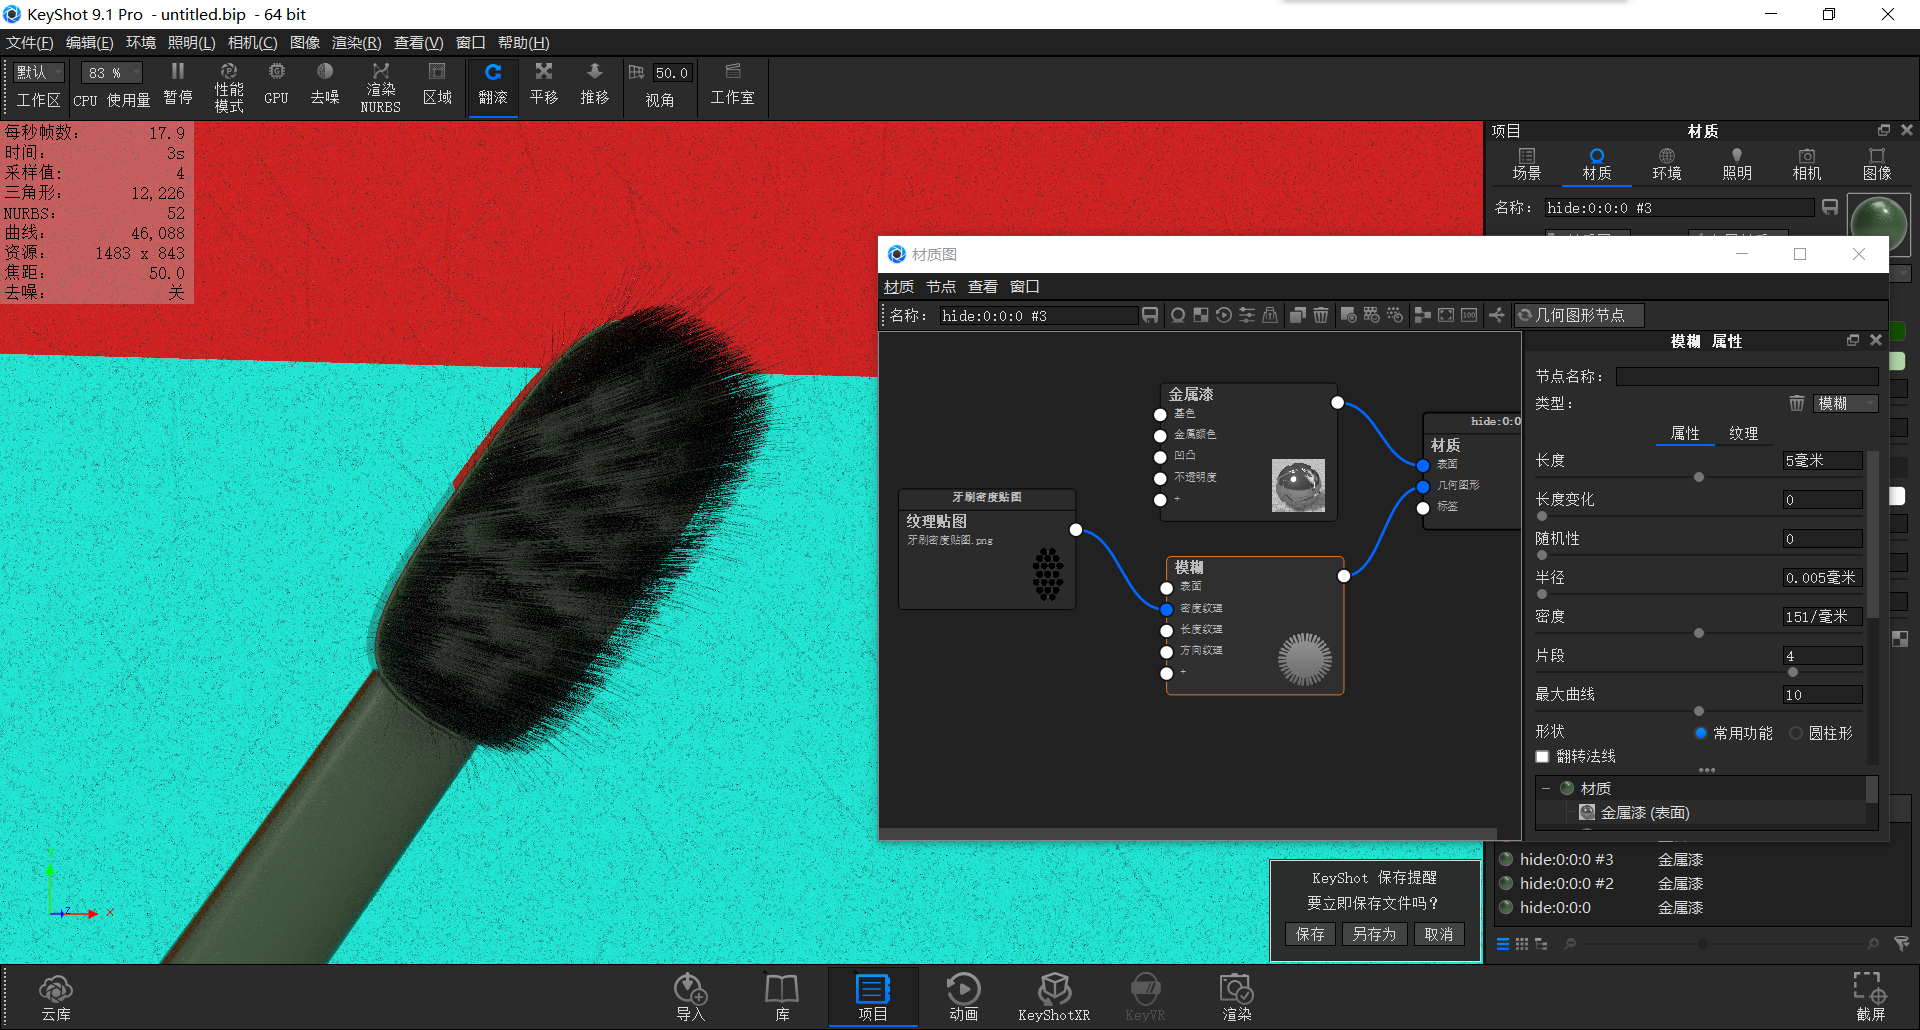
Link it to the density texture
(The density texture is controlled by the gray scale value of black and white, the number of hairs in line with the value of white, the number of hairs in black is not long, and the hair density of gray is controlled according to the gray value)
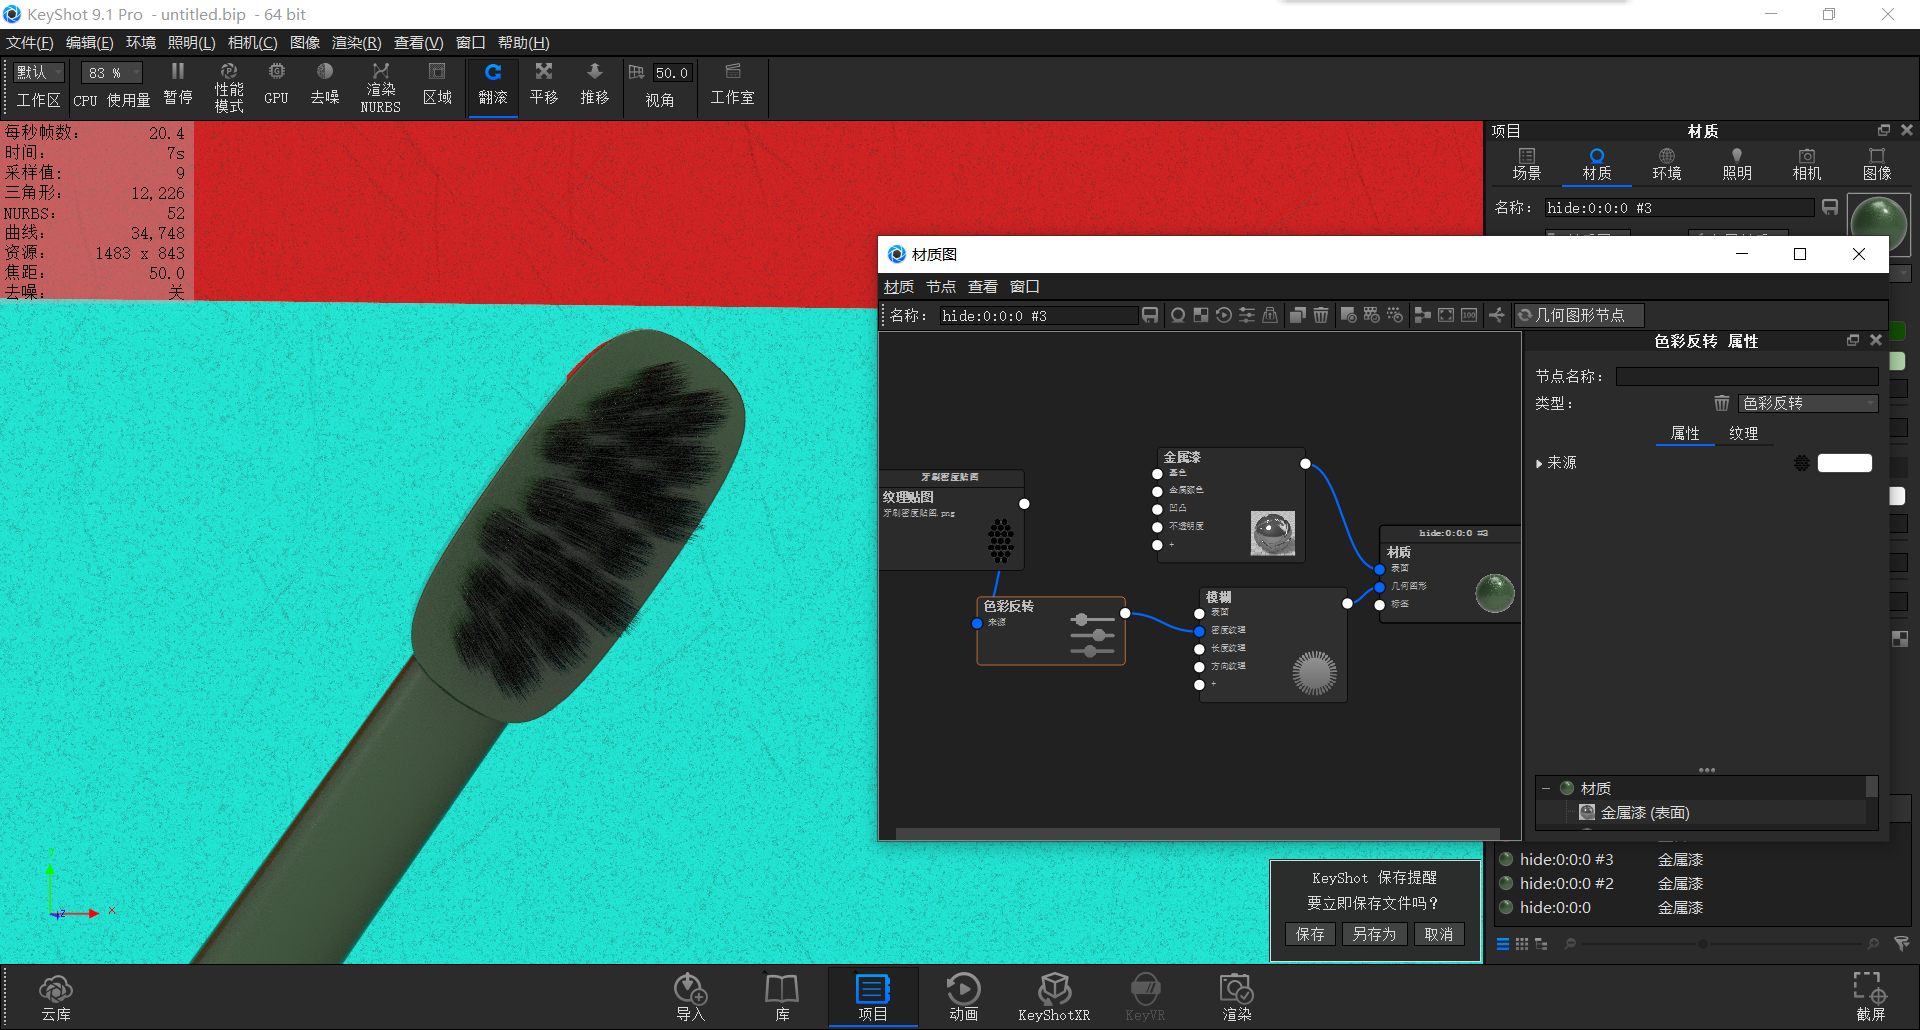
Add a color reversal in the middle to reverse black and white.
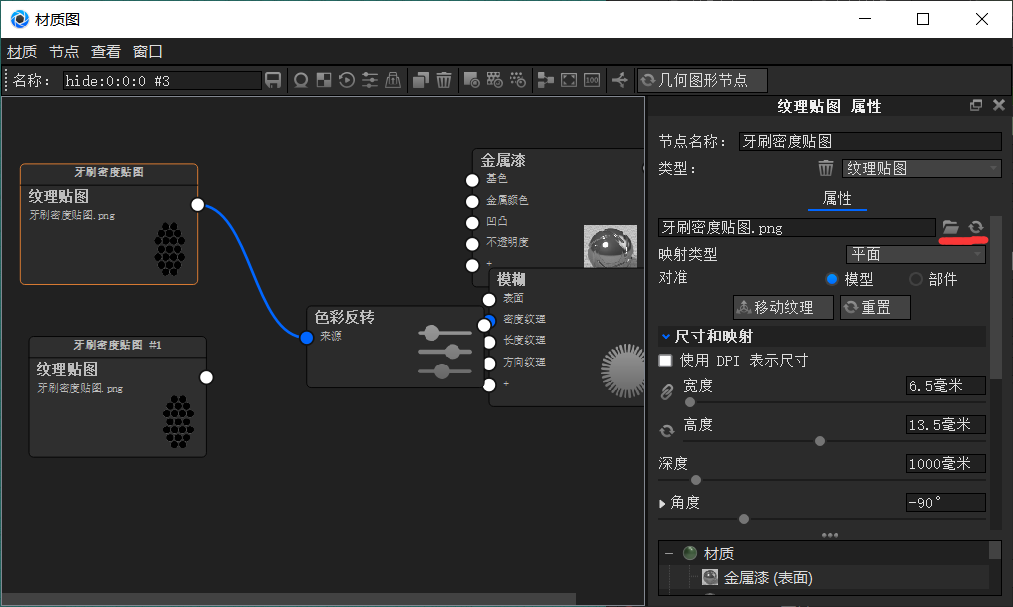
Then we copy a toothbrush density map, then open the folder at the red line and reload the toothbrush length map.
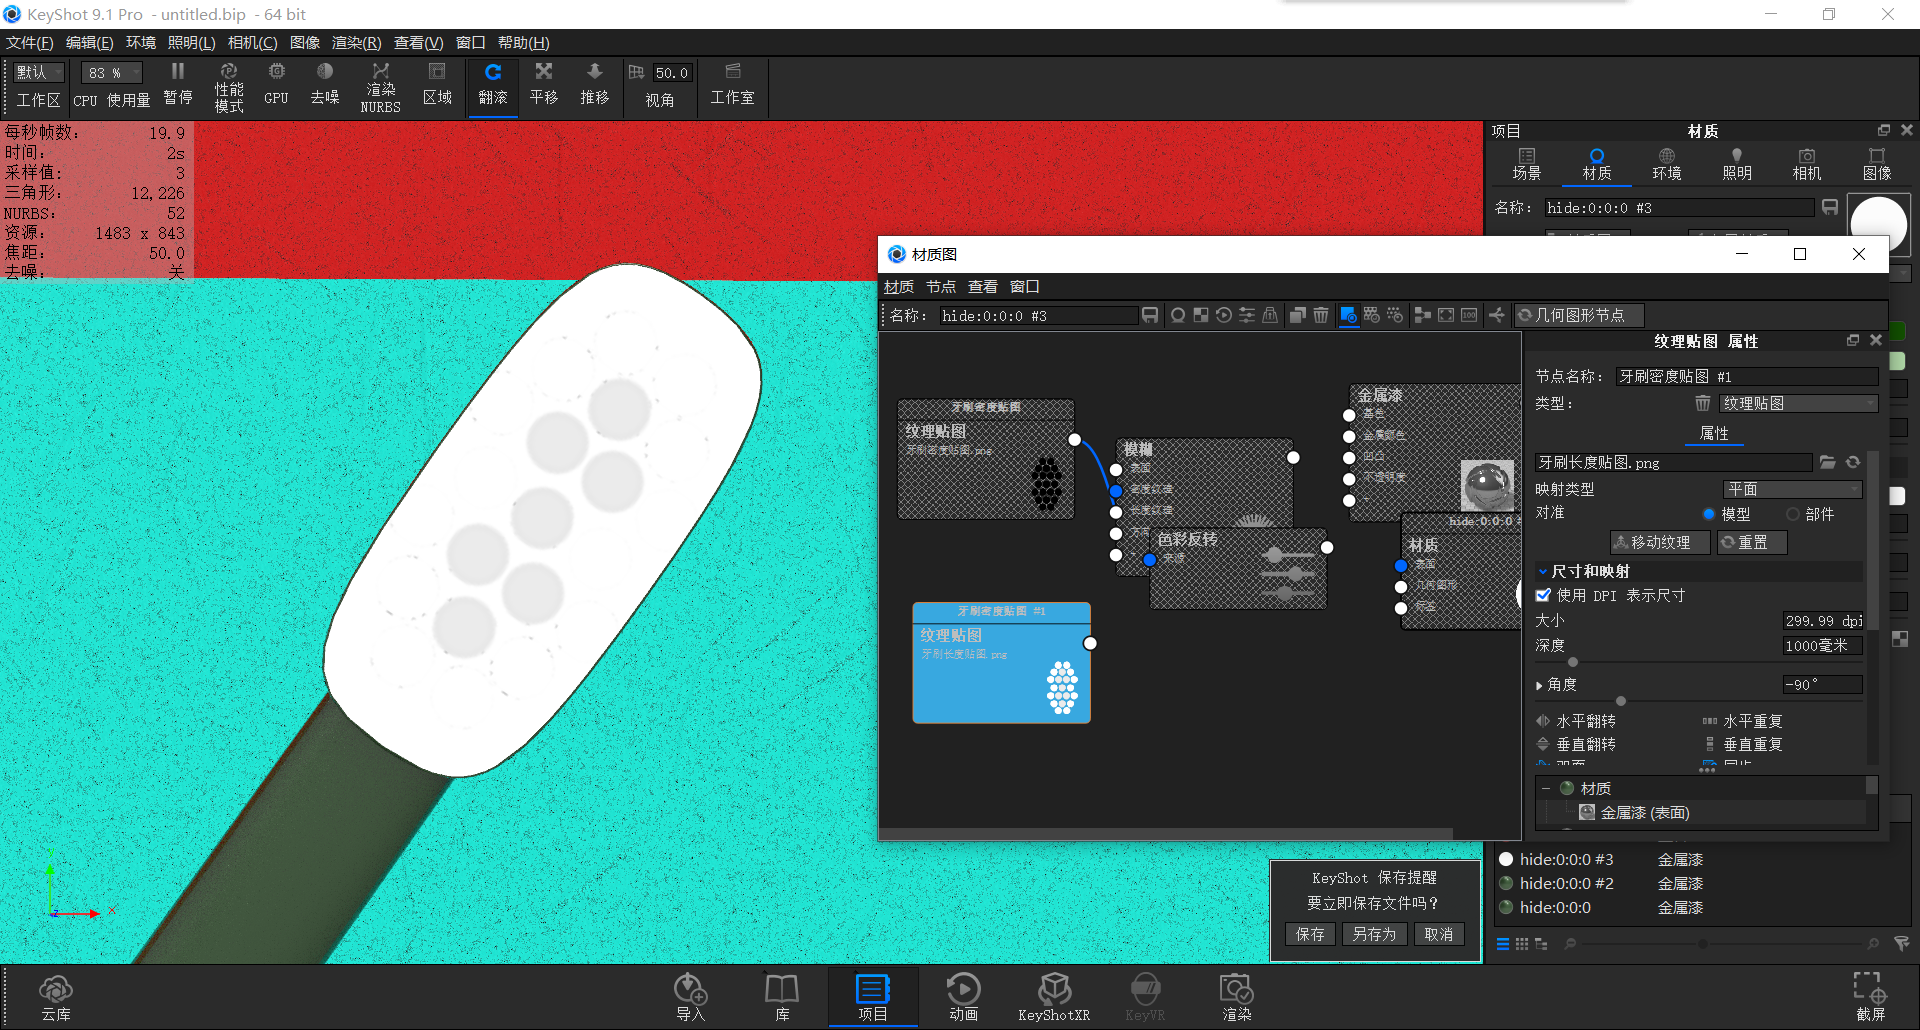
After doing so, we can find that all other parameters except the size have been copied, so we can align the position without manually.
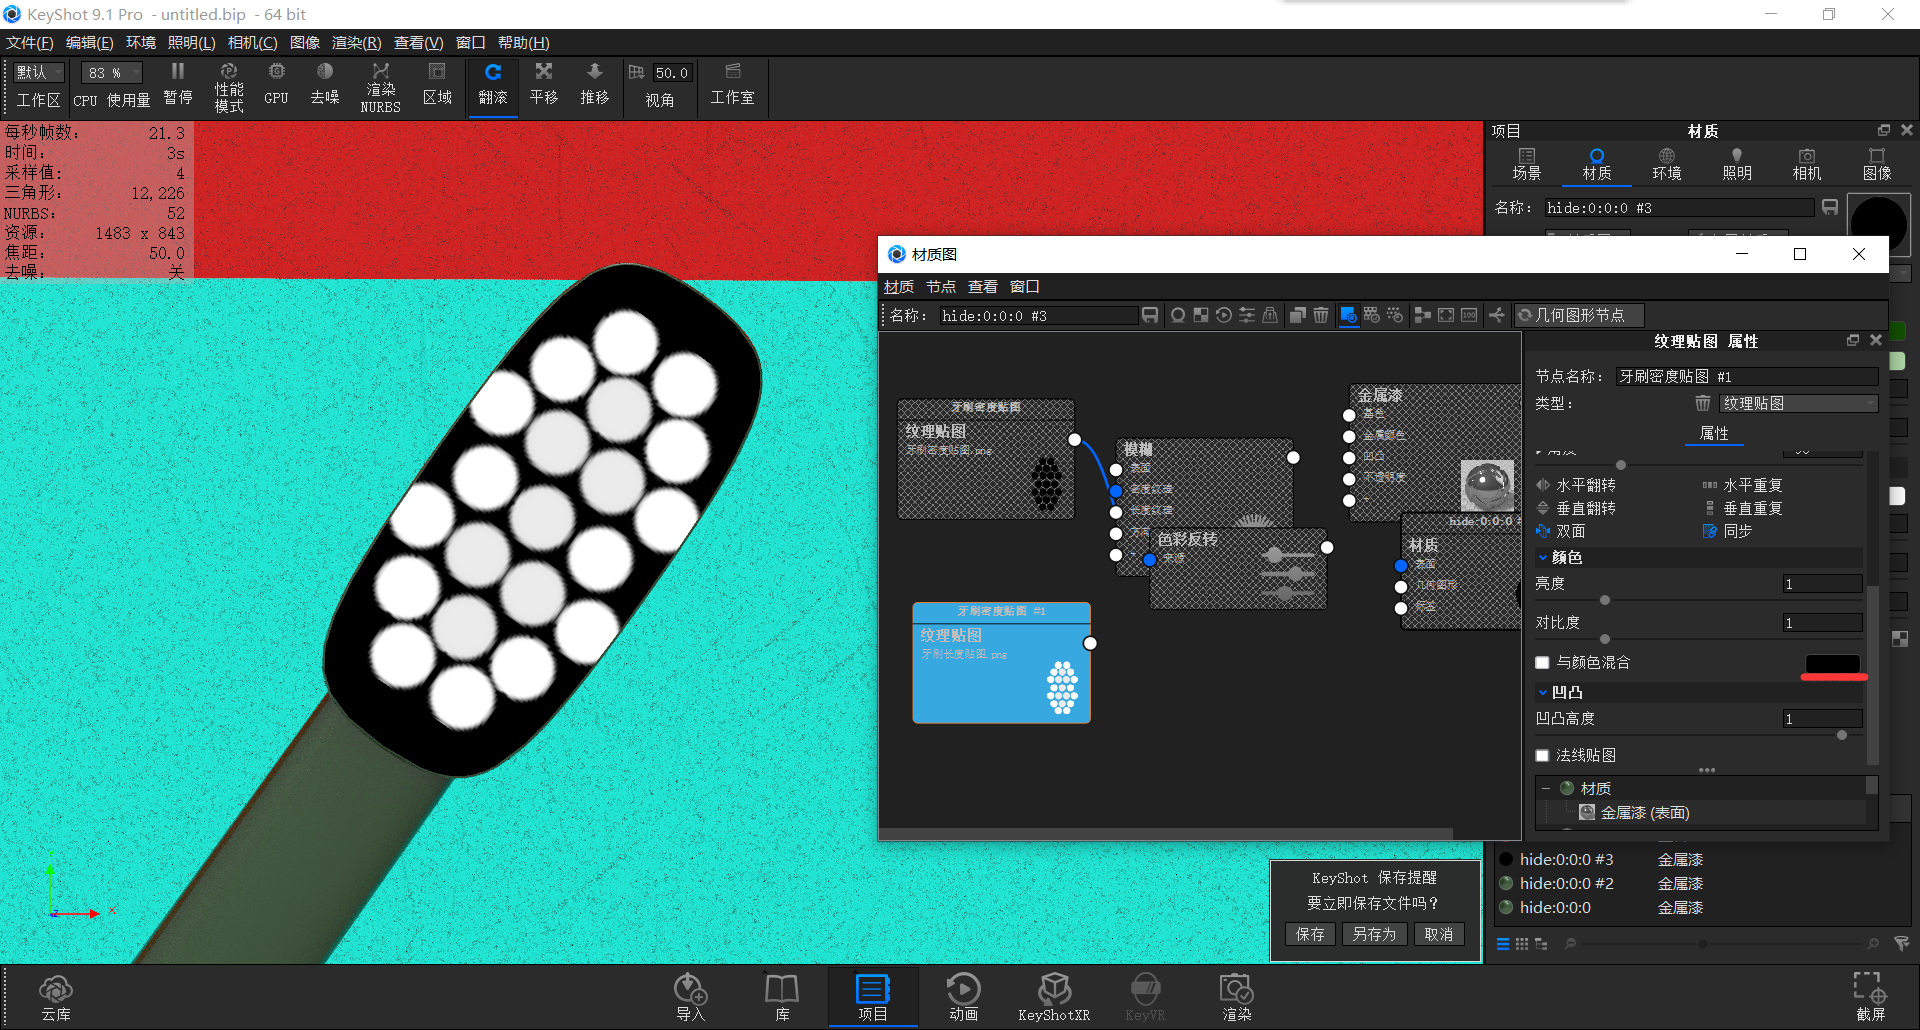
Similarly, we changed the background color to black.
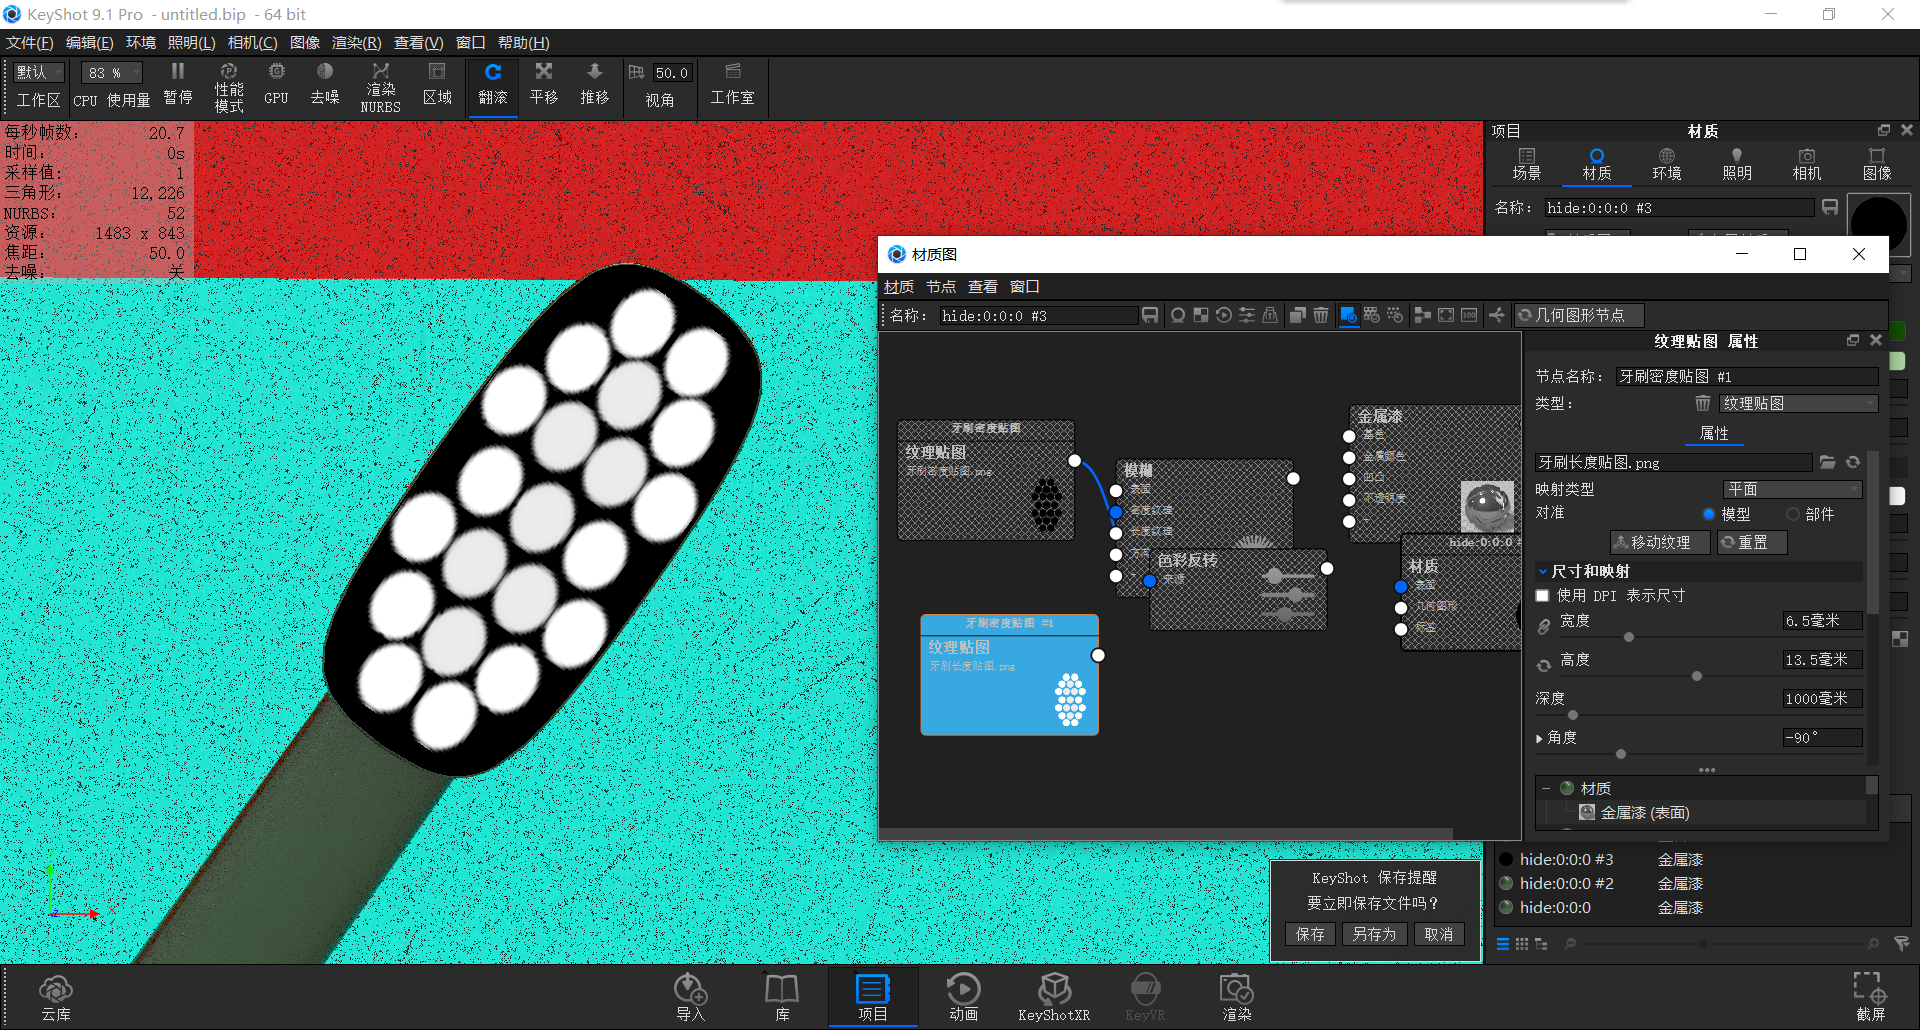
Then change the size value to the same size as the toothbrush density map

Then link it to the length texture and refresh it
(Length texture controls the length value of hair, the principle is similar to density texture, but white controls the hair and length parameters, black is 0, and gray controls the length according to the gray scale value. The closer to black, the shorter, and the closer to white, the longer)
(Directional texture controls the direction and angle of hair growth. When no mapping control is performed, hair grows in the normal direction. After control, it is controlled according to the bump map of the map, that is, the bump degree of the map is changed. He can only control the angle of hair, but he cannot control hair growth.
(Why is the direction texture controlled by the bump map? Because the bump map can change the normal direction of the surface of the object, so as to guide the hair growth, we will not repeat the more in-depth principle here, if you are interested, you can search for Du Niang)
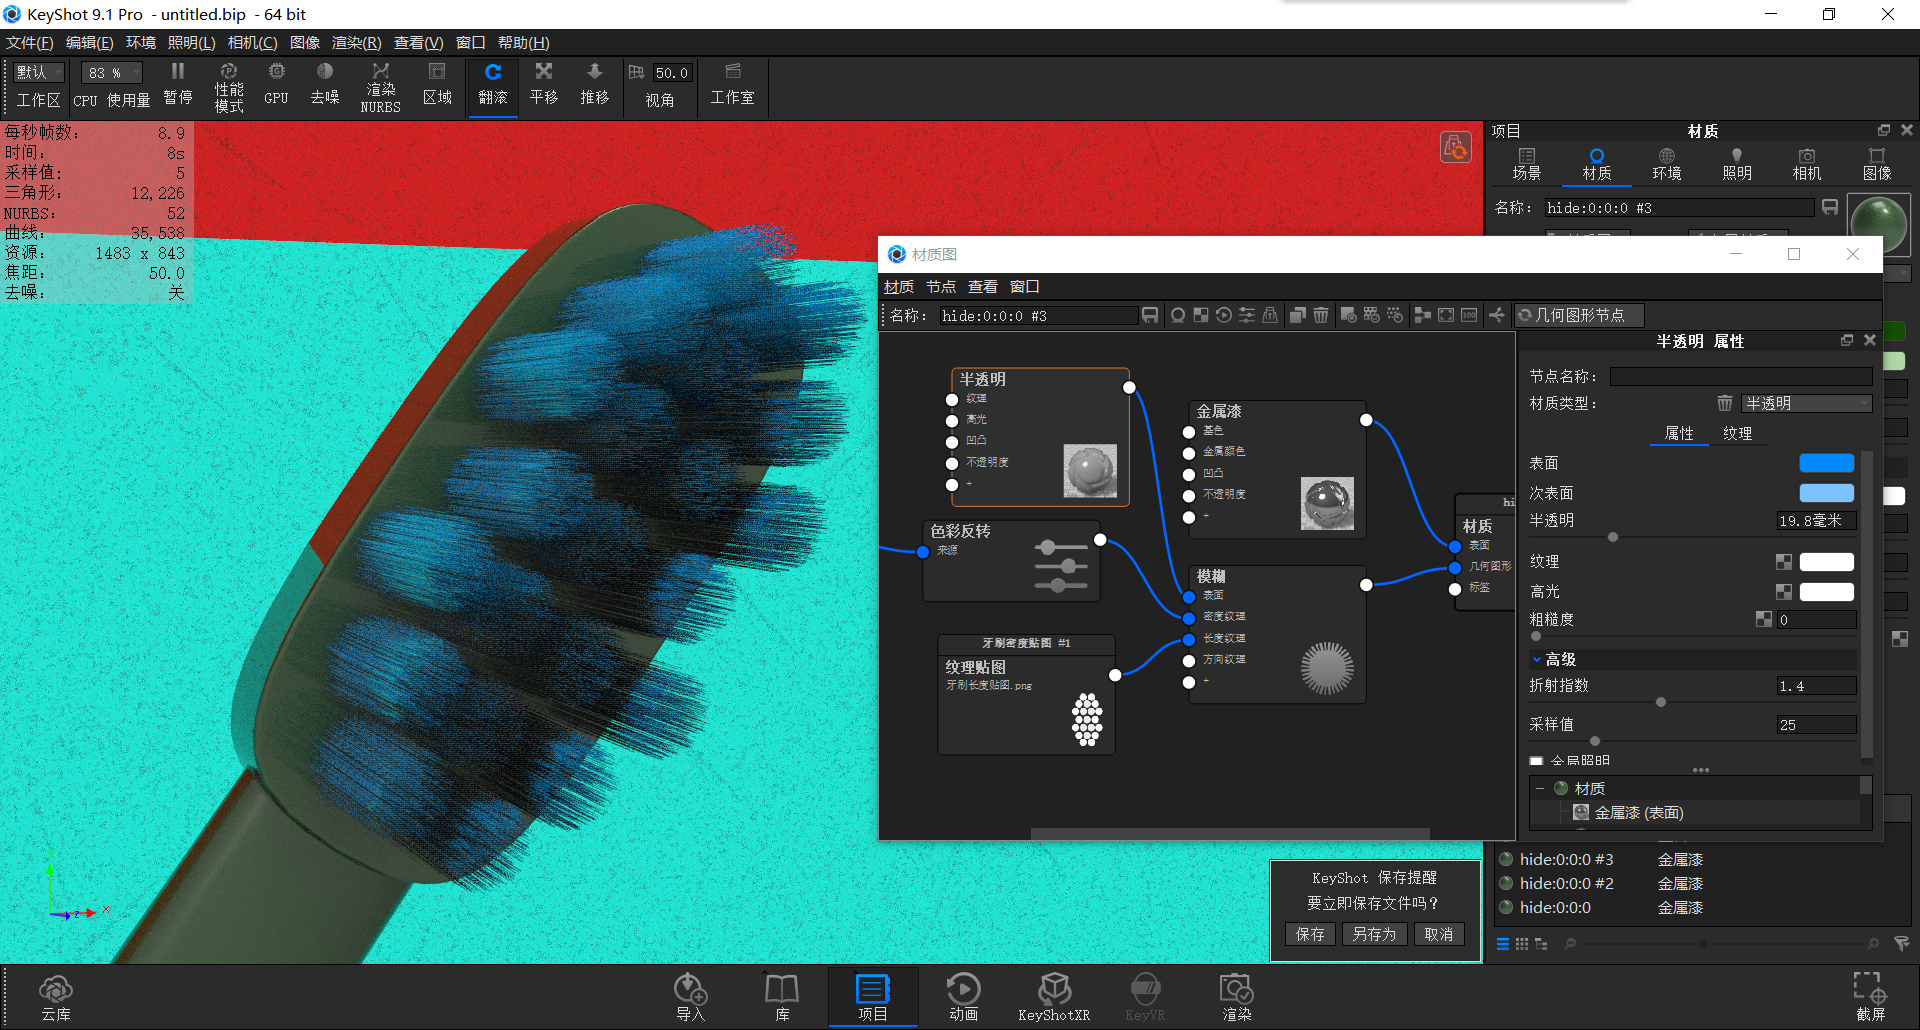
Then we add a translucent material, change the parameters by feeling or as shown in the figure, and then link it to the surface node
(What is translucent material? Translucent material is also called 3S material, such as light-transmitting leaves, illuminated fingers, jade and other light-transmitting but opaque materials, carefully observe the toothbrush hair, we can observe that it belongs to 3S material)
(The effect of making 3S materials keyshot is not very good, but the effect of OC renderer is amazing, which is also the strength of OC renderer. If I have the opportunity in the future, I will do a separate tutorial to discuss 3S materials, which will not be repeated here.)
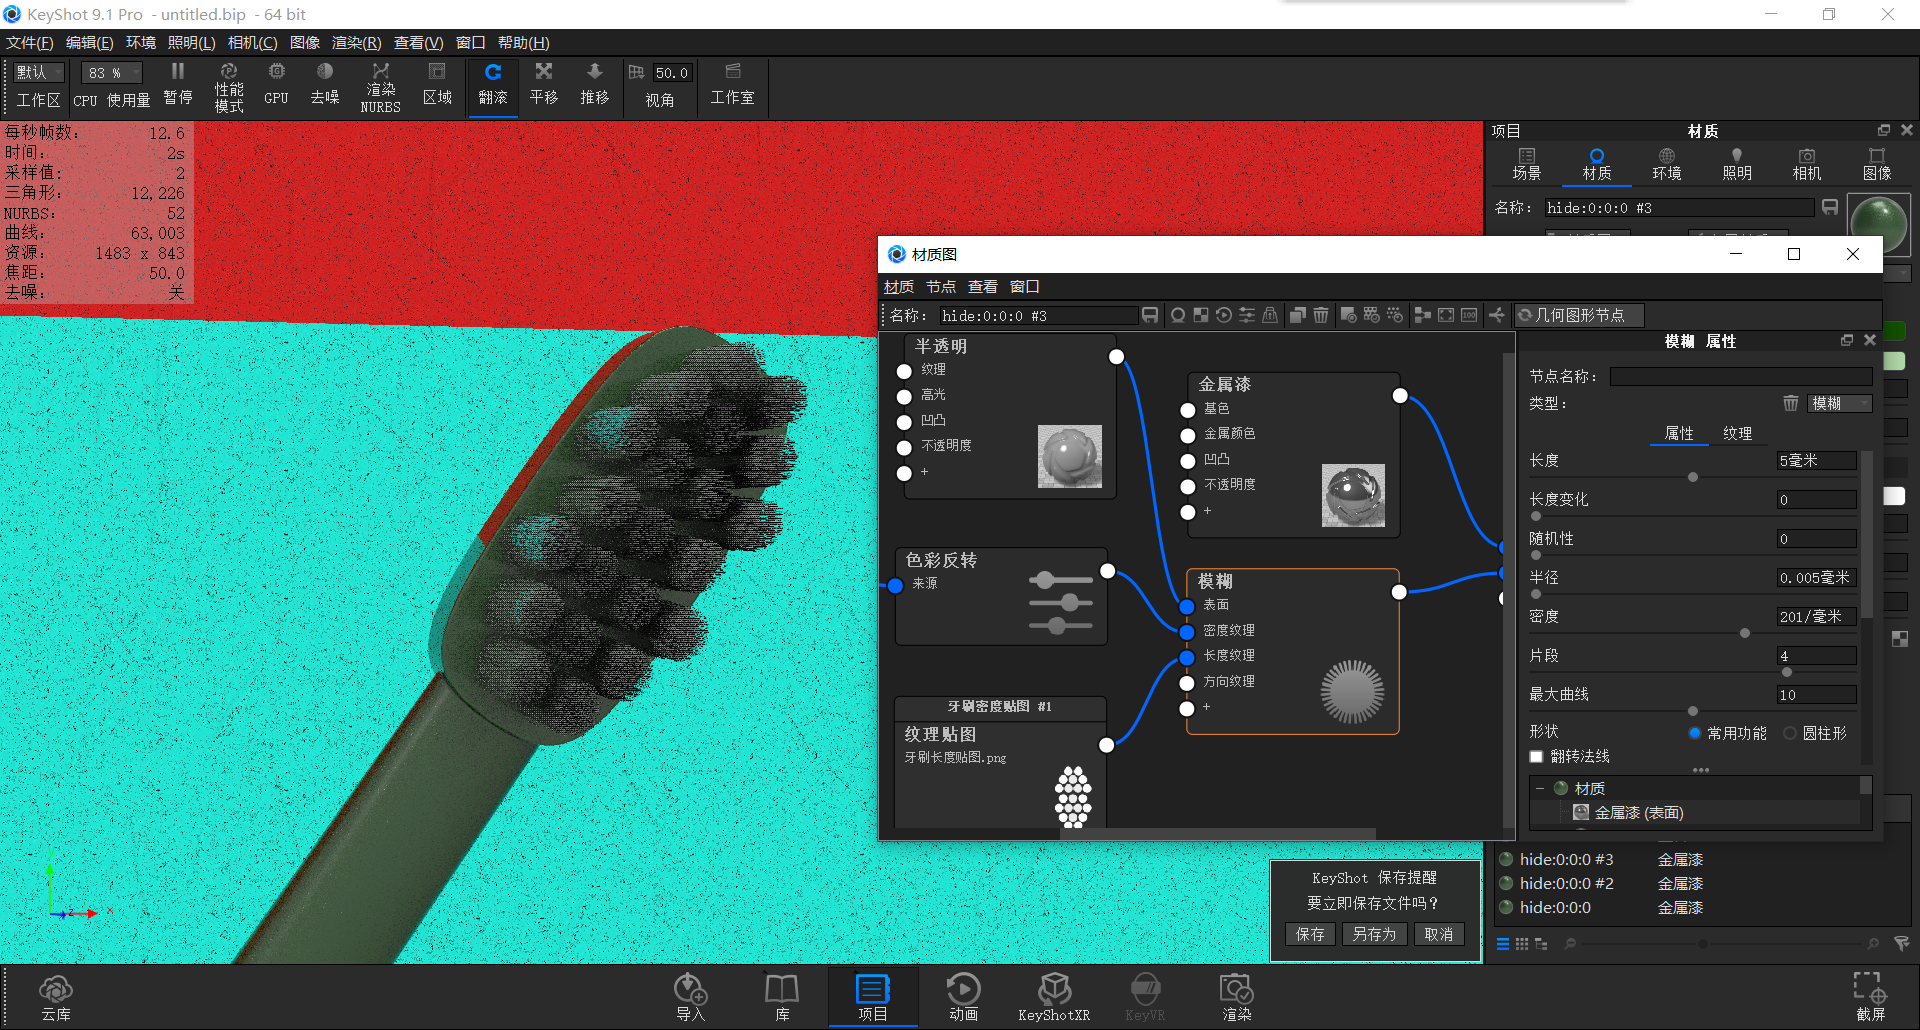
Then we fine-tune the parameters of the fuzzy node again to make the effect more in line with expectations, and here we can clearly see that the middle piece is concave because it is affected by the length texture map.
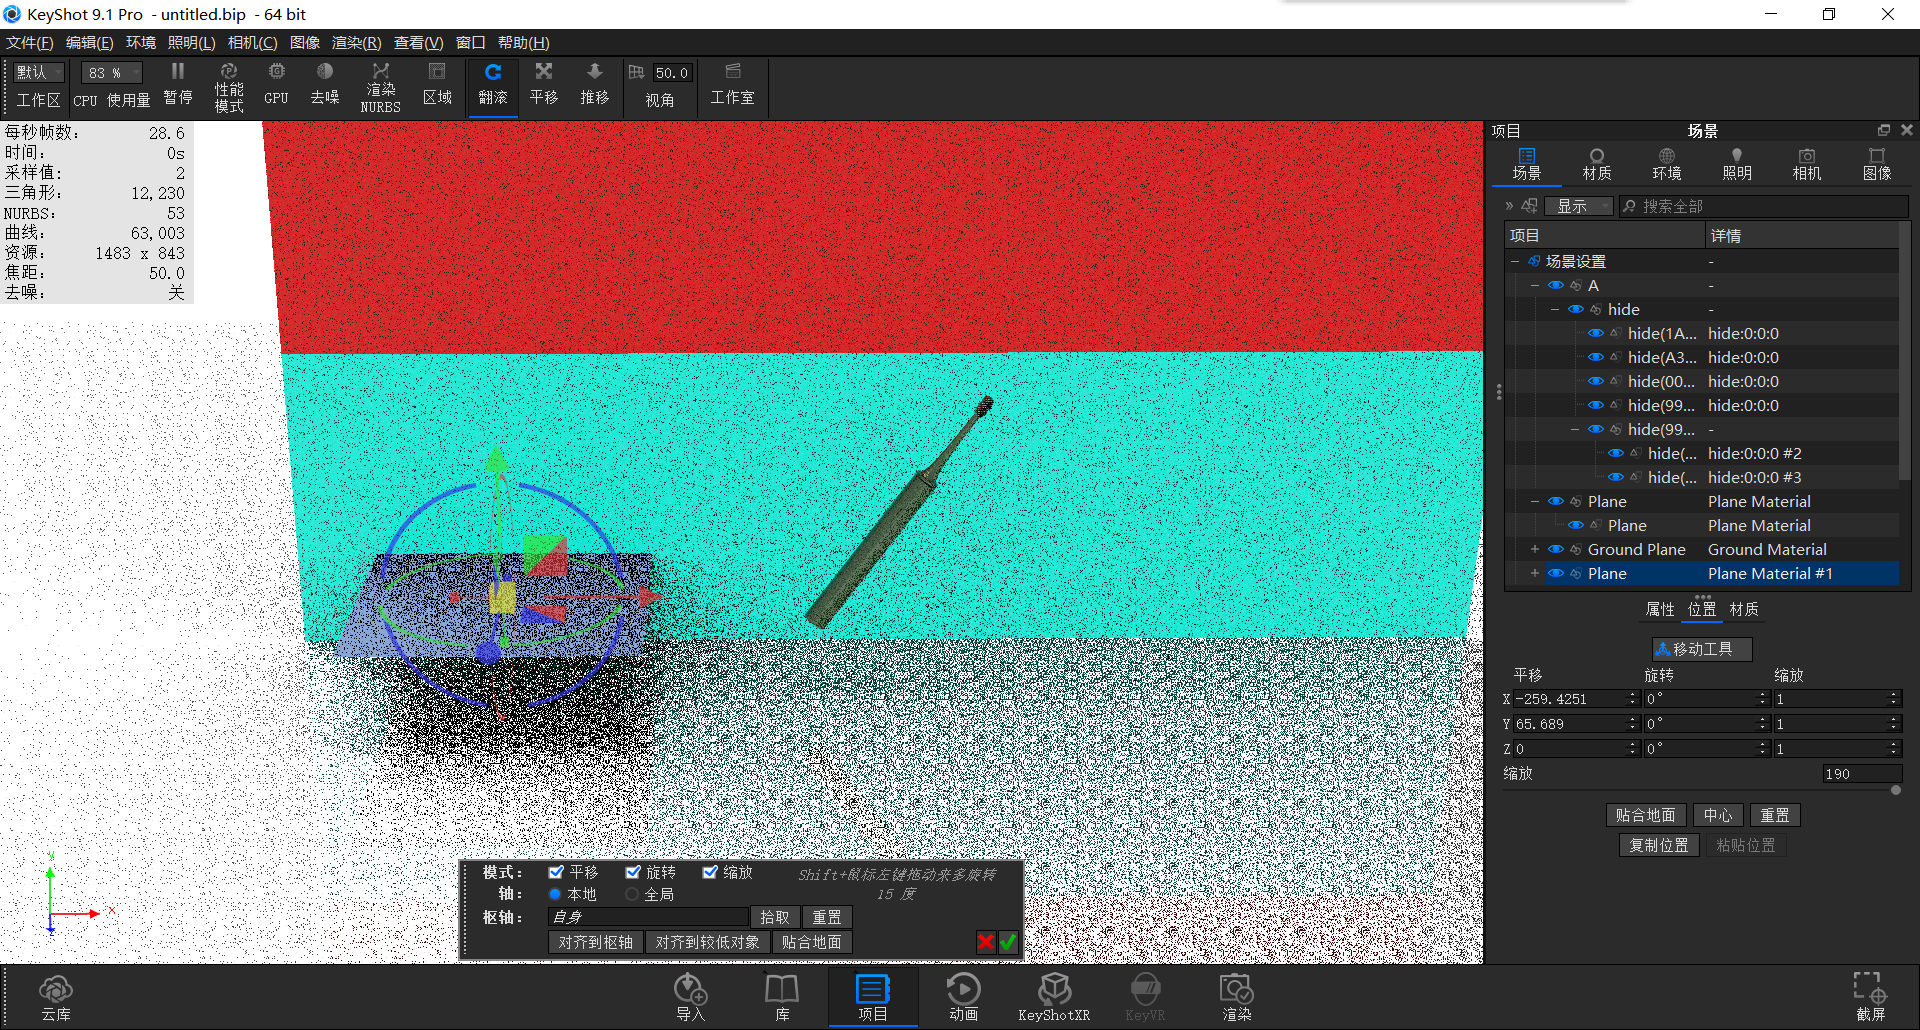
We press ctrl 7 to add a plane again, then press ctrl g to add a ground and change the ground material to plastic
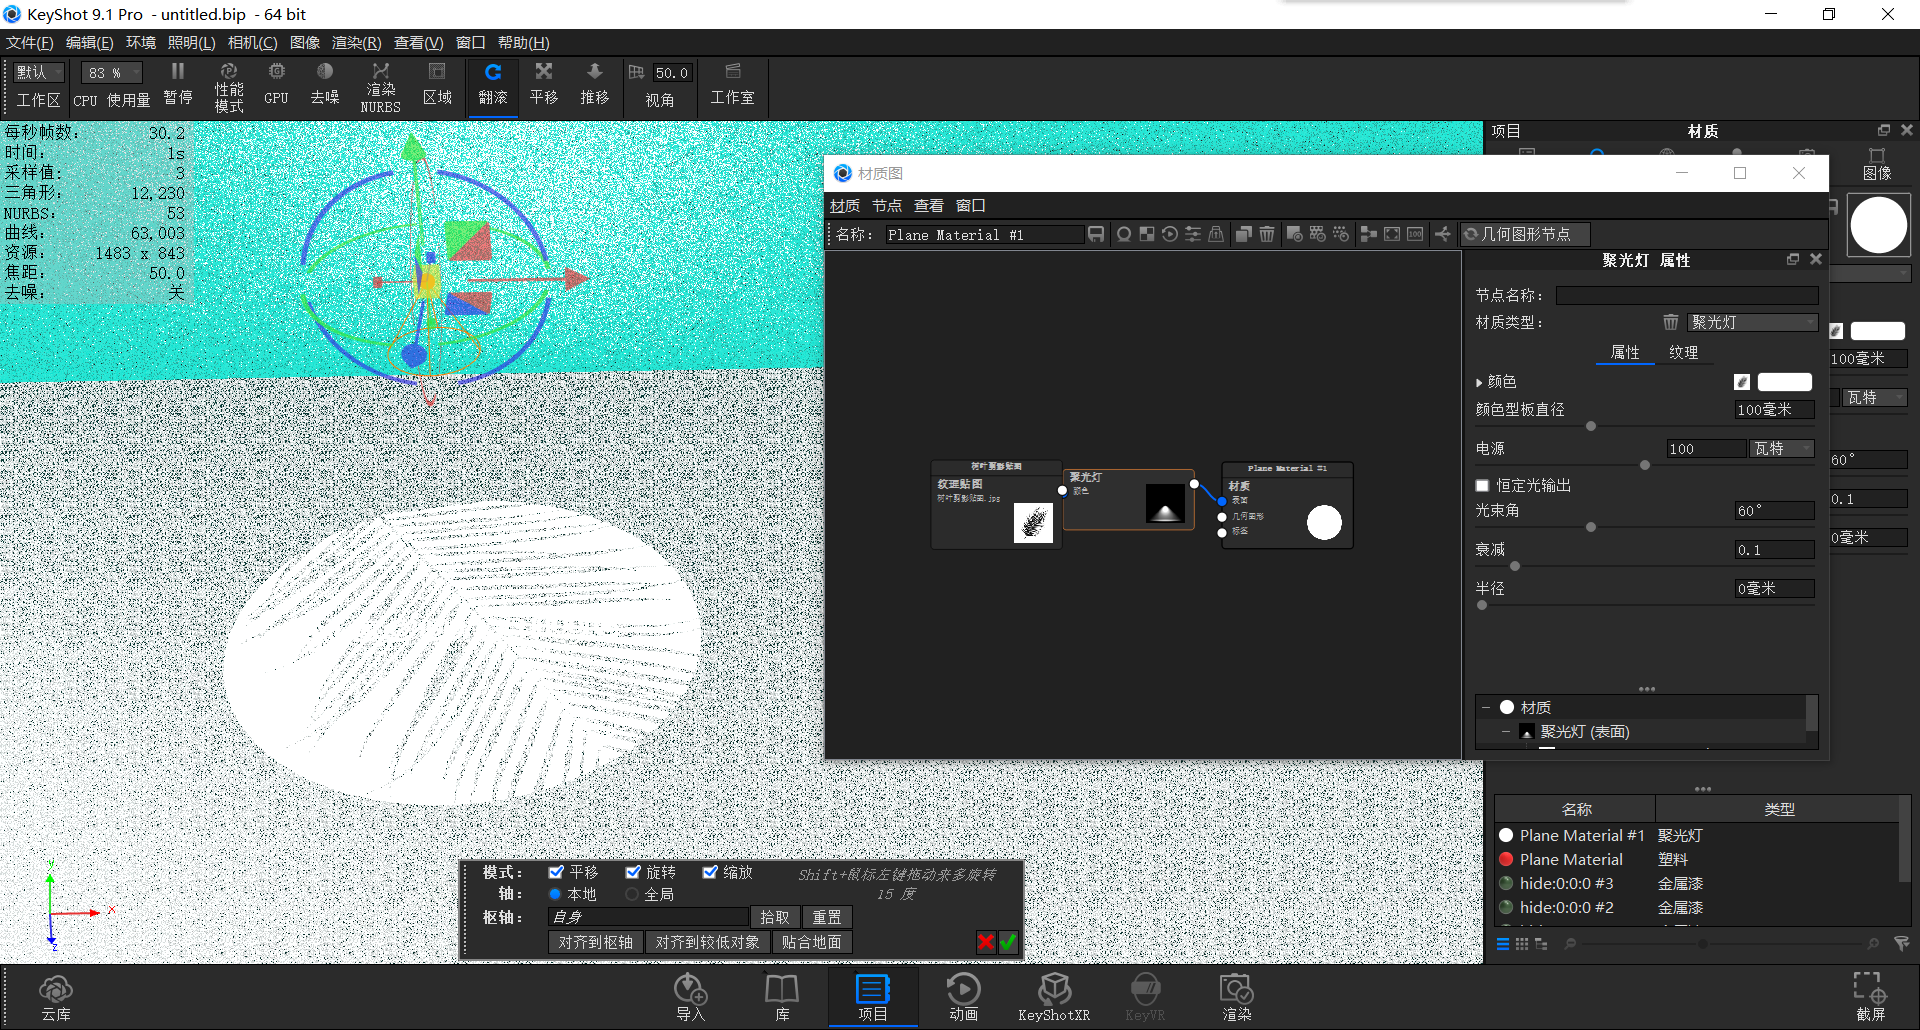
We give a spotlight material to the plane and drag the leaf silhouette downloaded from the internet into the material map to link it to the color node.
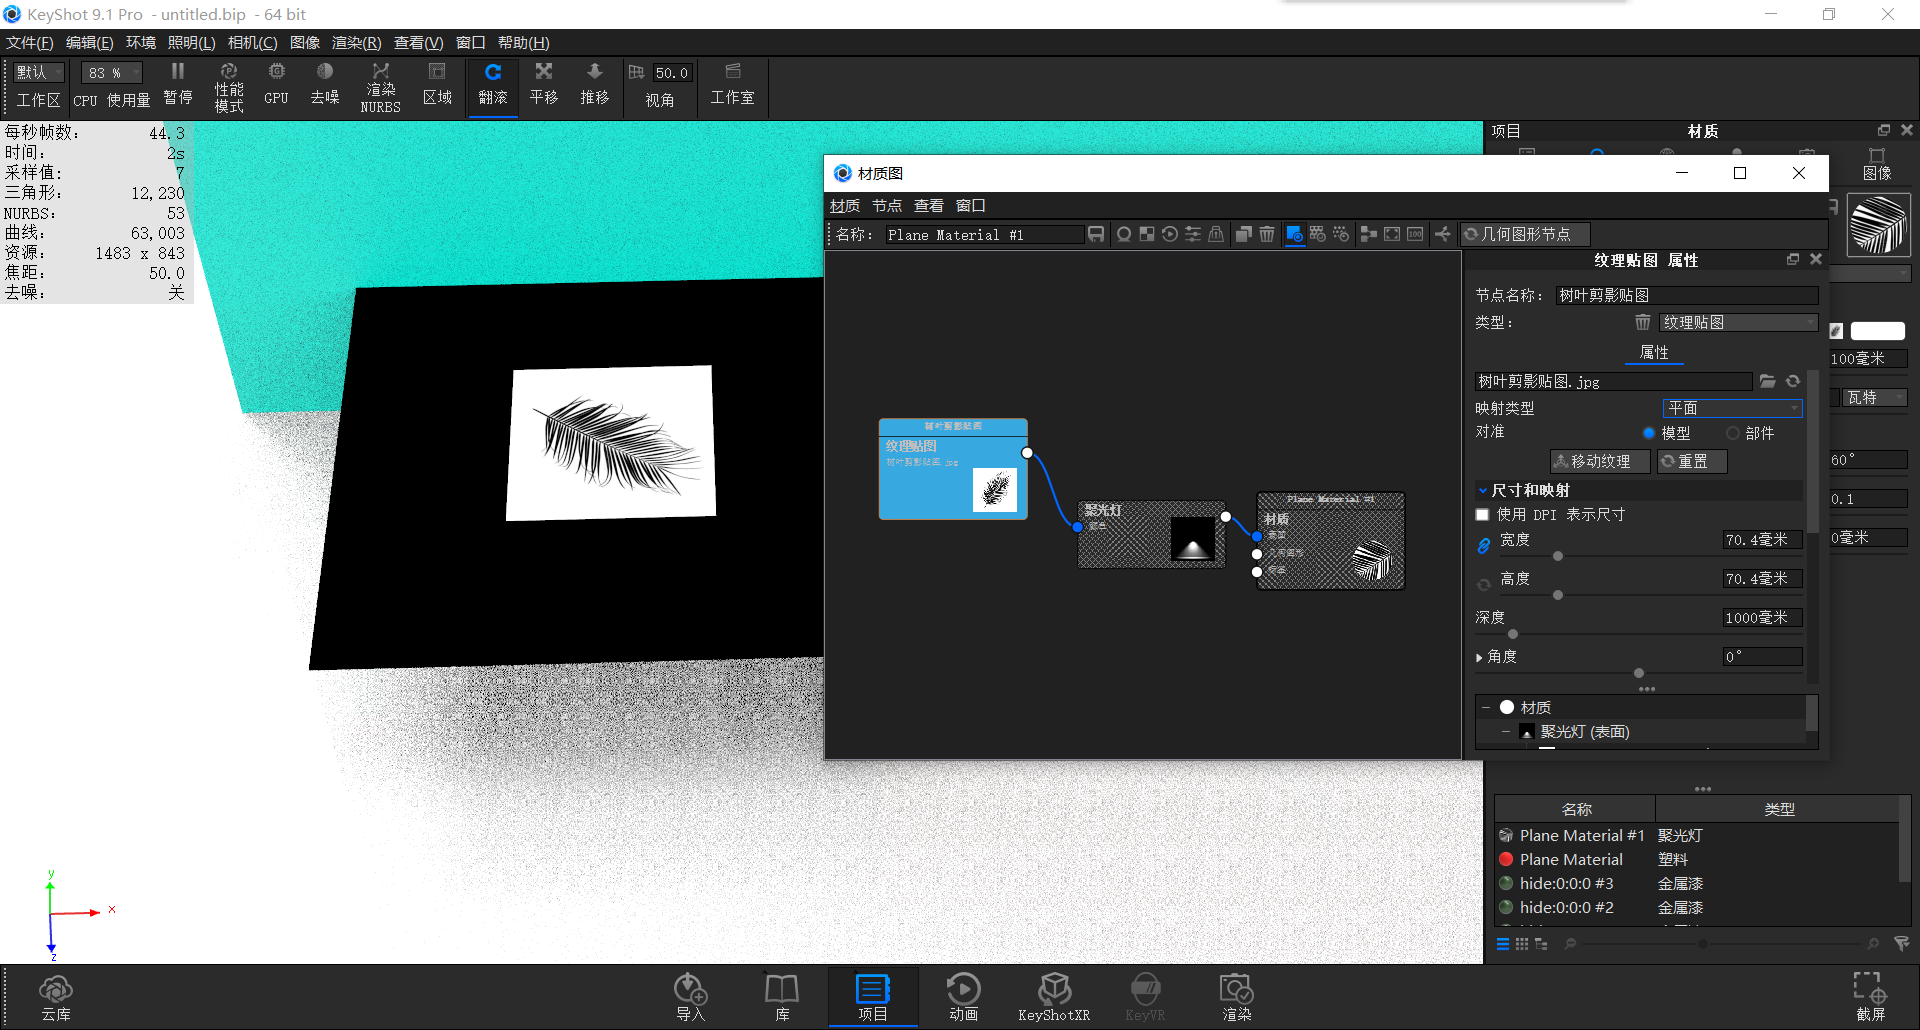
We changed the mapping type of the map to a plane
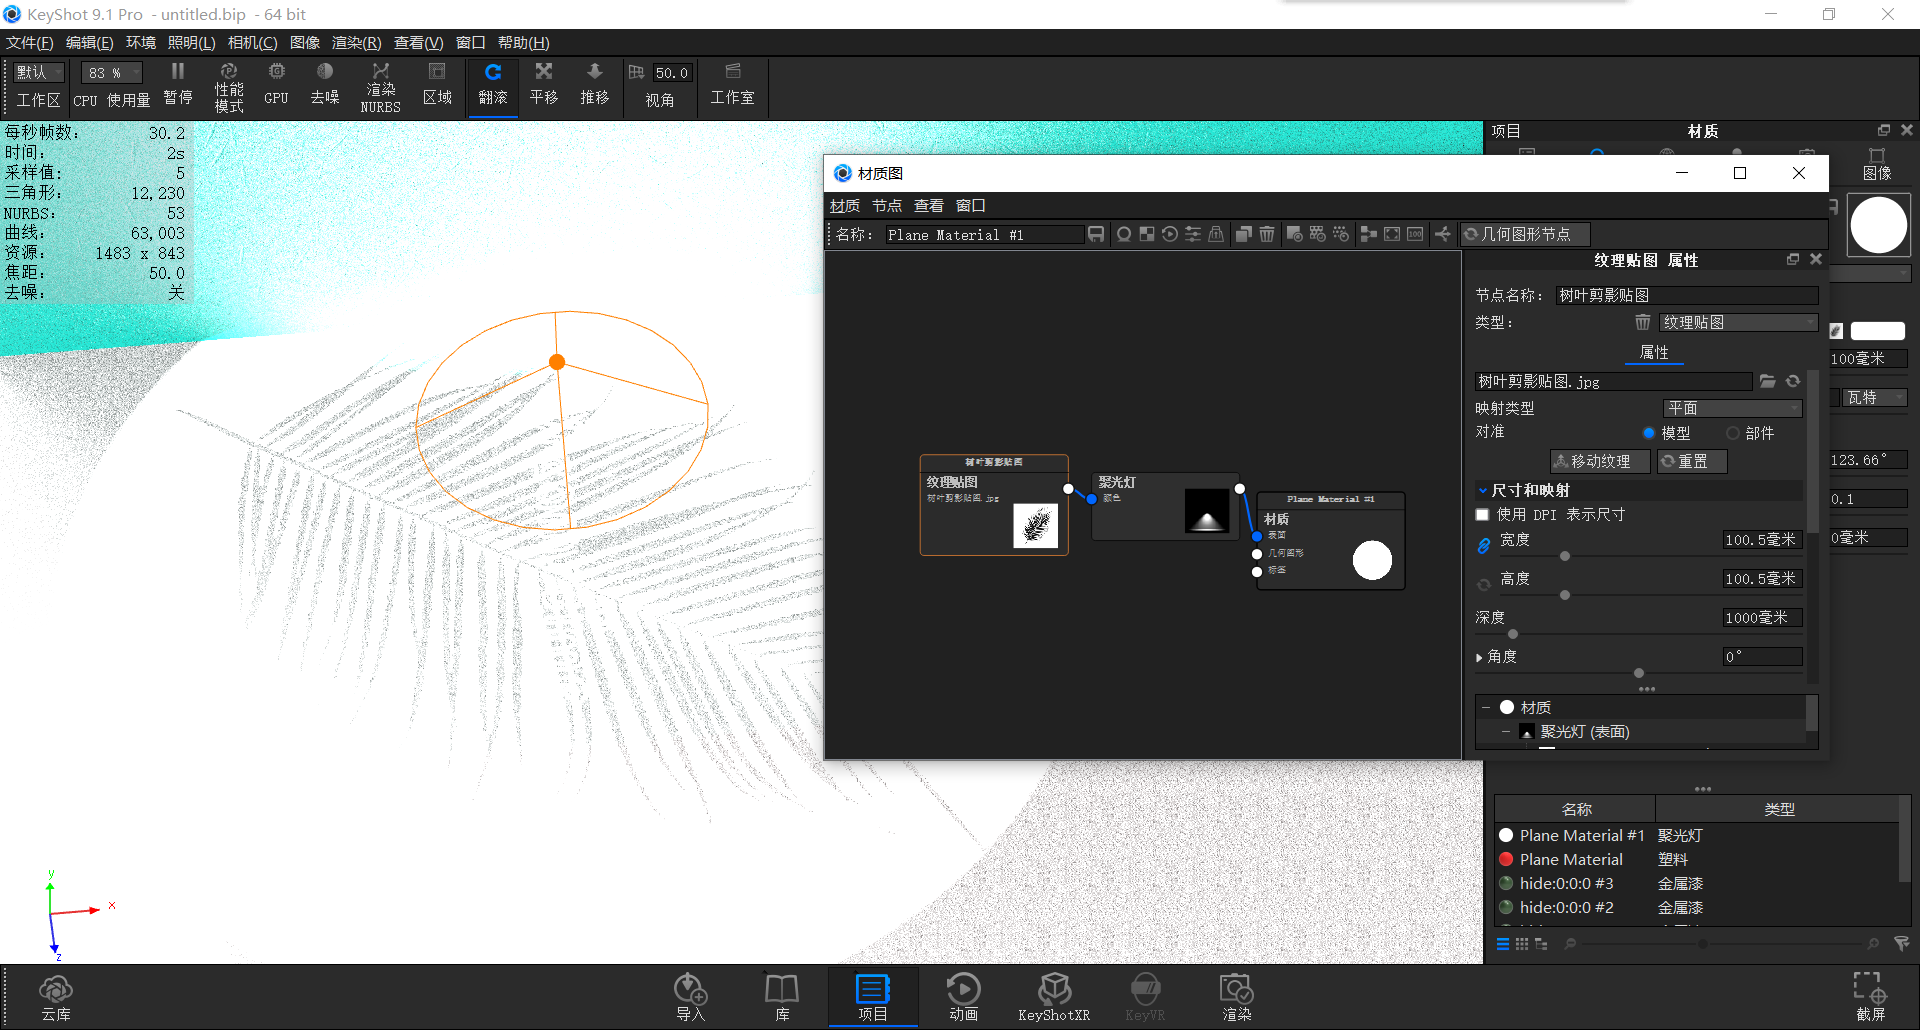
Then we can affect the size and quality of leaf reflection through the size of the map and the beam angle in the spotlight.
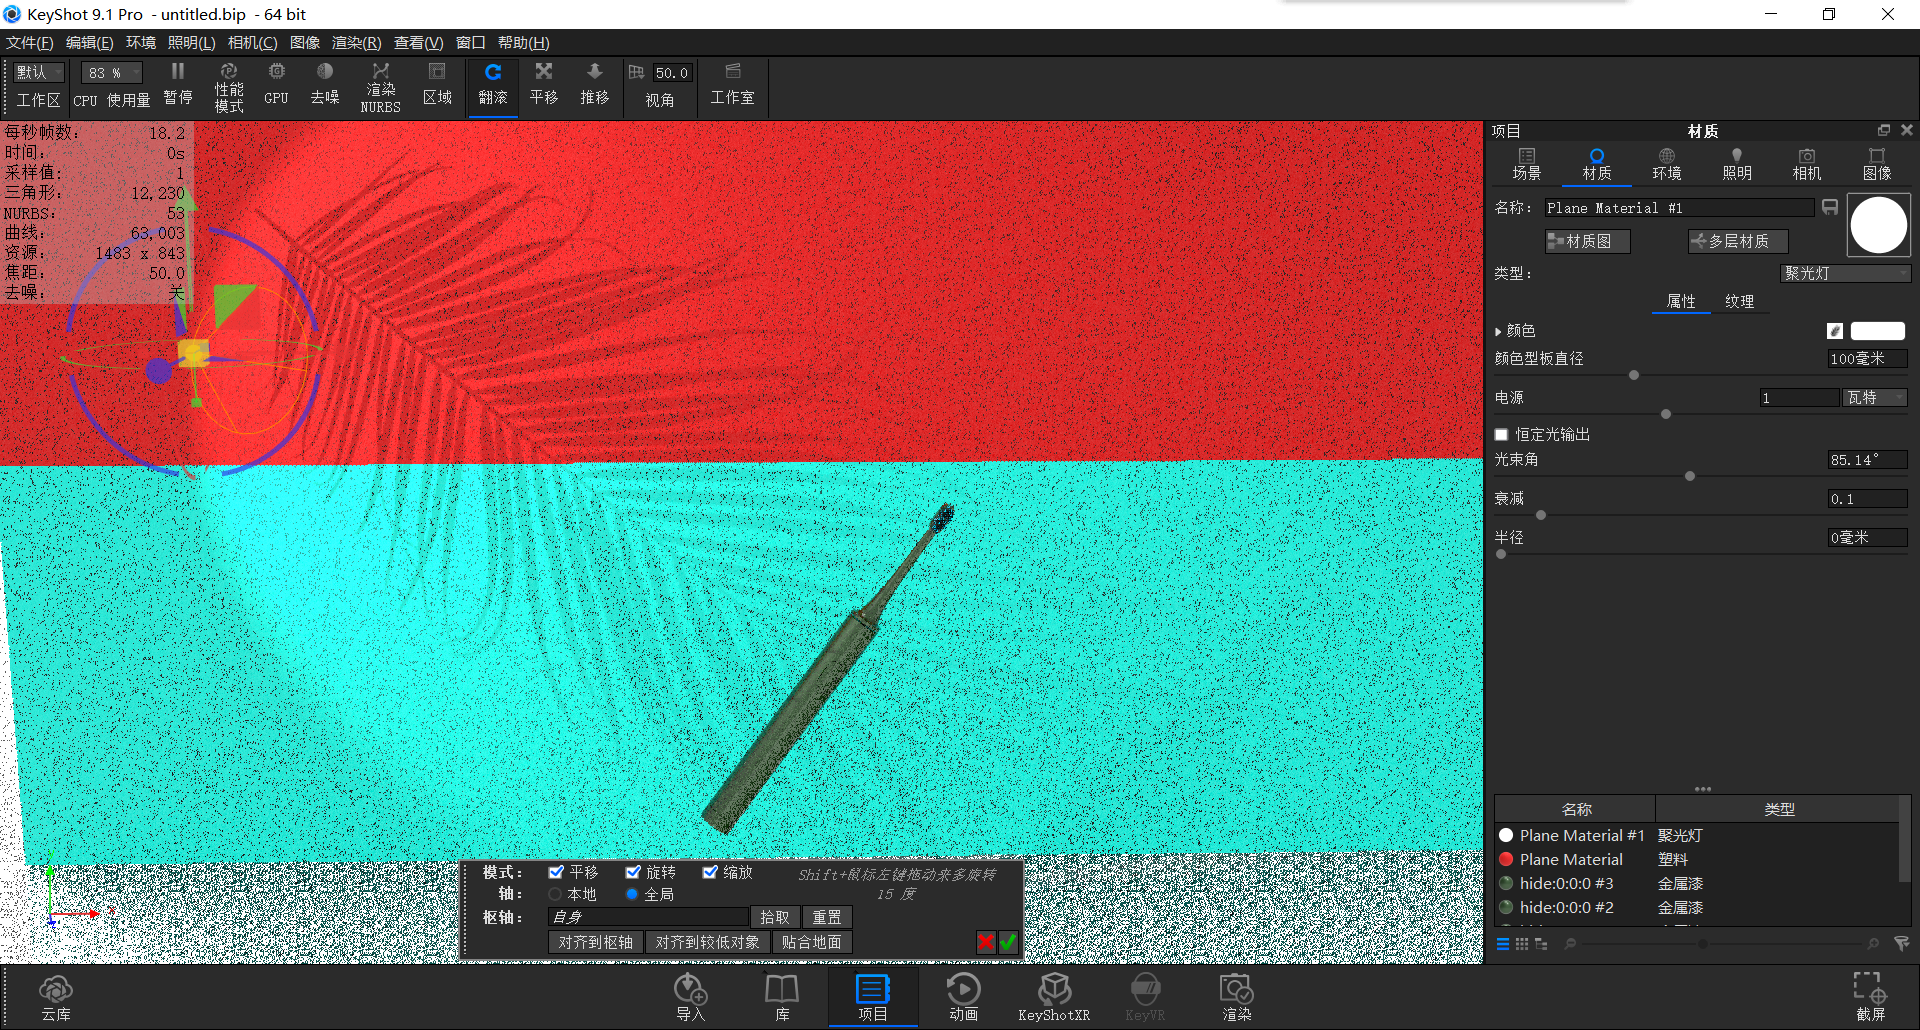
We shine the spotlight on the background board so that the reflection is mapped on the background board. We can control the depth of the reflection color through power, and we can also give some attenuation values to produce feathering effect around the aperture and better transition with the background board.
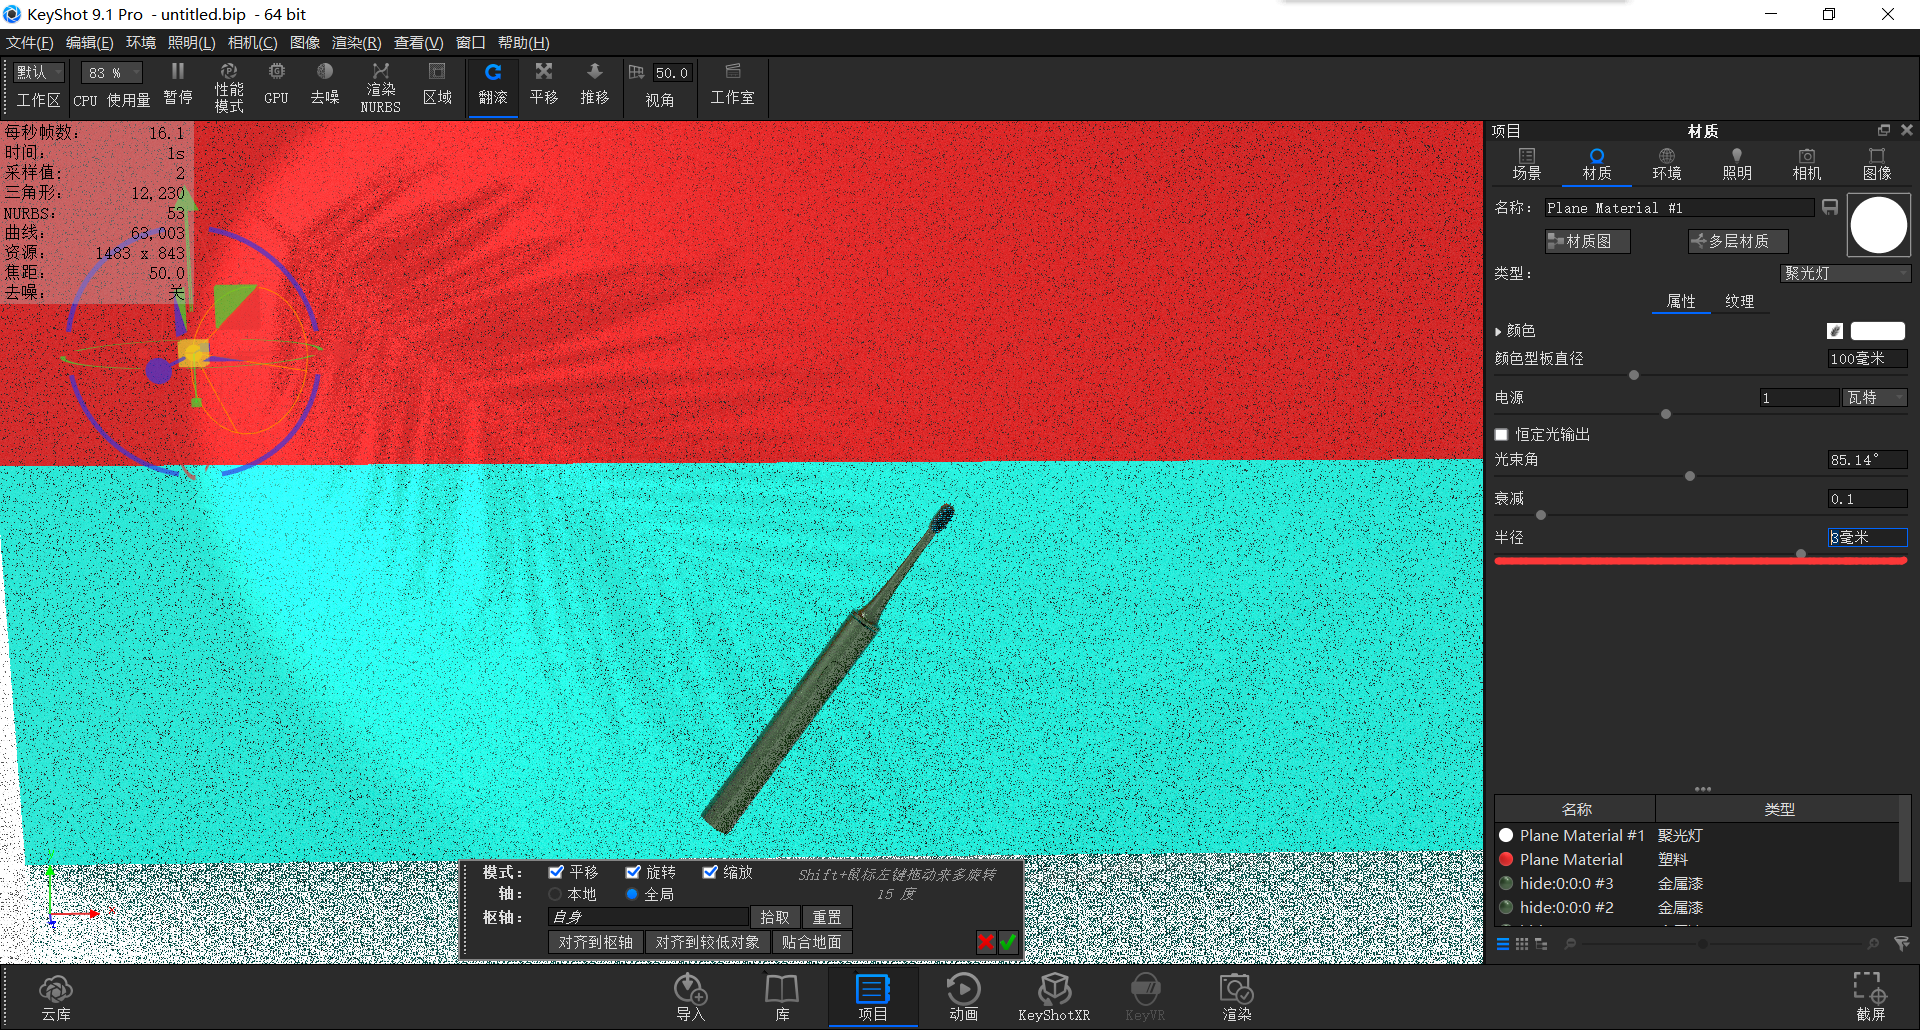
We can also control a feathering or blur effect of the overall reflection by changing the radius value (this parameter controls the whole, the attenuation parameter controls the edge, and please sense it through self-adjustment to deepen the impression)
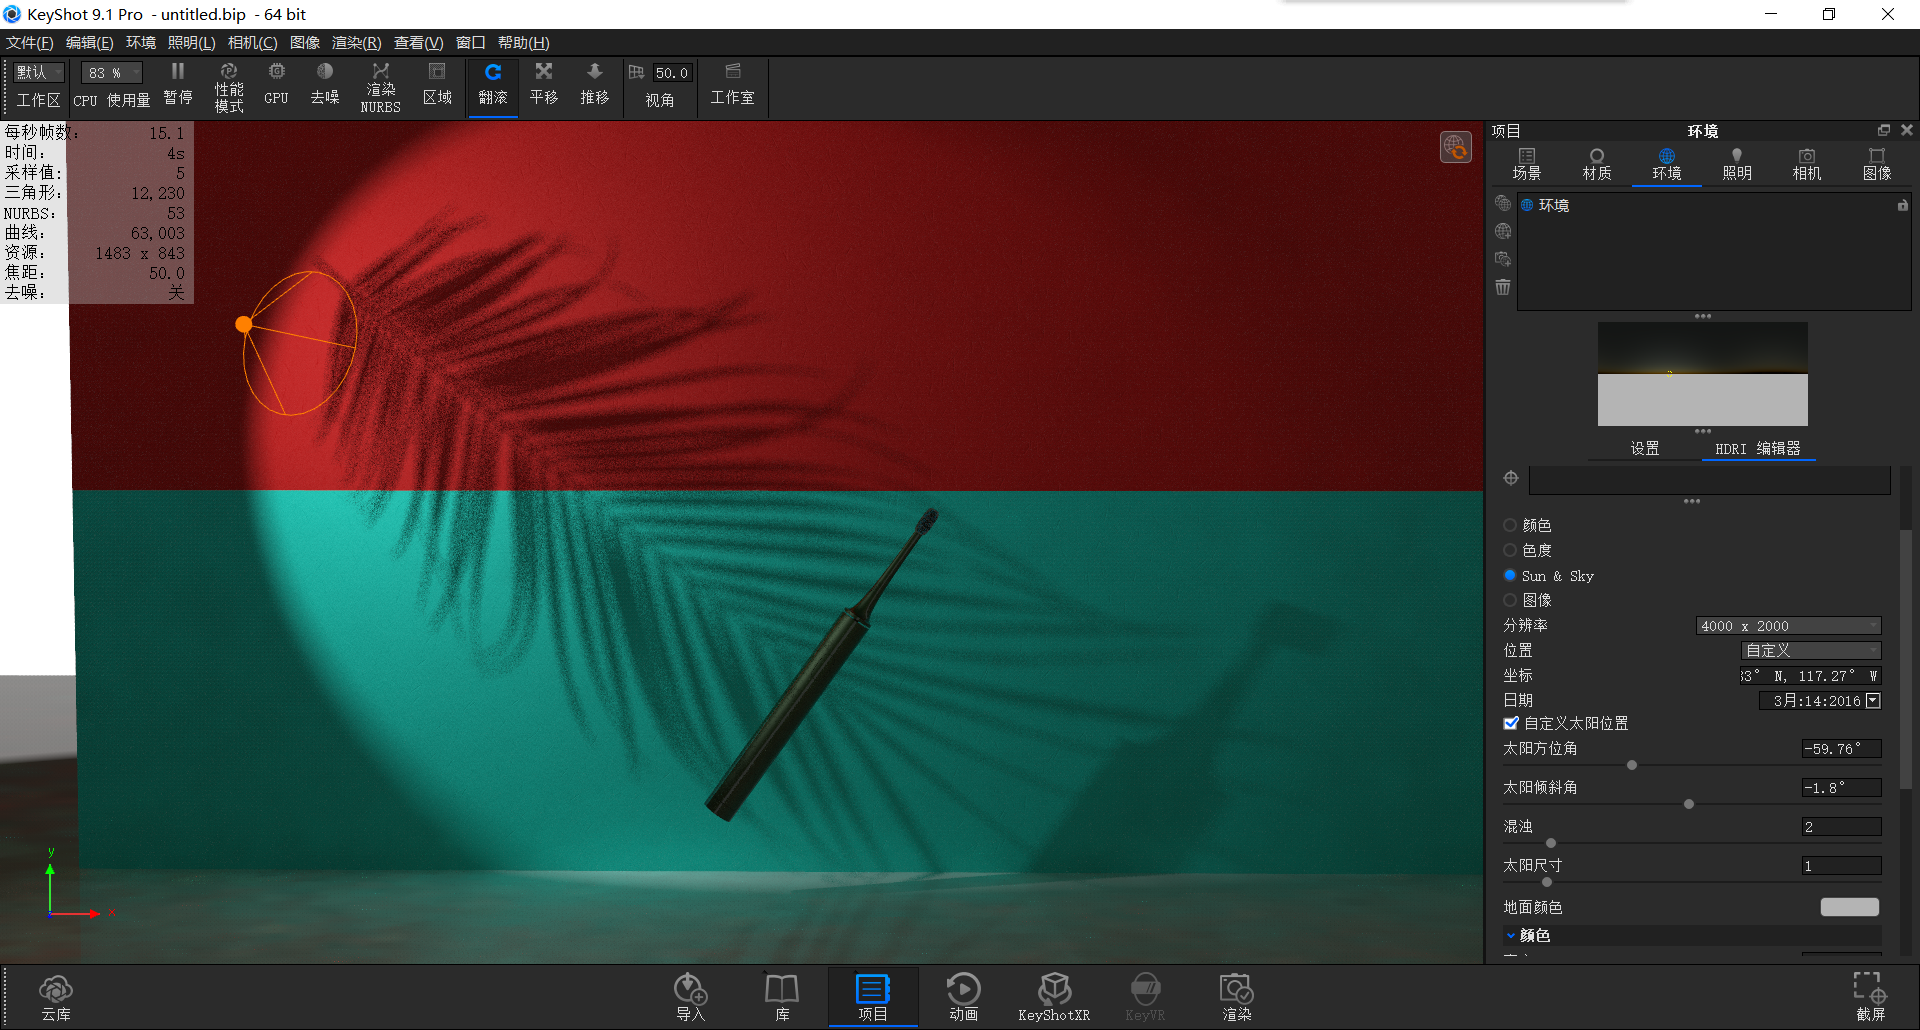
We changed the environment to sun & sky and checked the custom sun position.
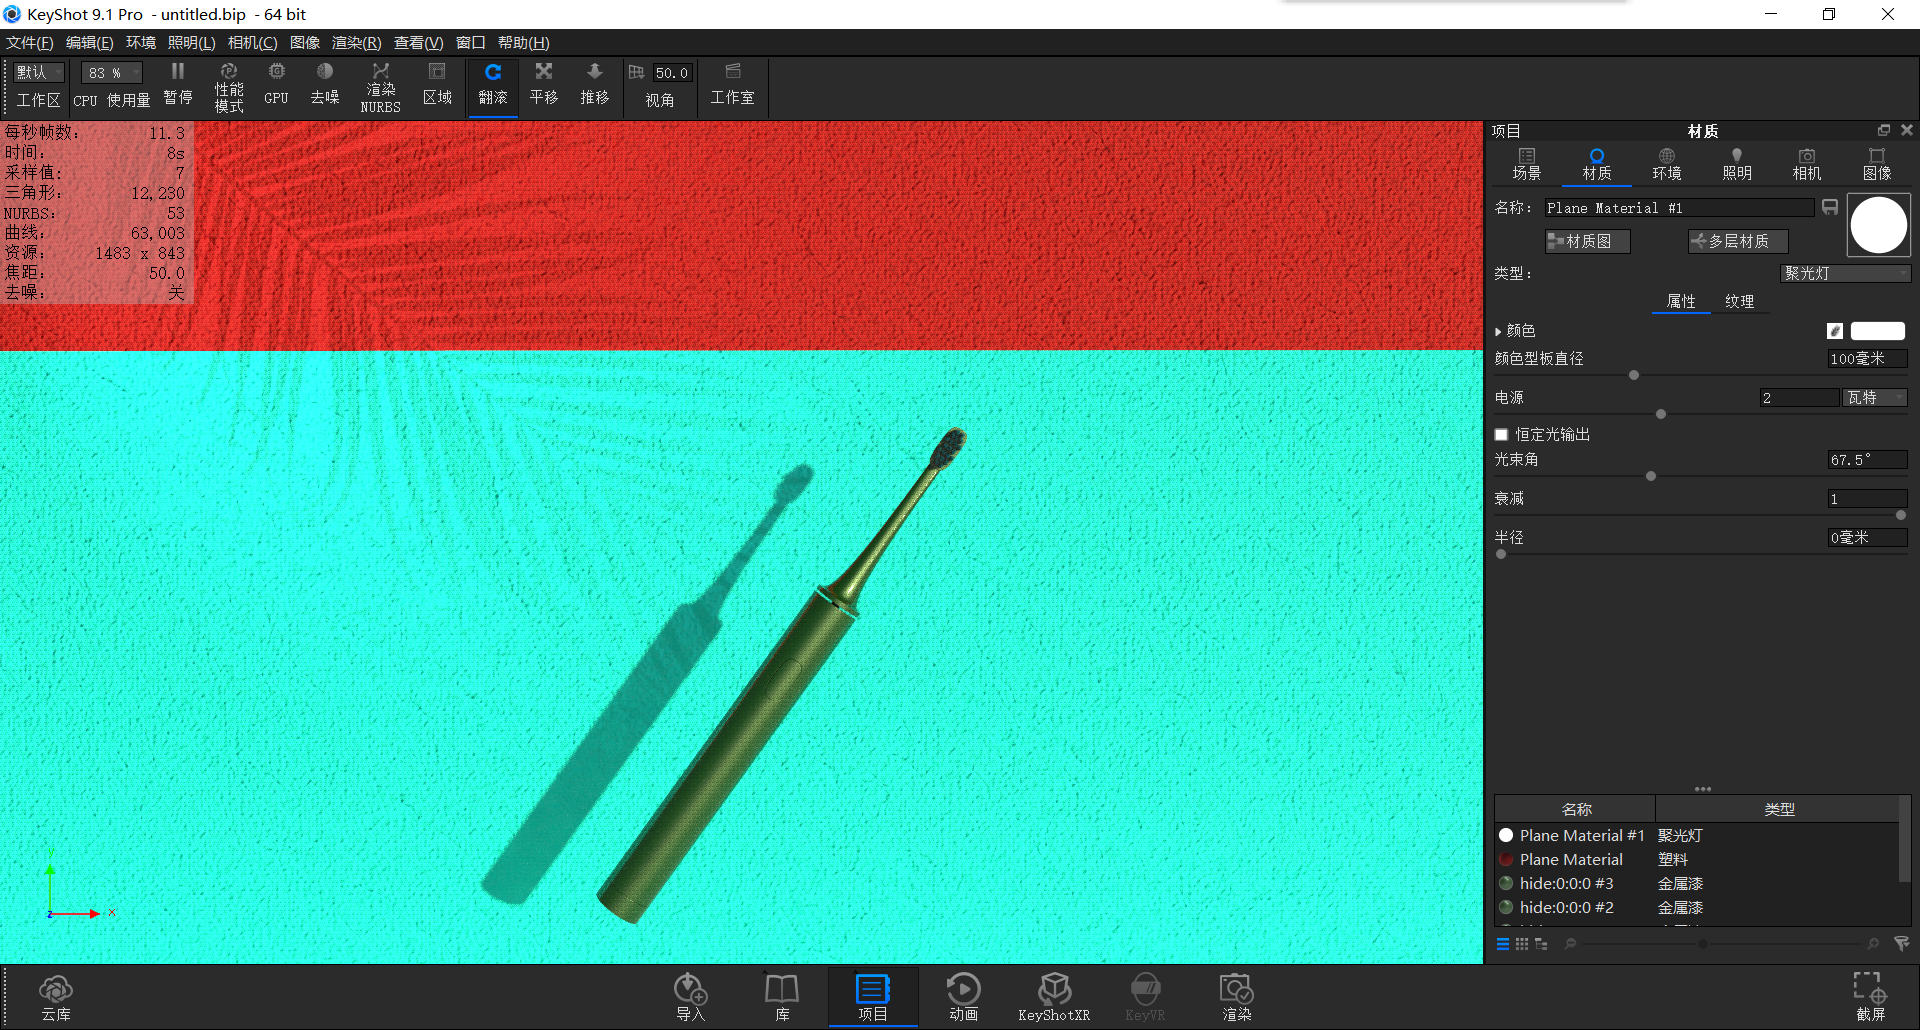
By changing the position of the sun to adjust to the angle we think is appropriate. If we think the reflection is too dark at this time, how can we add spotlight power to enhance the reflection?
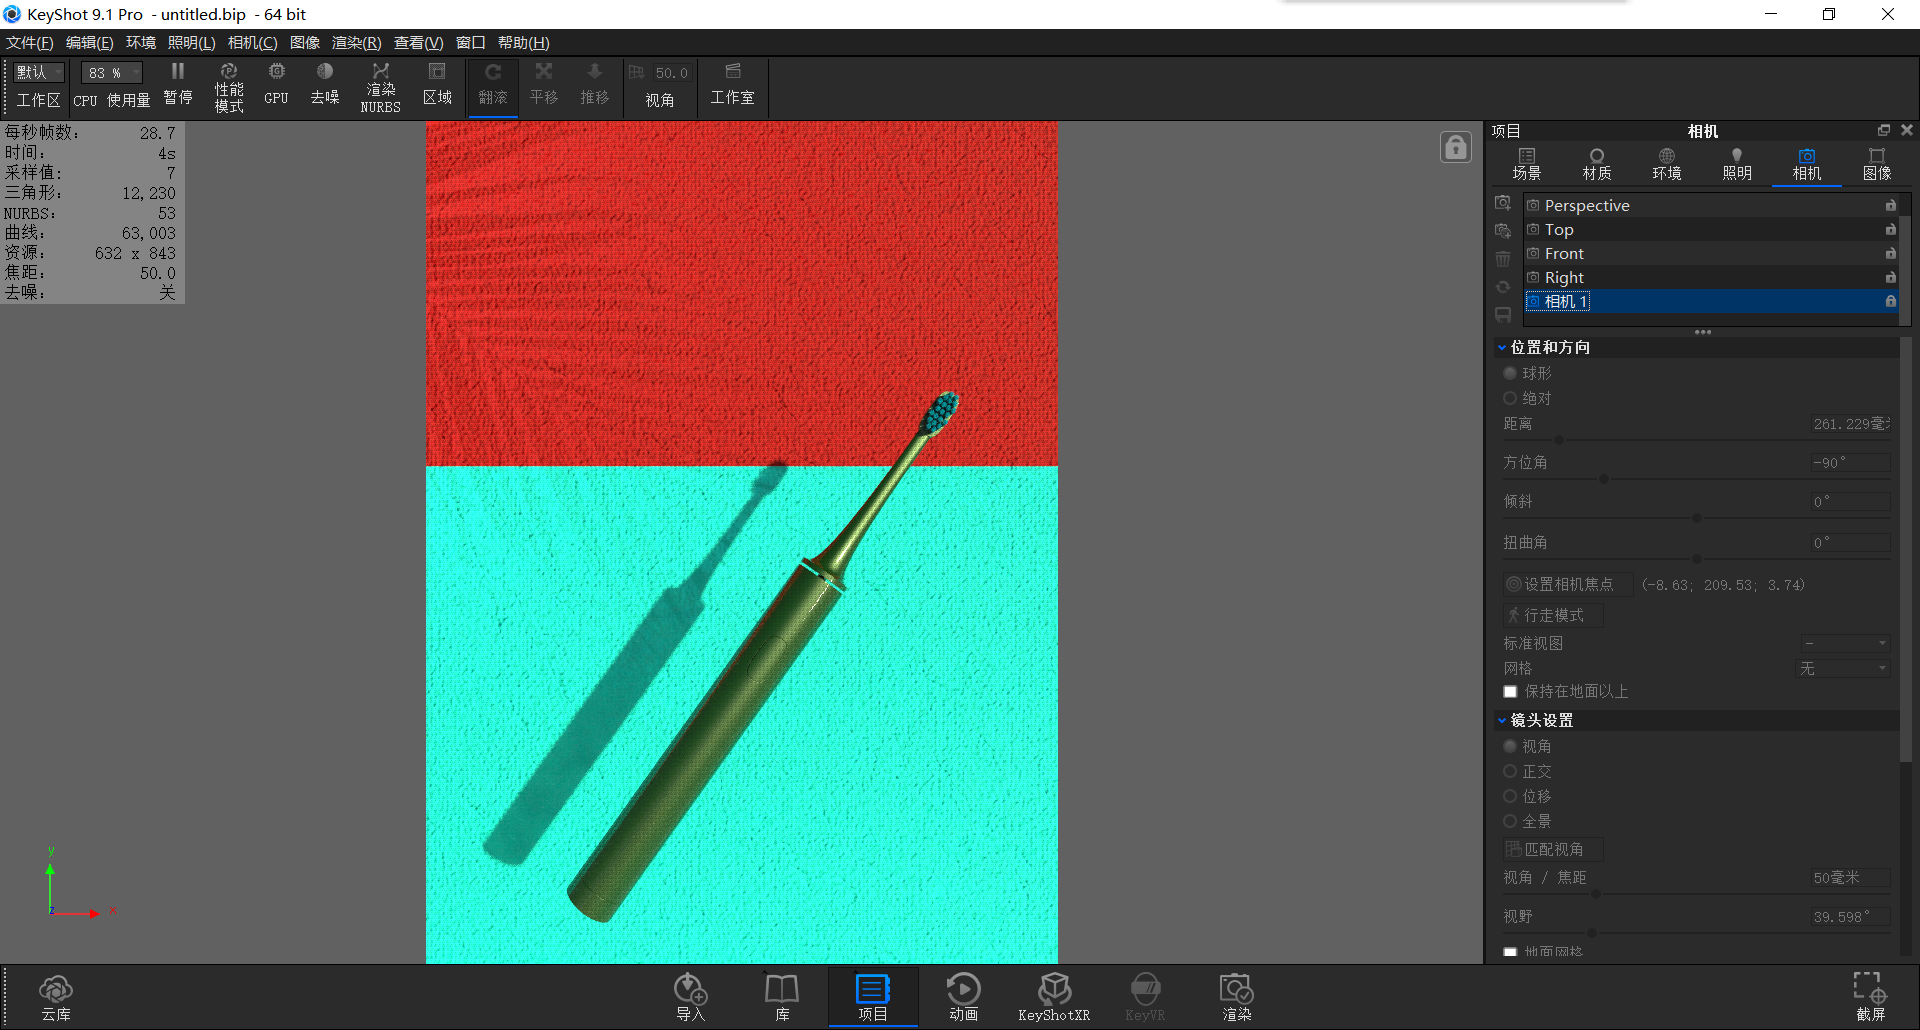
We changed the image to a vertical version in the image and added a front camera to save and lock.
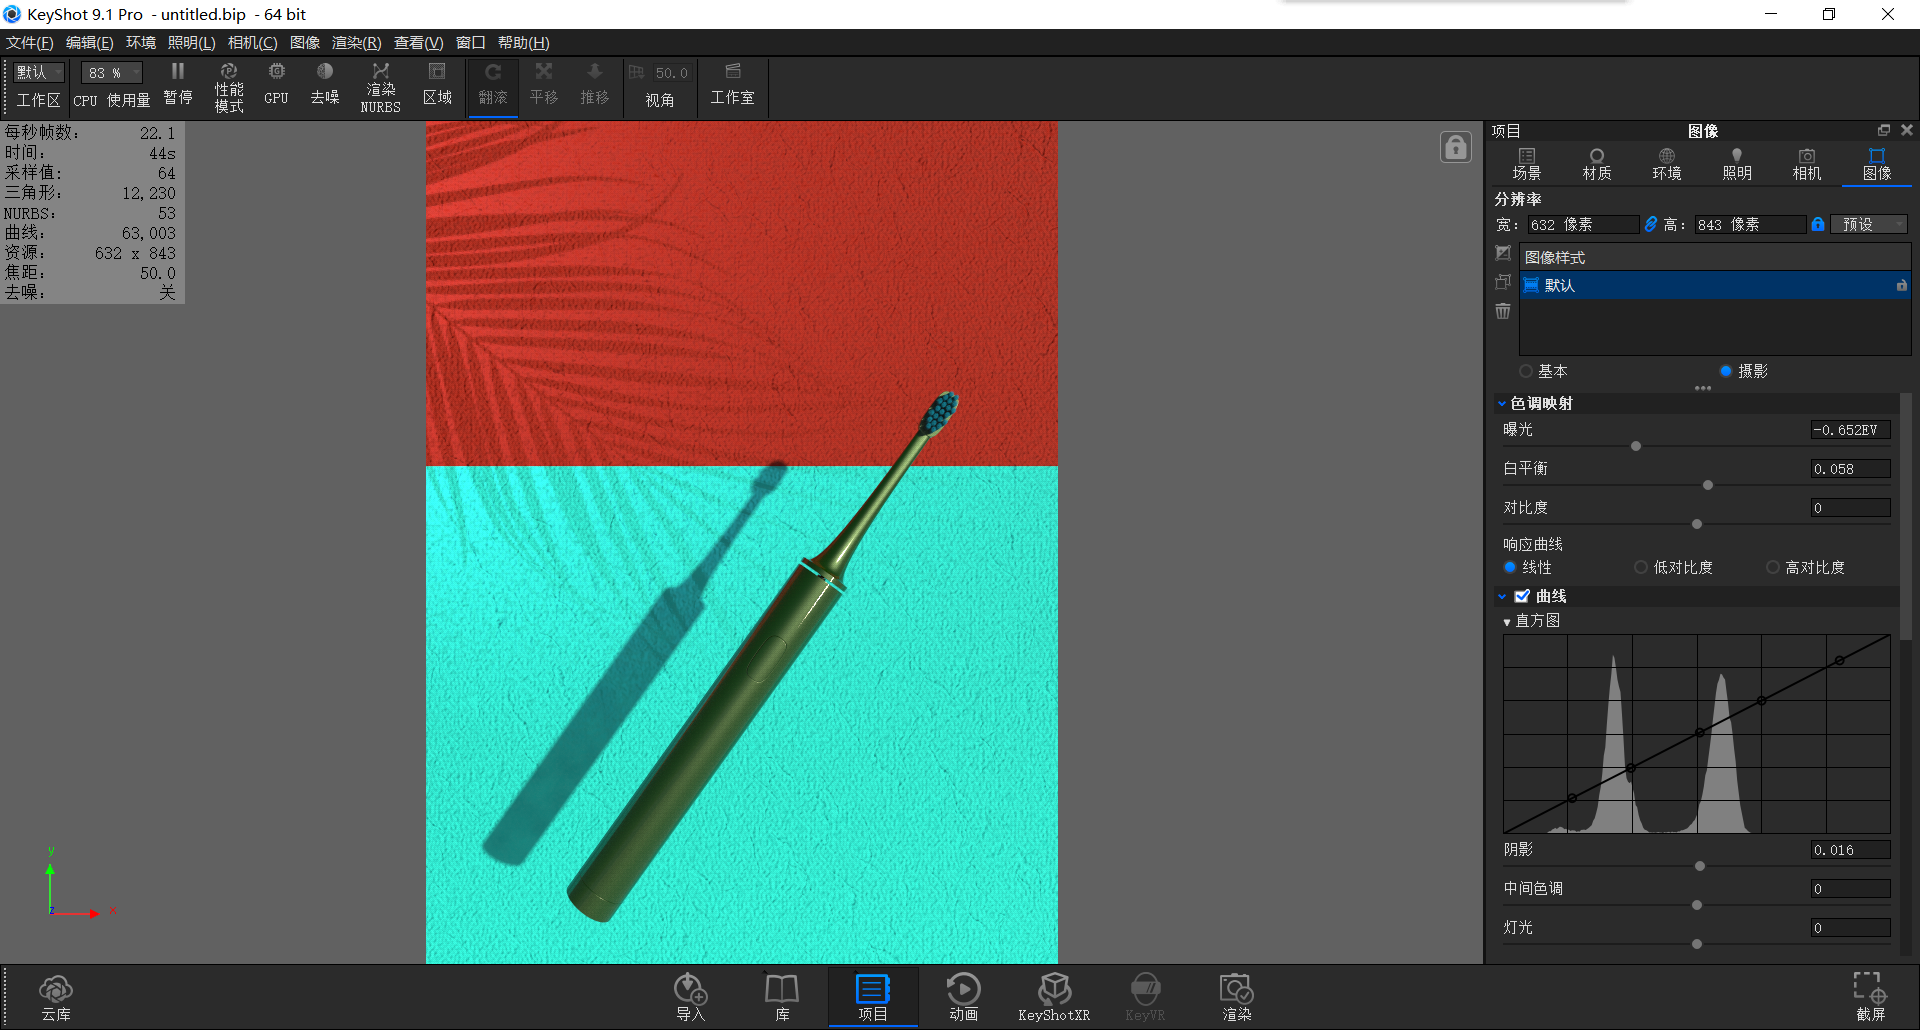
When adjusting the parameters of sunlight and spotlight, overexposure occurred. We can appropriately reduce the brightness of sun & sky in the environment, turn on the photography mode in the image, select linearity, and make some later readjustments (adjust exposure value, change white balance, adjust color tone, etc.)
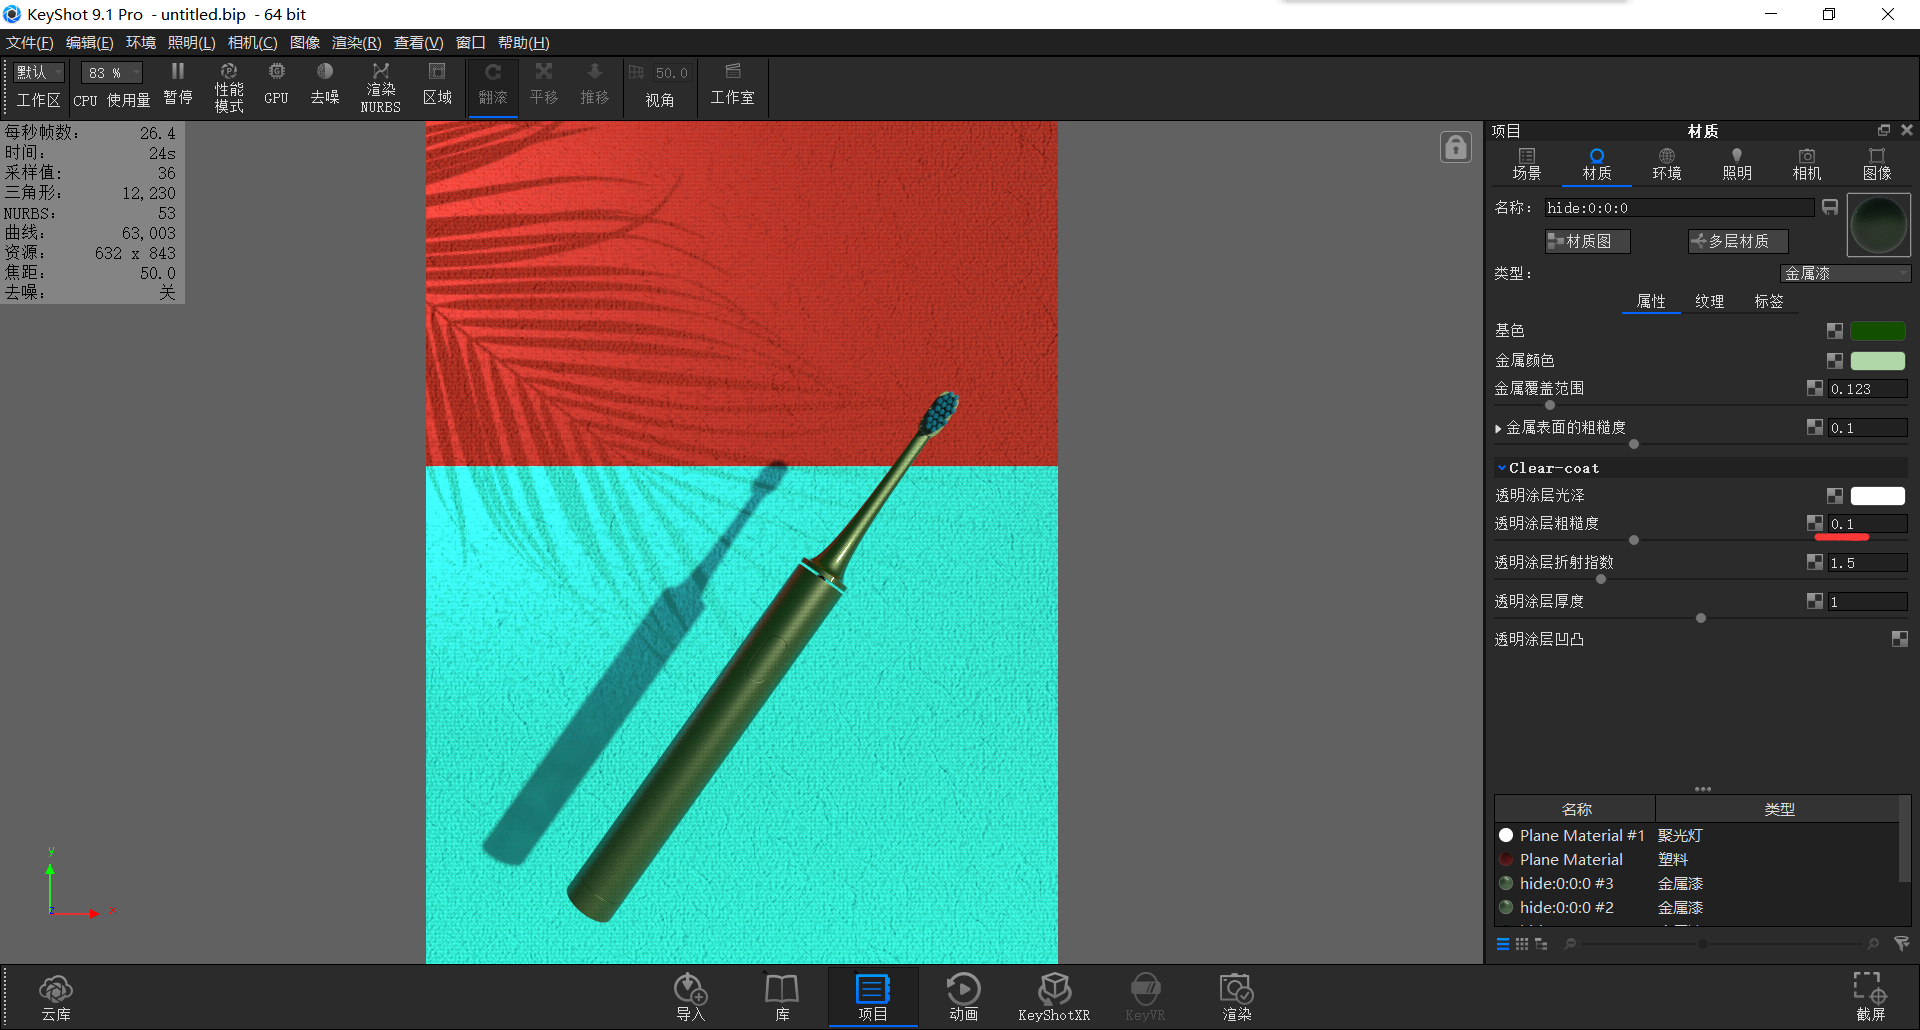
There are still some overexposure places on the toothbrush, because the reflection is too strong. We return to the material and give some roughness to the external transparent layer to enhance the diffusion.
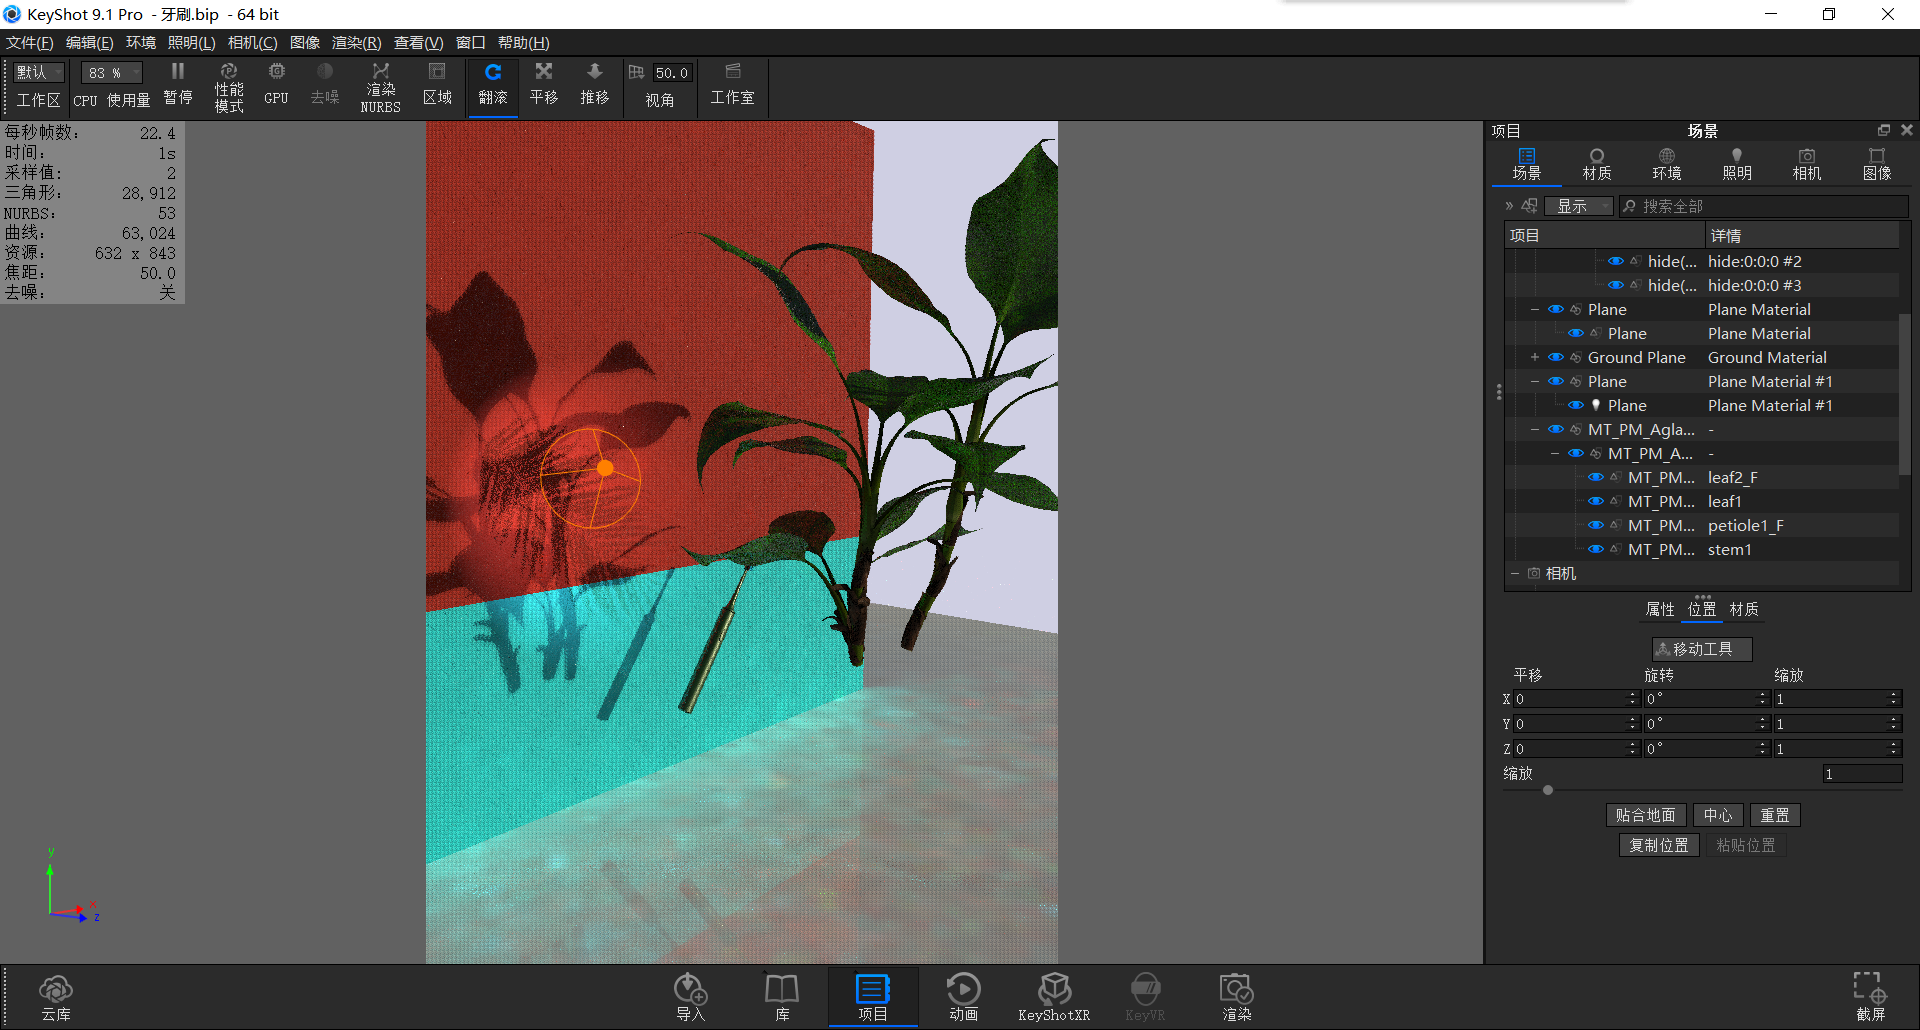
At this time, I found that there seemed to be something missing in the picture, so we opened the model library, downloaded a plant model from the cloud library and added it.
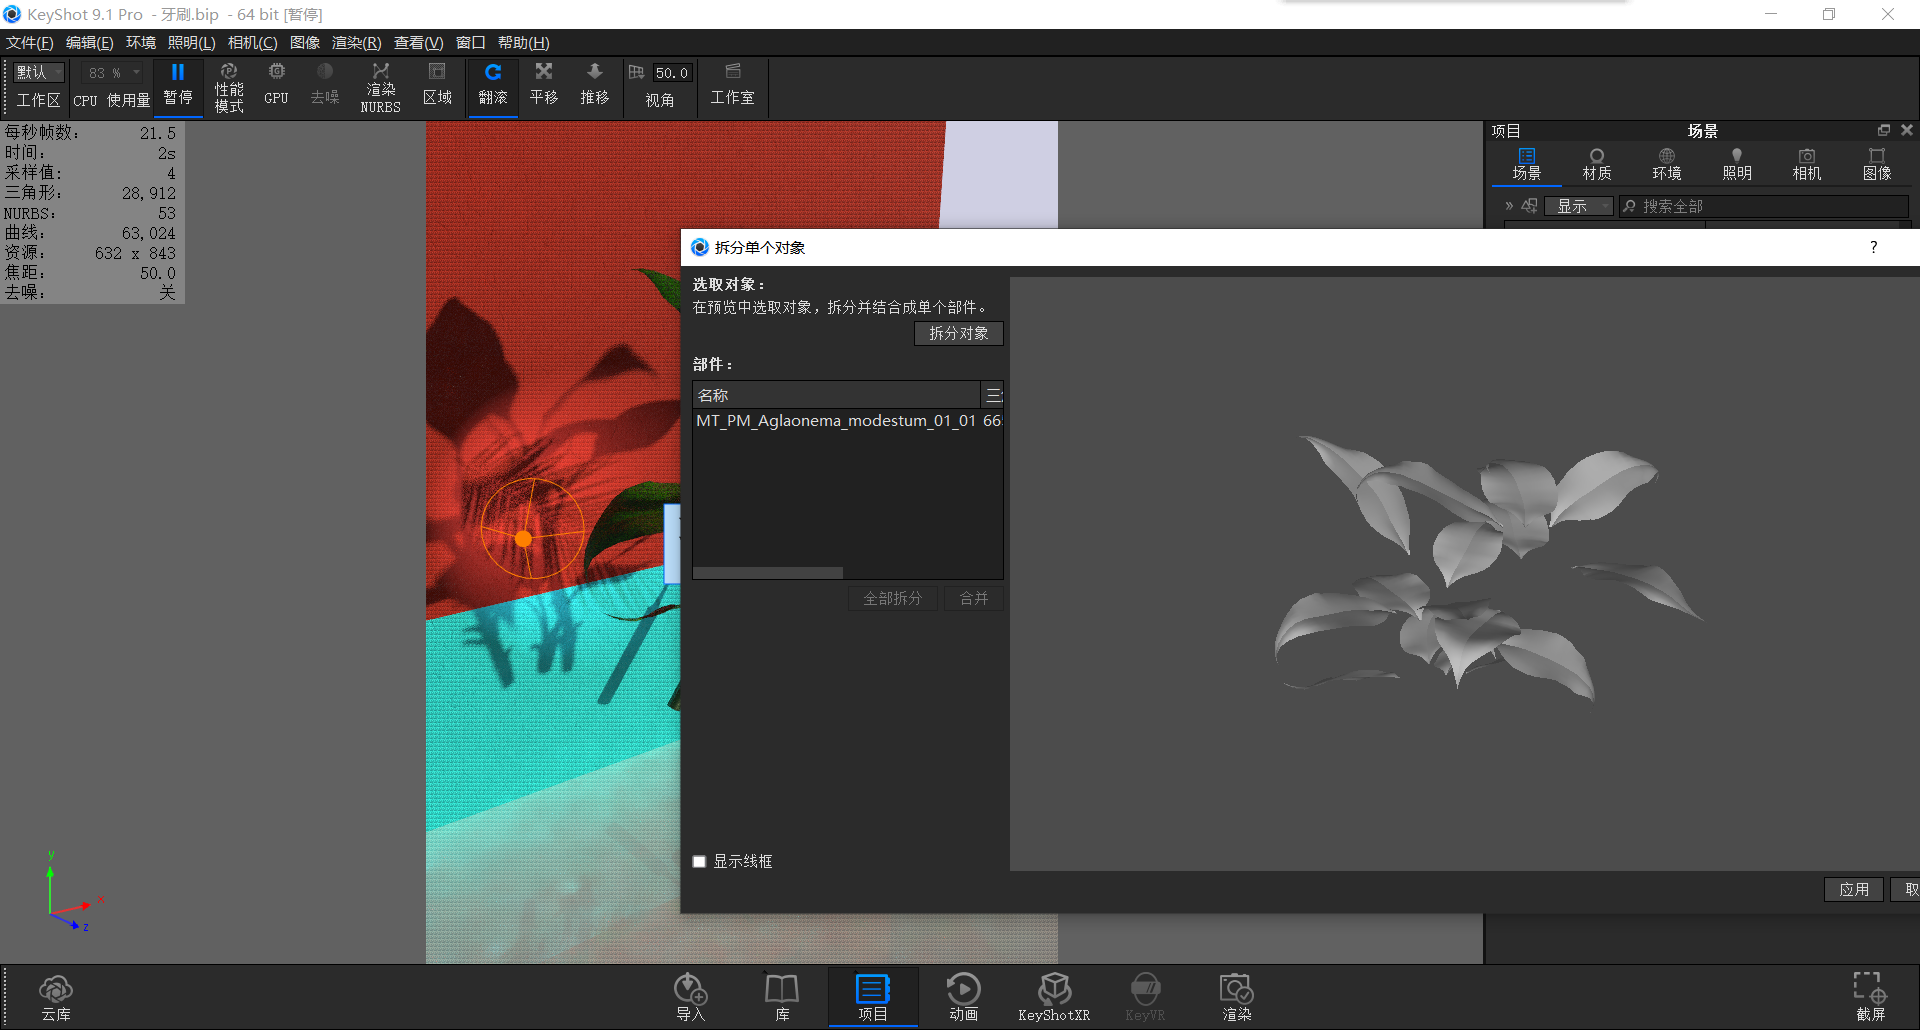
Right-click on the leaf to open the split single object operation method is similar to the split object surface, but it becomes a single object
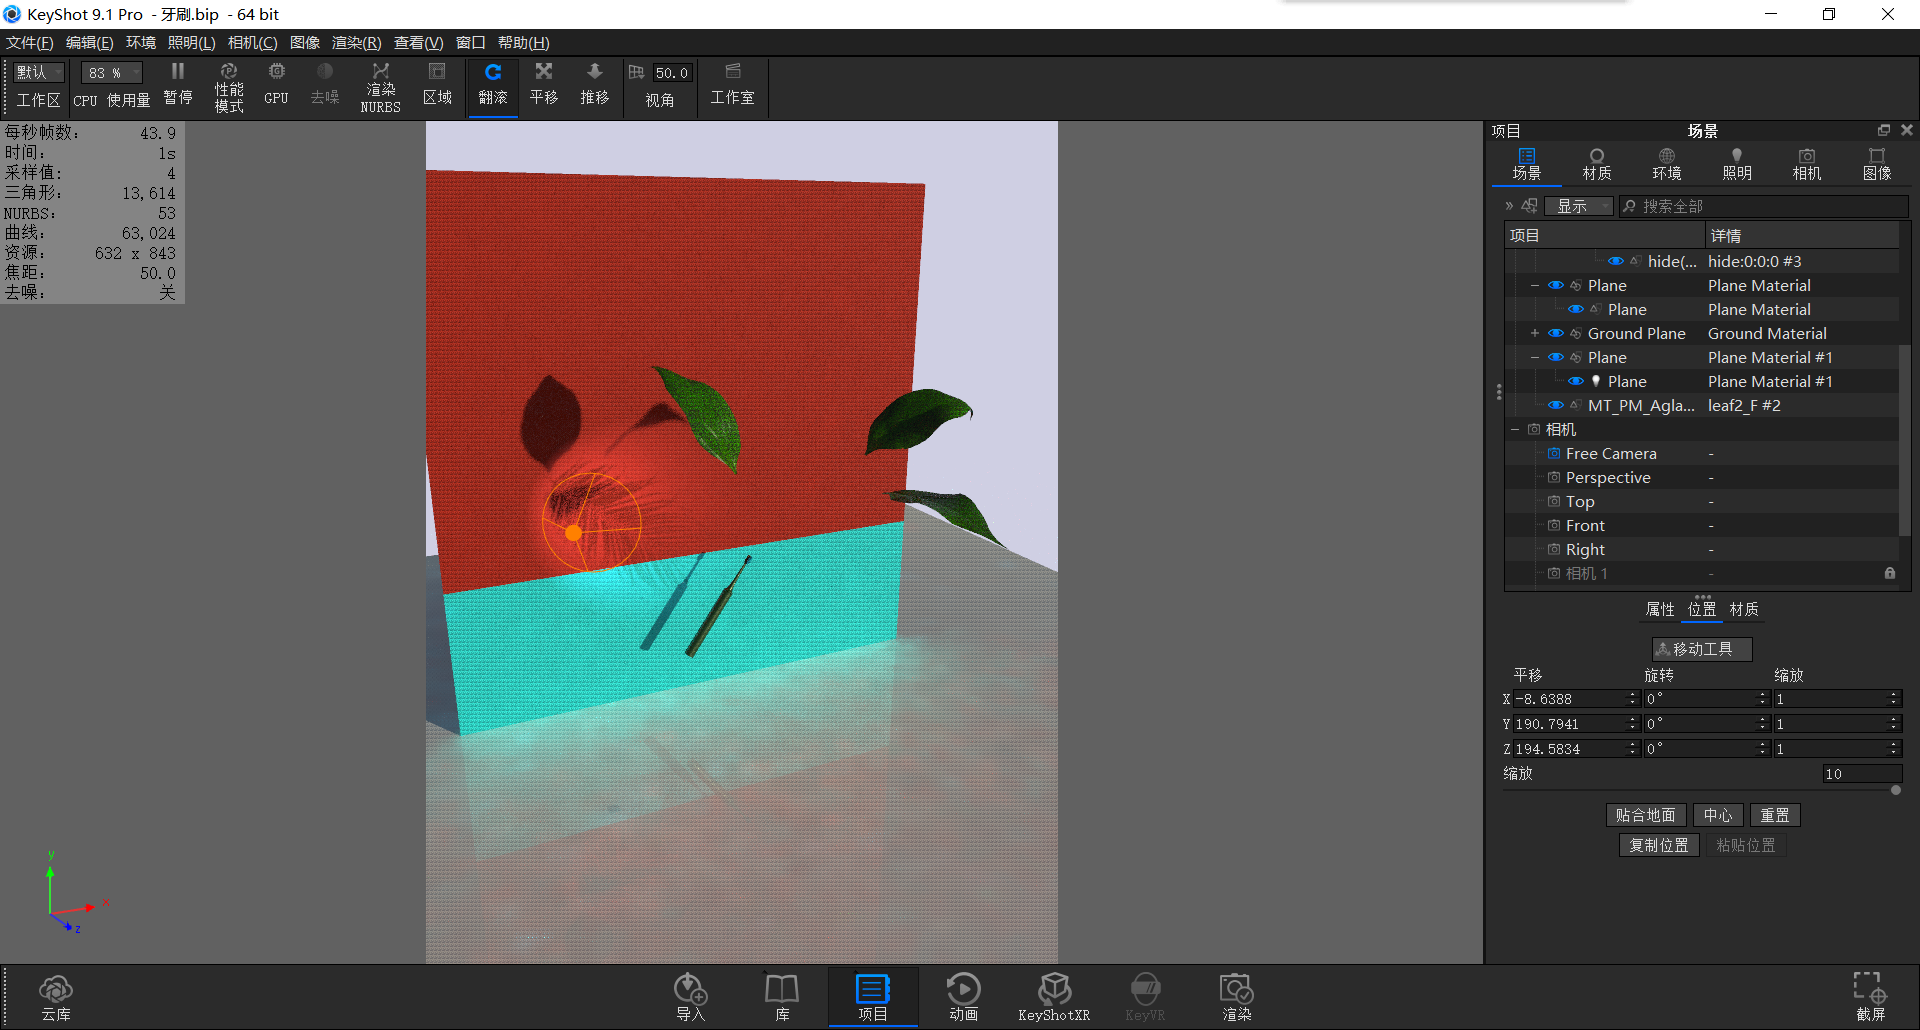
We will leave the split leaves and delete the rest.
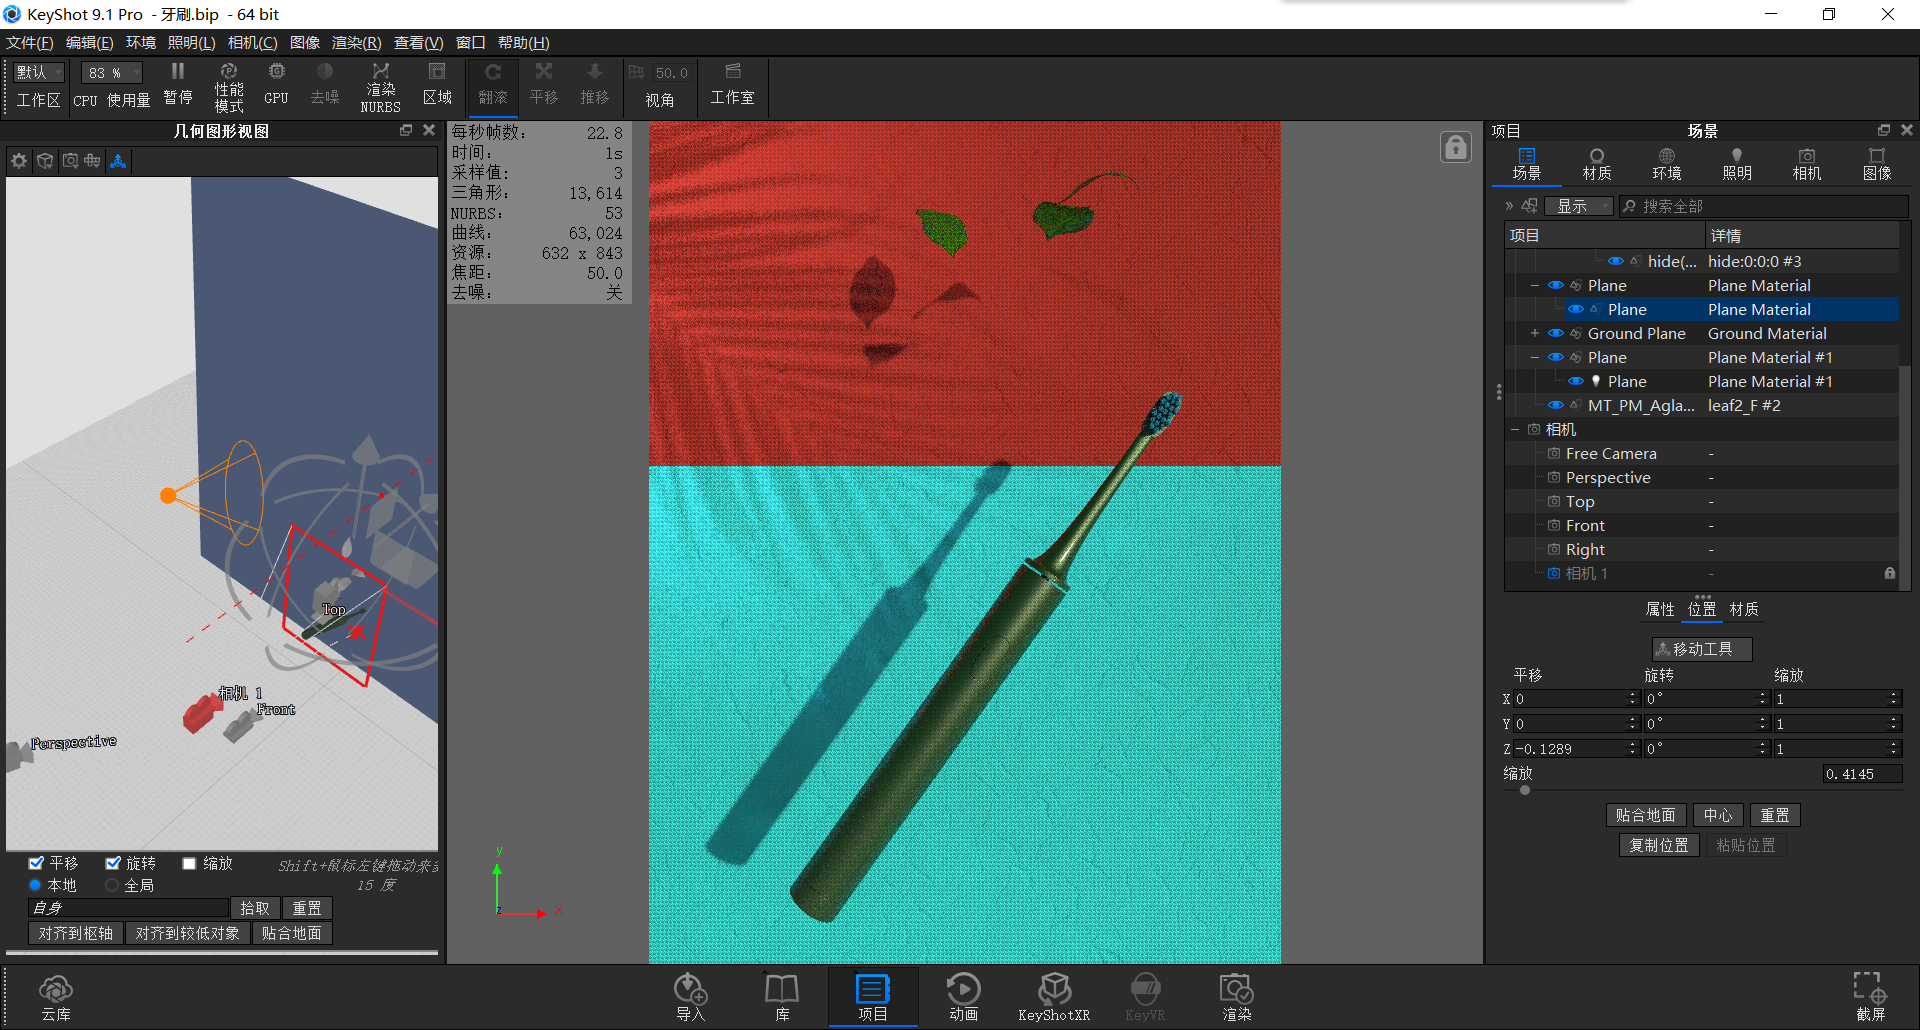
Go back to the saved and locked camera again, press the O key, open the geometric view to zoom and adjust the leaves (the advantages of the geometric view are reflected here. We can observe the effect from the fixed output window on the right and adjust in real time from the geometric view on the left, so as not to switch the camera angle back and forth to adjust and observe, thus improving efficiency. Please try it yourself before you can feel the convenience of geometric view)
You can fine-tune the parameters of each material before drawing.
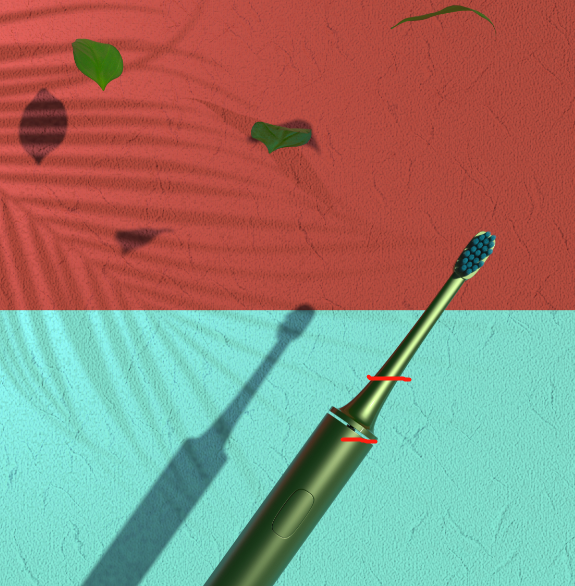
After the adjustment is completed, the map can be rendered, and then we can finally eliminate the overexposure of a small part of the rendering problem on the electric toothbrush through ps, and improve the quality of the effect map.
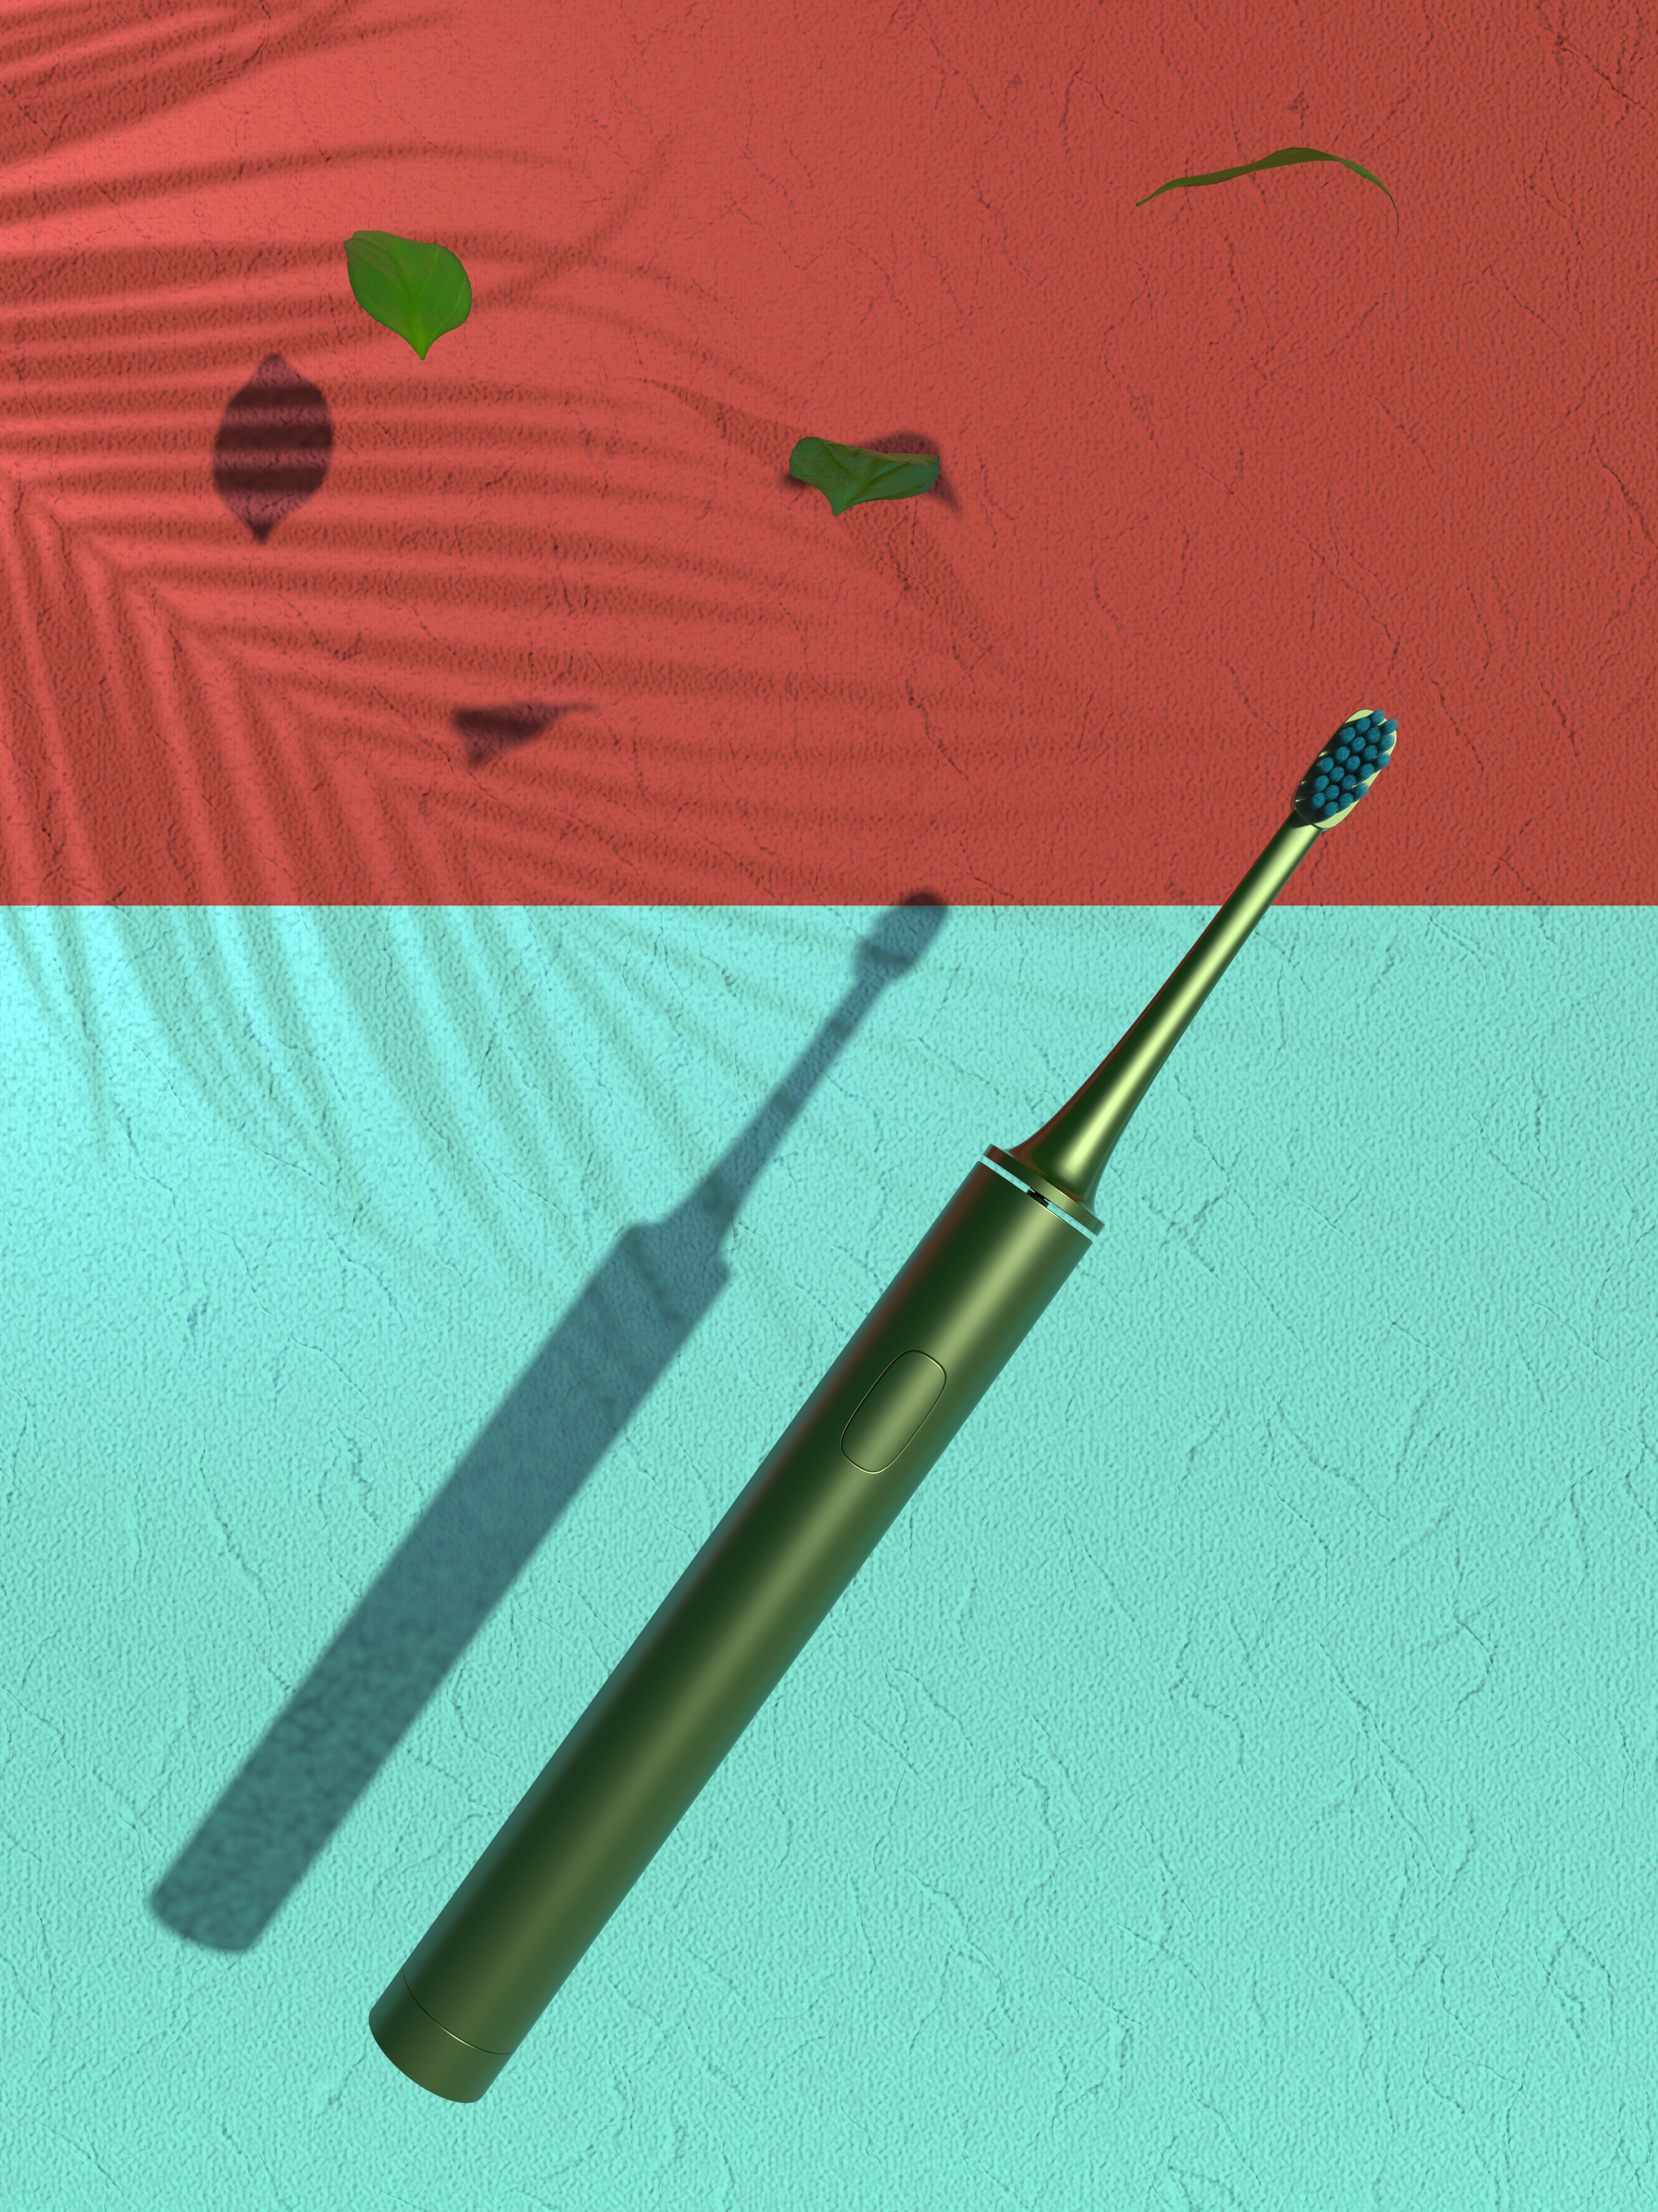
How, you taste, you carefully taste, the feeling that you can't speak out comes out, ha, ha, ha, I don't know how to describe it, anyway, it is to feel that kind of palace retro style, falling leaf silhouette bleak feeling and so on. (The color brightness of the original image is high, and the color brightness of the rendered image is low, which seems to produce a different feeling)
Why don't you open your KEYSHOT and practice? I believe you can do better than me and share it then
Those who need source files can leave comments and email, and I will send them as soon as I see them.
(Please also hope that friends who need source files can help and praise me. This is a great support and encouragement to me. Original free tutorials are not easy. At least dozens of pictures and more than 2000 words of explanation are needed. Please also hope to encourage me a lot. Thank you!)
The copyright of this work belongs to 二哈. No use is allowed without explicit permission from owner.

New user?Create an account
Log In Reset your password.
Account existed?Log In
Read and agree to the User Agreement Terms of Use.

Please enter your email to reset your password
Please send a copy of the 1538303336@qq.com source file, thank you.
If you want to learn dry goods, please send the source files and maps, 1821371005@qq.com, thank you.
1104800675@qq.com worship the great god! Great god asks for source files and maps, wants to learn hair effect and leaf shadow ~ thank bosses
Can you ask the brush part, what is the map of the brush height added? According to your steps, the other problem is that there is no height map missing, and the middle brush does not sink.
If you want to learn dry goods, please send the source files and maps, 1310608285@qq.com, thank you.
If you want to learn dry goods, please send the source files and maps, 480761880@qq.com, thank you!
If you want to learn dry goods, please send the source files and maps, 1946620689@qq.com
1208631856@qq.com bosses ask for a source file
If you want to learn dry goods, please send the source files and maps, 1769604120@qq.com
Boss, please find a source file, thank you (* °)= 1123007390@qq.com
Boss, I want it too, crab crab, 2258603186@qq.com
Boss, please find a source file, thank you (* °)= 32437322403@qq.com
Big brother is very good, ask for a source file to learn, 769068916@qq.com, thank you!
178490142@qq.com great god asked for the source file and wanted to learn the hair effect. thank you very much.
Boss, thank you for the source file 1947818640@qq.com